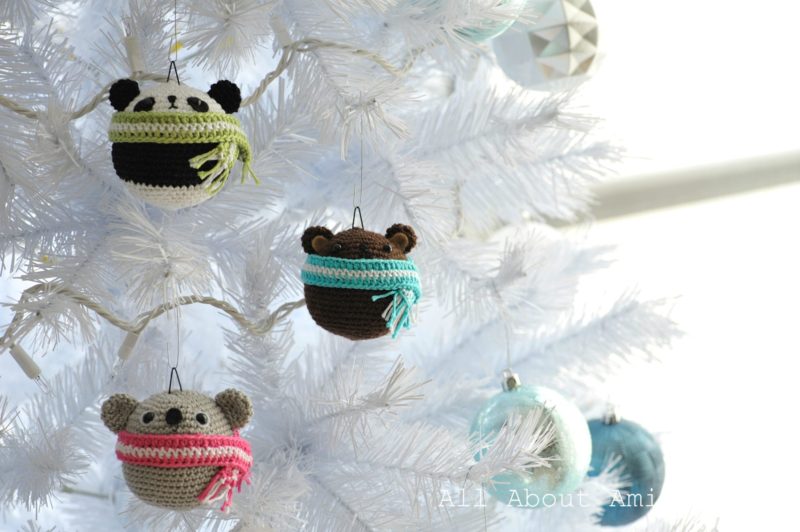
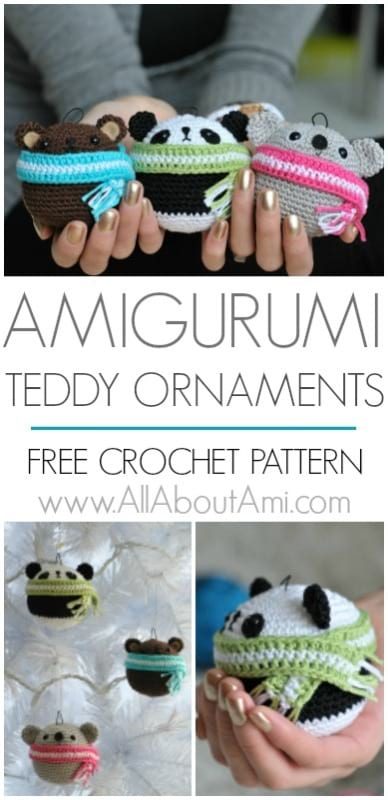
Get ready to “amigurumi-fy” your Christmas trees with these adorable round teddies all bundled up in their colourful scarves! Whether you prefer pandas, koalas or ordinary teddies, they’re sure to add a touch of cuteness and craftiness to your trees this season!
***You can purchase an INEXPENSIVE AD-FREE PDF of this pattern on Etsy HERE and on Craftsy HERE! The printable PDF with step-by-step pictures has been condensed into a total of 5 pages including the cover page and also includes the Bunny Ornament Pattern too!
***Please follow along with MY BLOG POST HERE to see step-by-step photos. If you are new to crochet, please see my “Amigurumi for Beginners” and “How to Read Amigurumi Patterns” blog posts! The How to Read Amigurumi Patterns post actually breaks down this specific teddy pattern round by round so you can see where to work your increases and decreases!

Materials:
- Lightweight yarn (3): brown for the teddy, grey for the koala, black and white for the panda; turquoise, pink, green and white for the scarves (I used Patons Grace mercerized cotton all throughout except for the brown)
- 2.00 mm Clover Amour crochet hook
- Yarn needle (bent tip helpful for attaching amigurumi parts- see HERE)
- Fiberfill
- Black felt (around eyes of panda and koala’s nose) and white felt (around eyes of koala)
- 6 mm safety eyes (for brown teddy) and 7.5 mm safety eyes (for koala and panda)
- Black cord
- Black embroidery floss (for brown teddy and panda nose)
- Metal ornament hooks
Note: I worked in continuous rounds (vs. joined rounds).
HEAD/BODY
Using desired colour,
R1: 6 sc in Magic Ring. (6 sts)
R2: 2 sc in each sc around. (12 sts)
R3: *Sc 1, 2 sc in next sc*, rep 6 times. (18 sts)
R4: *Sc 2, 2 sc in next sc*, rep 6 times. (24 sts)
R5: *Sc 3, 2 sc in next sc*, rep 6 times (30 sts)
R6: *Sc 4, 2 sc in next sc*, rep 6 times (36 sts)
R7: *Sc 5, 2 sc in next sc*, rep 6 times (42 sts)
R8: *Sc 6, 2 sc in next sc*, rep 6 times (48 sts)
R9-20: Sc 48 ***For Panda, change to black yarn after finishing Row 11. Then switch to white yarn after finishing Row 19.
R21: *Sc 6, dec 1*, rep 6 times (42 sts)
R22: *Sc 5, dec 1*, rep 6 times (36 sts)
R23: *Sc 4, dec 1*, rep 6 times (30 sts)
Attach safety eyes (for panda and koala, cut eye roundies from felt, make a small x, and place safety eyes through before attaching). Embroider nose and smile with embroidery floss. Begin stuffing head.
R24: *Sc 3, dec 1* rep 6 times (24 sts)
R25: *Sc 2, dec 1*, rep 6 times. (18 sts)
R26: *Sc 1, dec 1*, rep 6 times. (12 sts)
R27: *Dec 1*, rep 6 times. (6 sts)
Fasten off and weave in end.
(For Panda, R1-11 are white, R12-19 are black, and R20-27 are white).
SCARF
Using desired colour,
Ch 62
R1: Starting in third chain from hook, half double crochet (hdc) 60. Fasten off.
R2: Join middle colour (white for my scarves) with sl stitch in first stitch. Ch 1. Sc 59. Fasten off.
R3: Join original colour (from Row 1) with slip slitch in first stitch. Ch 2. Hdc 59. Fasten off.
Add fringe. See my photos here or video here on how to do this. Trim fringe to desired length. Glue or sew scarf around bear just below mouth to make them cozy and snug.
TEDDY & PANDA EARS (make 2)
Using brown or black yarn,
R1: 5 sc in Magic Ring.
R2: 2 sc in each sc around. (10 sts)
R3-4: Sc 10.
Fasten off and leave long end for sewing. Sew open end together. Sew ontop of head.
KOALA EARS (make 2)
Using gray yarn,
R1: 6 sc in Magic Ring.
R2: 2 sc in each sc around. (12 sts)
R3-5: Sc 12.
Fasten off and leave long end for sewing. Sew open end together. Sew ontop of head.
* Loop black cord through top of teddy’s head. Tie the ends in a knot and hide it in teddy’s head. Attach teddy ornament to tree with ornament hooks.
* Or, make a series of chain stitches and use it to attach teddy to the tree.
Have a very blessed and Merry Christmas, everyone 🙂 May these teddies bring some warmth, joy and love into your homes this season! I would love to see your versions of these teddies on your tree, so please send me photos of your work through my e-mail (all_about_ami@hotmail.com), facebook page or twitter!
[Update #1: People have been sending me photos of their own teddy ornaments, and I’ve compiled them all in a Crochet Corner post! Check out everyone’s own rendition of my teddy ornaments here.]
[Update #2: Anne of “A Gamer’s Wife” has modified my pattern using thicker, worsted weight yarn. She has clearly laid out her edits in her blog post here. Check it out if you want your ornaments to remain the original size but you want to use thicker yarn!]
[Update #3: I’ve added a “Bunny Ornament” to this collection, and you can check out the step-by-step blog post and free pattern HERE!]
![]()
Amazon affiliate links:
***Get the Dutch translation of this pattern HERE!
This pattern is an original pattern by Stephanie Lau of All About Ami (December 2011). Please do not claim this pattern as your own. If you wish to share this pattern, you may link to this pattern but please do not reprint it on your site. You may keep a copy for your own personal use but please DO NOT sell the pattern or distribute it.
You may sell products made from this pattern but please clearly credit the design to me, Stephanie Lau of All About Ami, and provide a link to my blog www.AllAboutAmi.com. Permission is NOT granted for mass production or factory manufacturing of any kind. Thank you for being respectful and for your understanding!