This was our first year setting up our Christmas tree in our new house. We bought our tree last year at Walmart after Christmas when all the prices were heavily reduced, so we had to wait almost one whole year before we could set it up! As we assembled our tree and placed the lights and ornaments upon the branches, Ryan and I thought how it’d be so adorable if we could somehow incorporate our love of amigurumi onto our tree. I had been wanting to make some sort of Christmas-themed amigurumi, so we came up with the perfect solution: make amigurumi ornaments! Our tree had round ball ornaments, so we thought of making round teddies– you all know how much I love my teddies! To play up the Winter/Christmas theme, we talked about adding colourful scarves to show these teddies all bundled up!
Ryan did a preliminary sketch of our design. I thought it was so cute how the scarf was positioned so high up! We ended up omitting the arms since we thought they looked cuter without 🙂
![]()
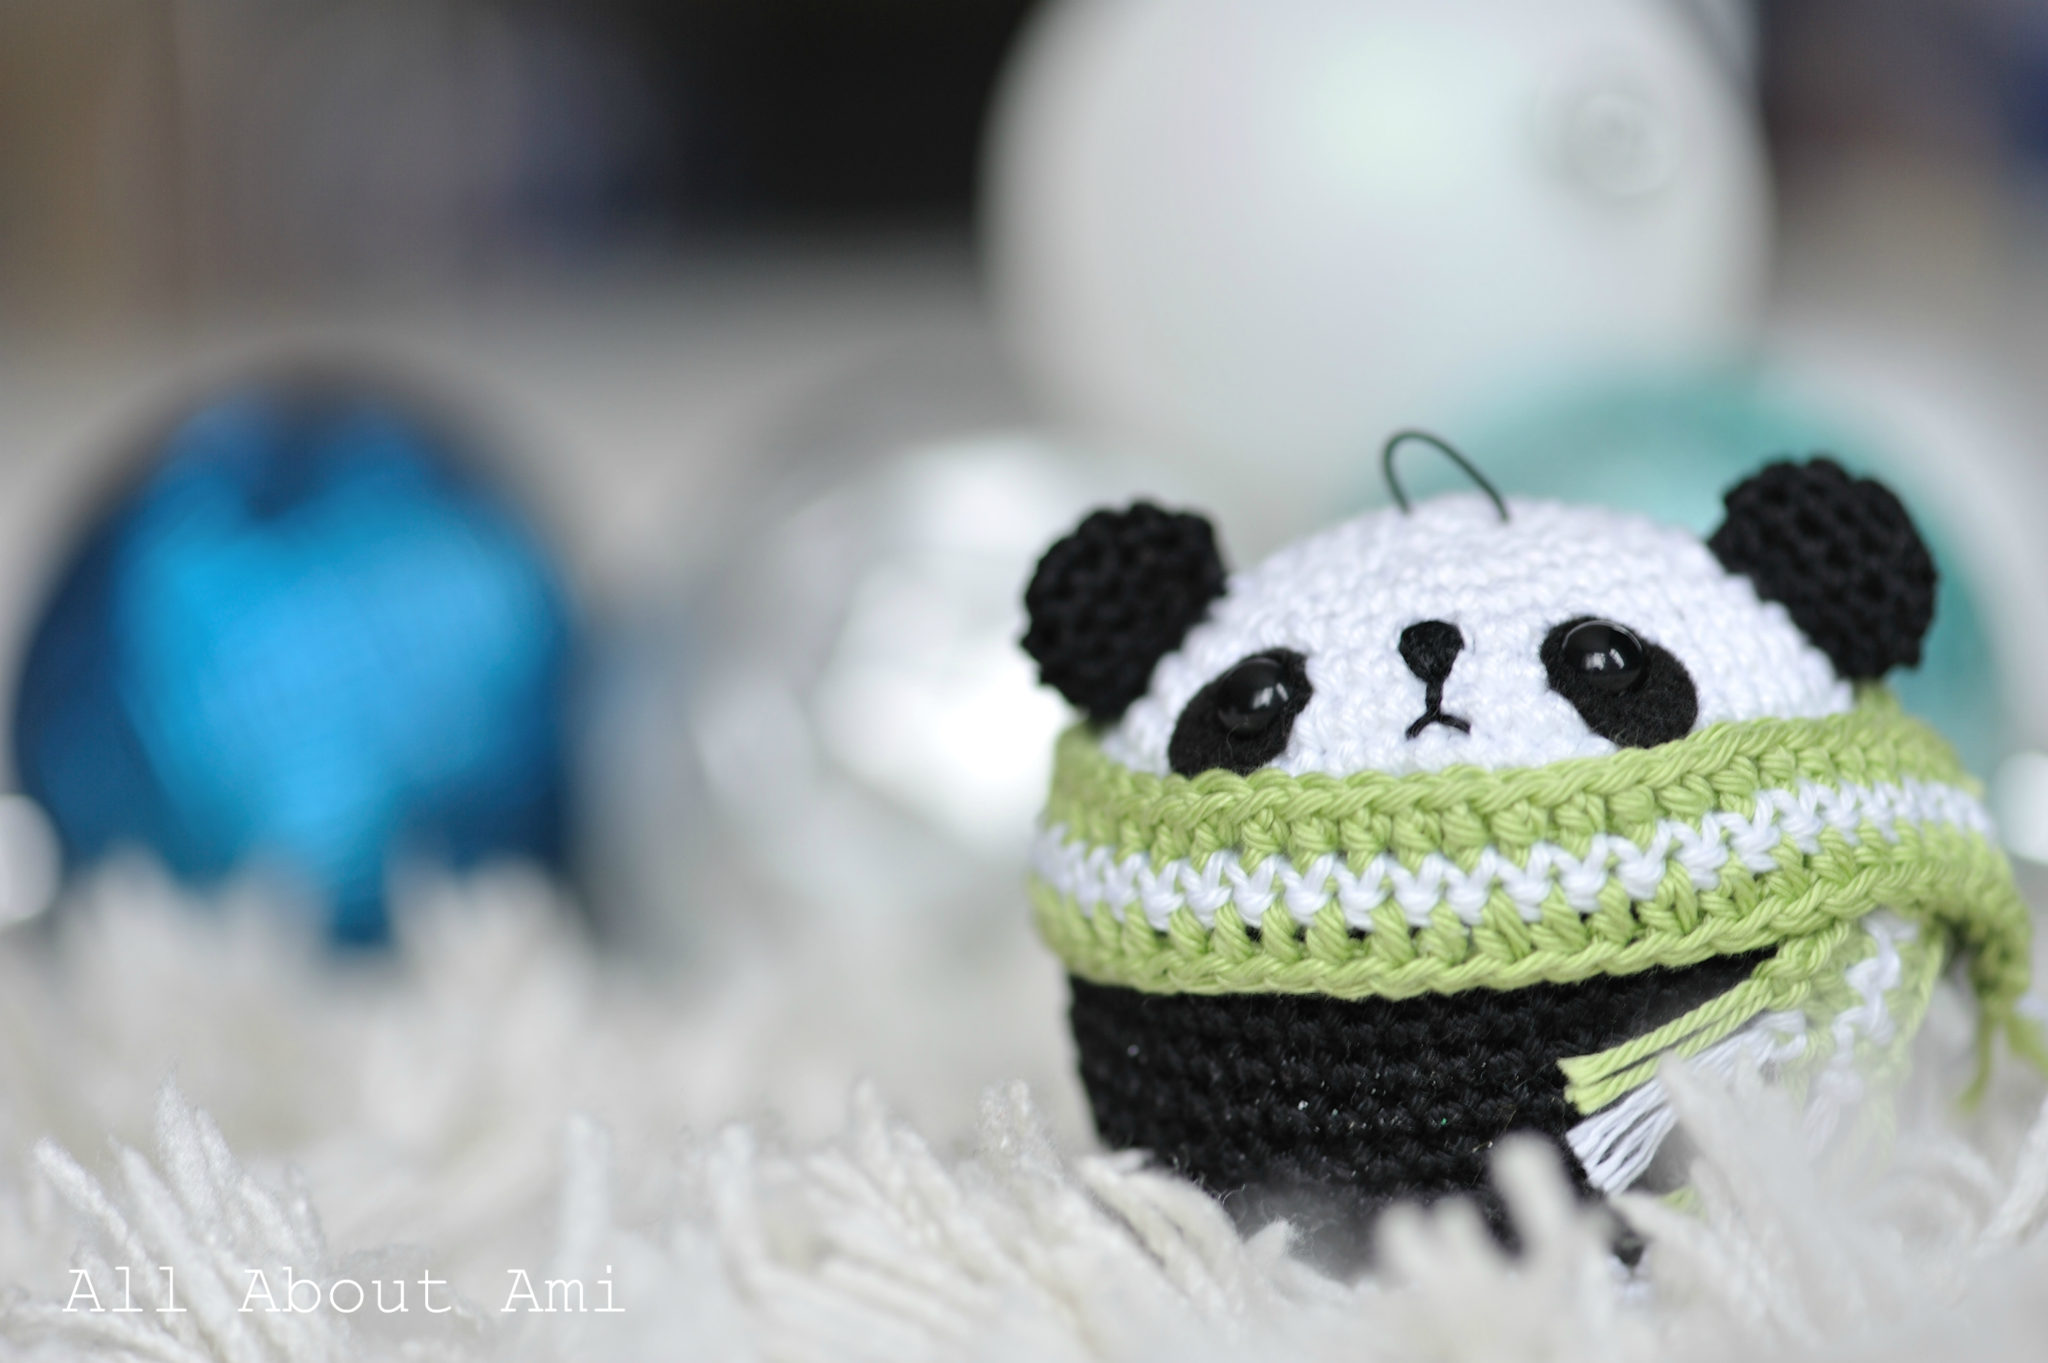
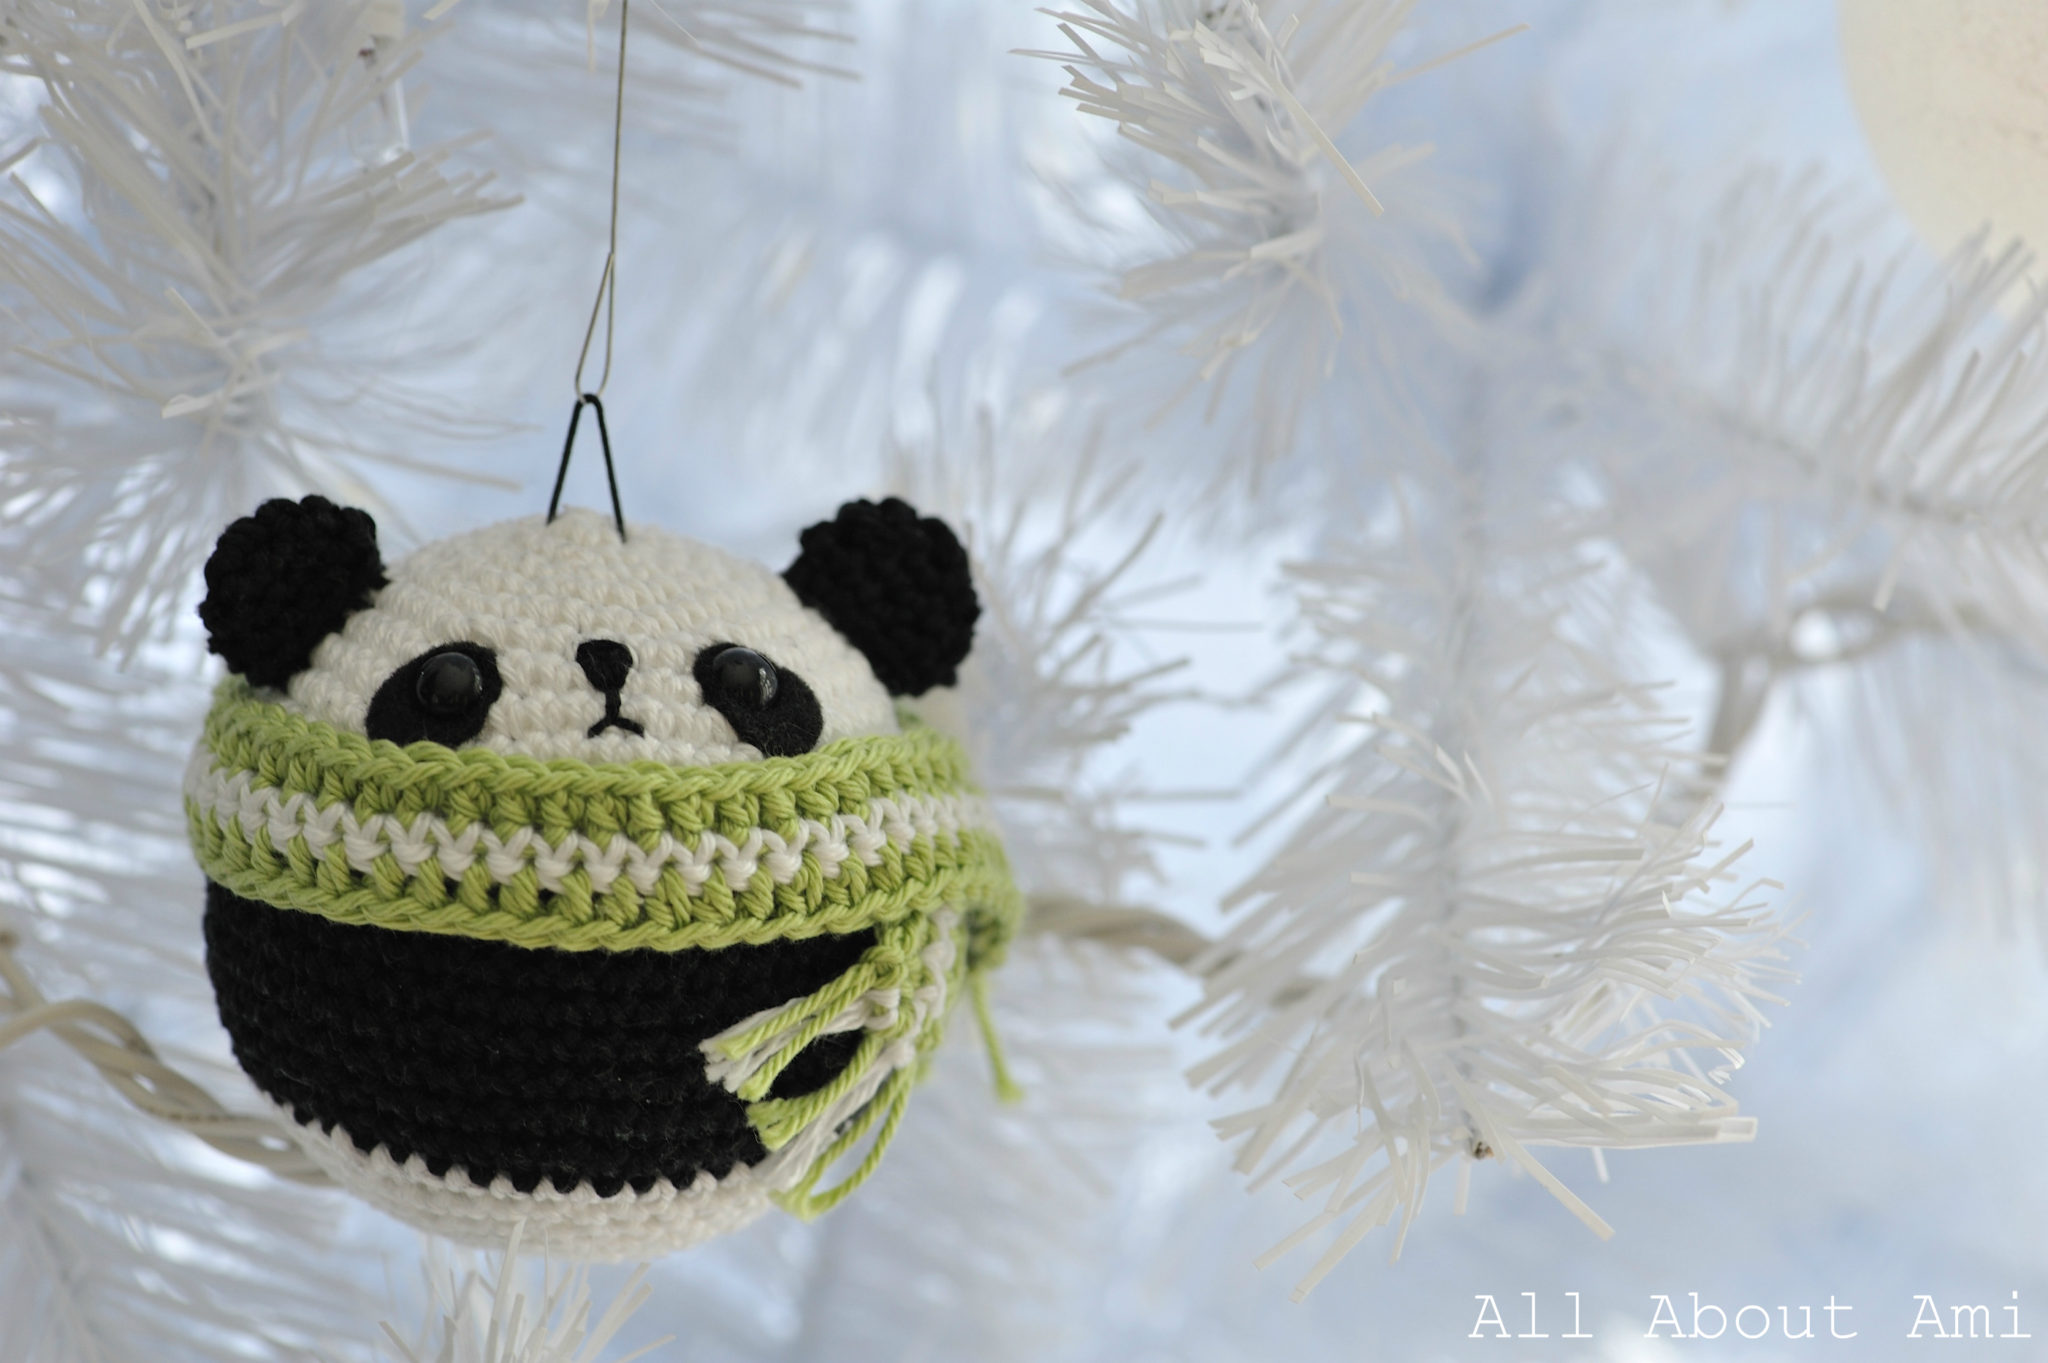
I had ALWAYS been wanting to crochet a panda bear, so now was our chance! I absolutely melted when Ryan sketched this little guy up!
![]()
And so we began! I worked on crocheting a very round ball first starting with white, then switching to black, and then switching back to white.
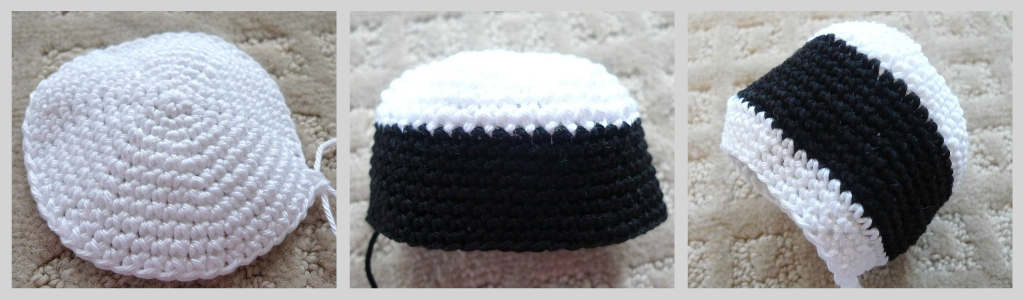
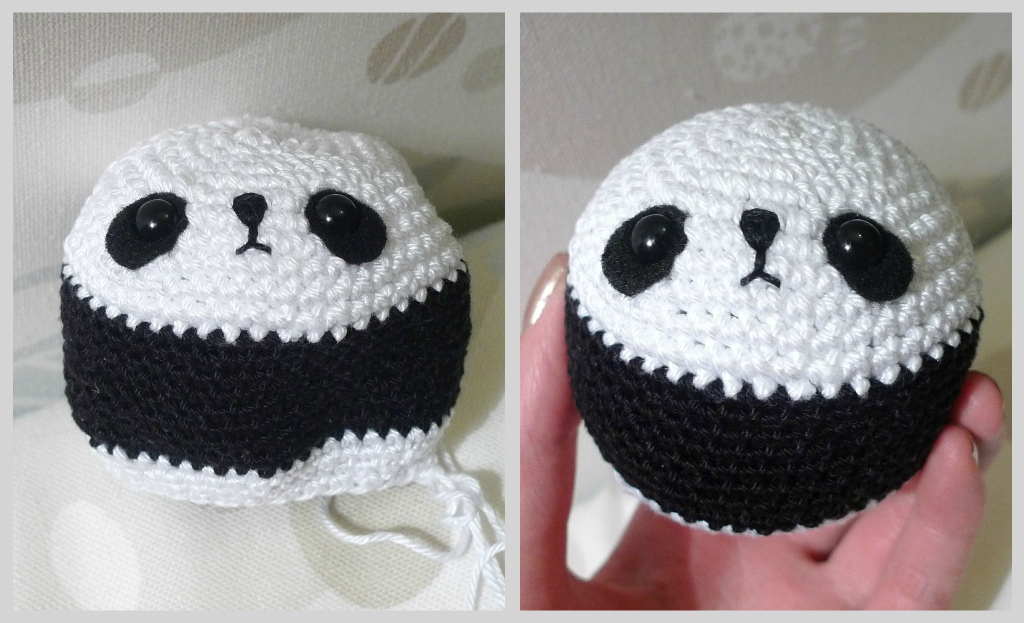
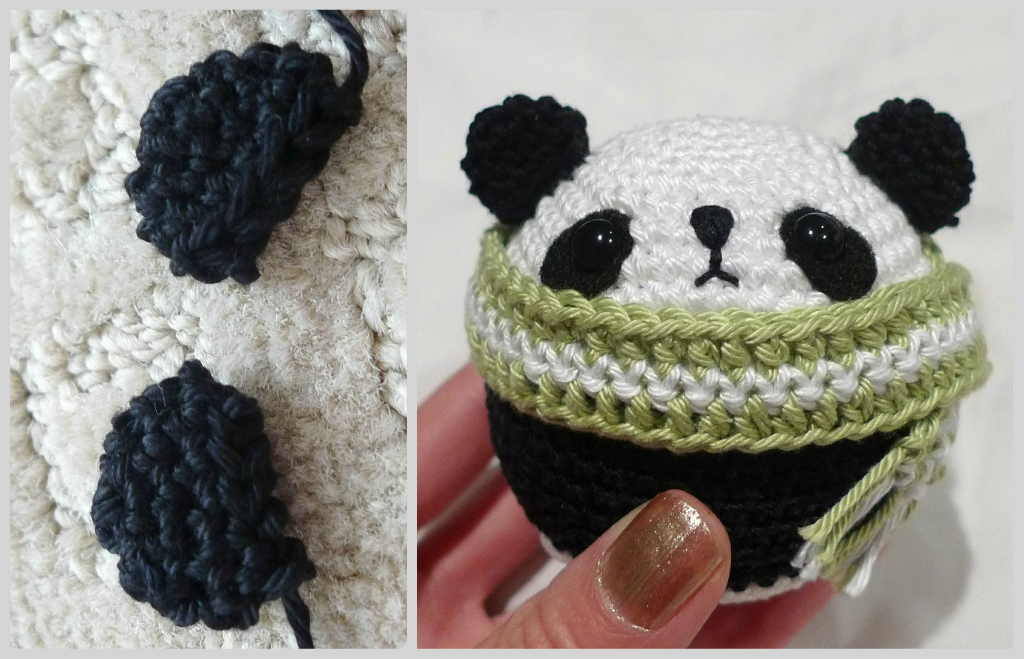
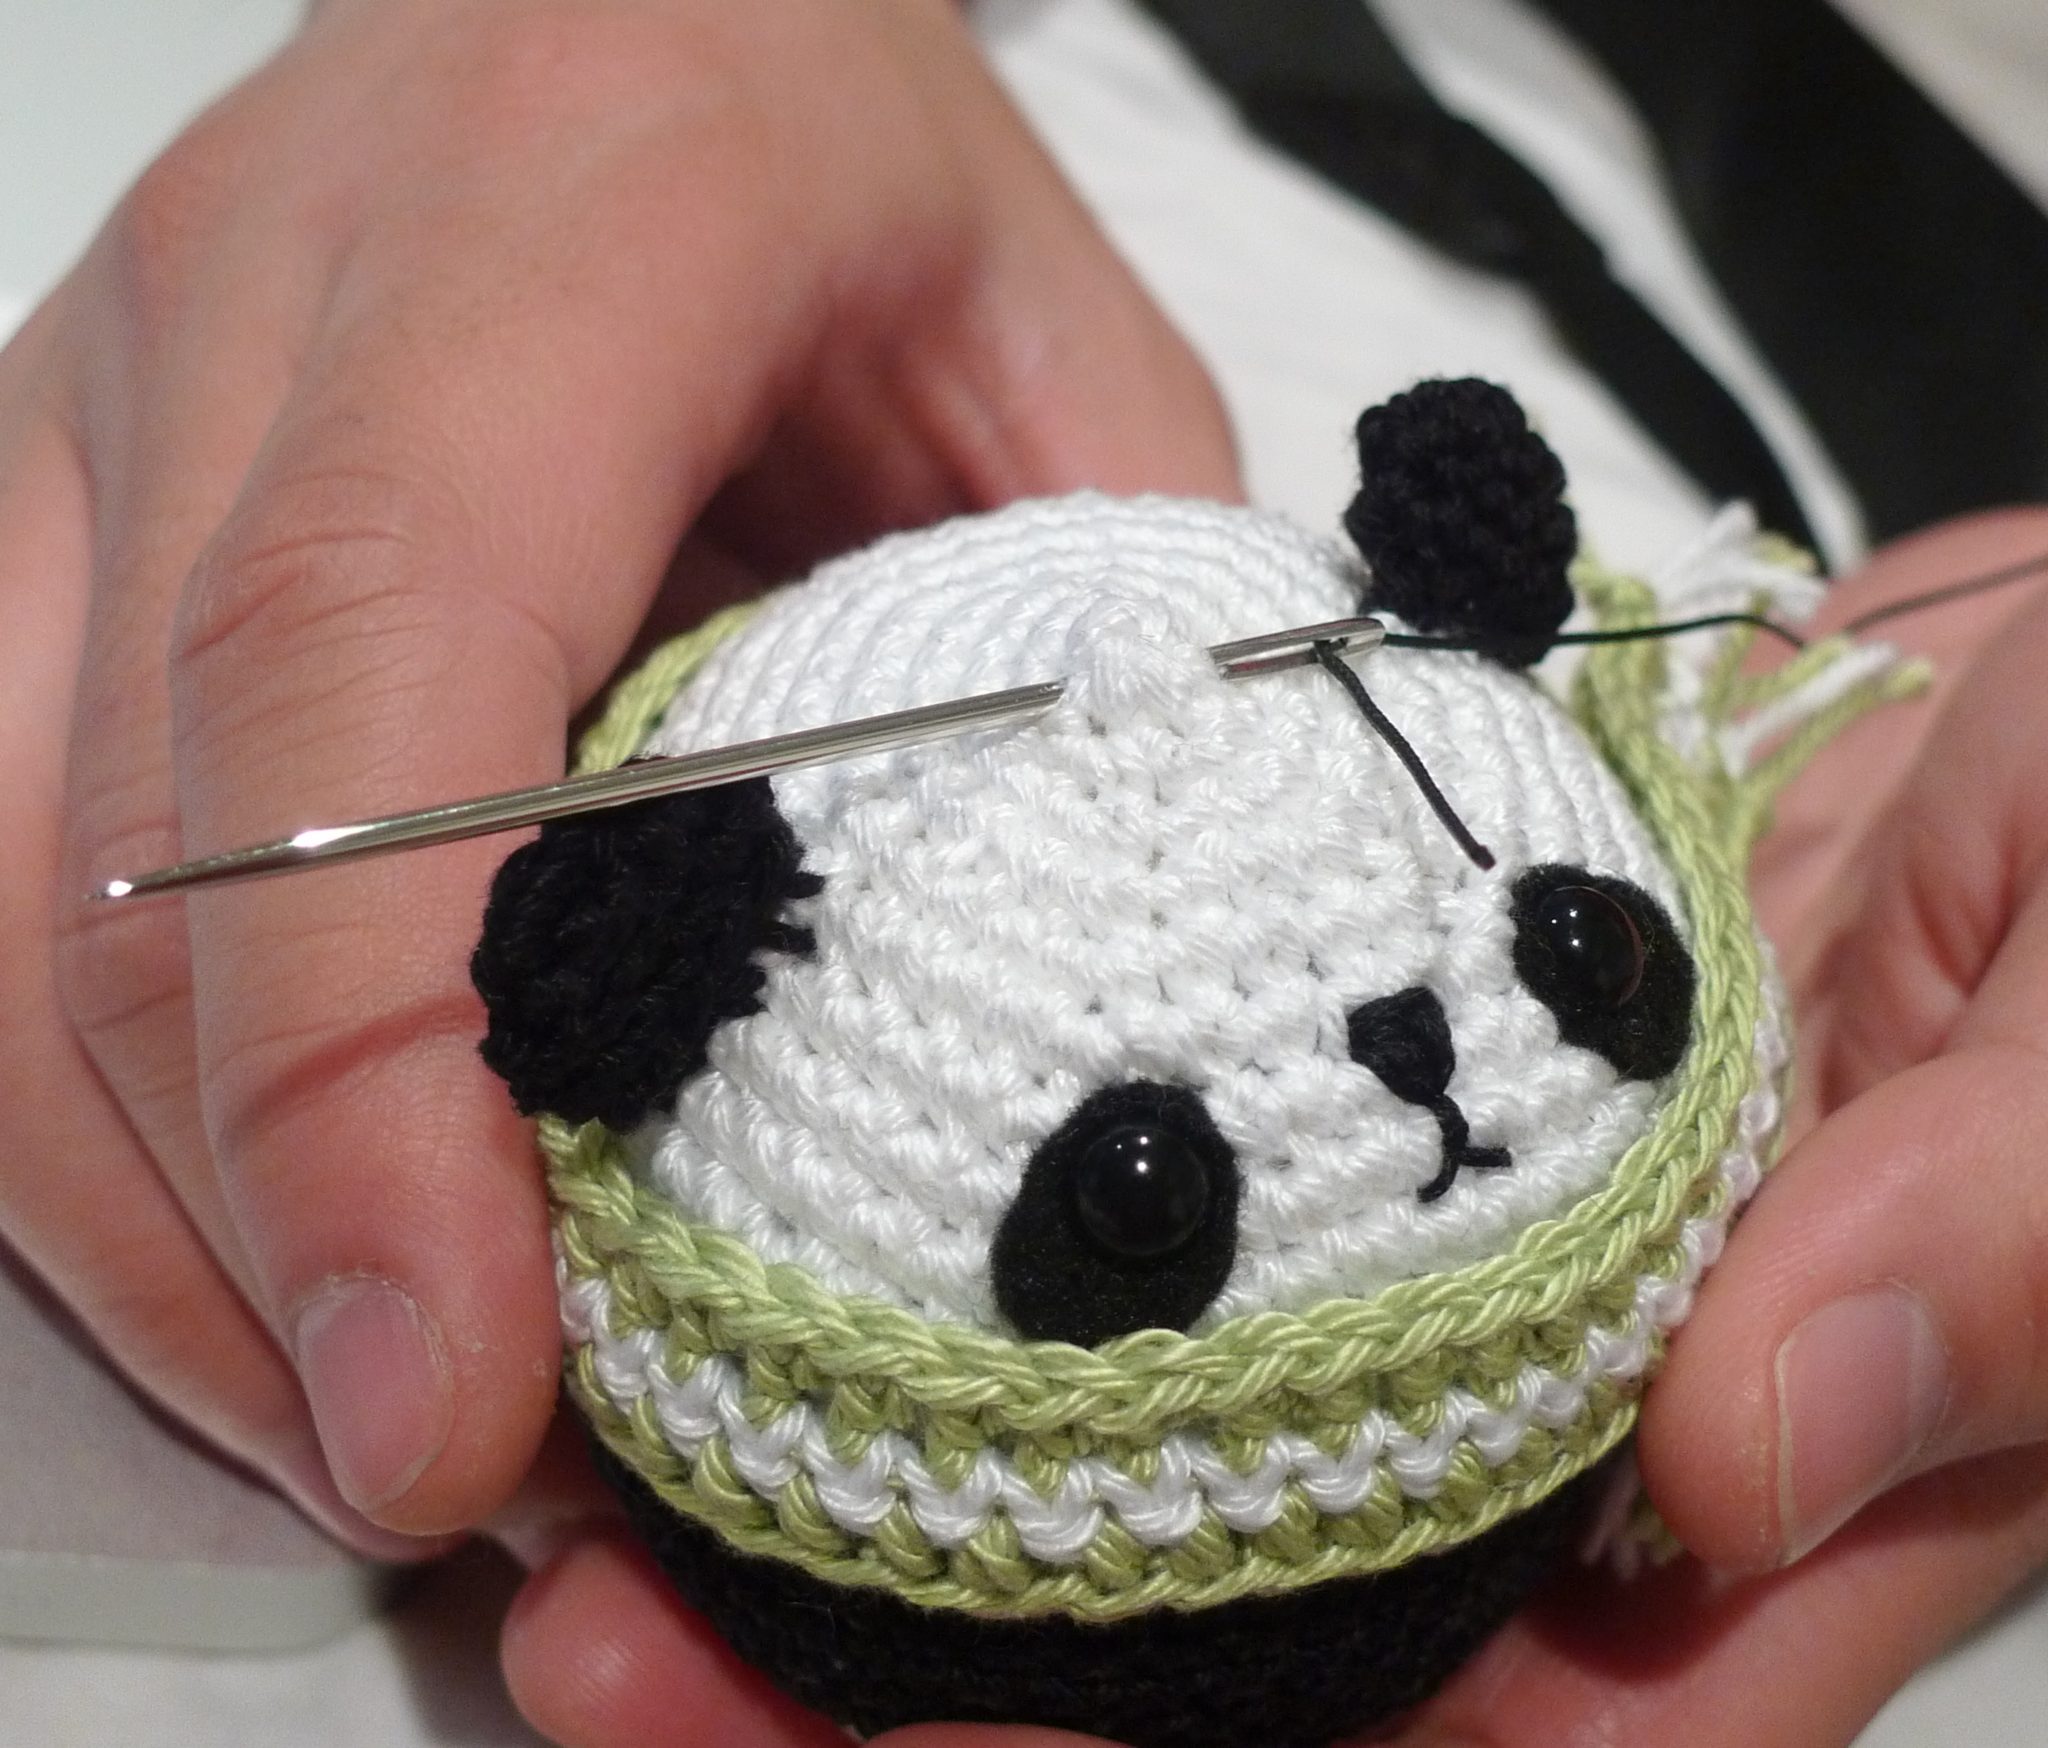
Ryan used his phenomenal attention to detail to help add the safety eyes by first placing them through oval pieces of black felt, and then stitching the nose and mouth. Who could resist such a sweet face? We then stuffed him up to give his full roundness 🙂
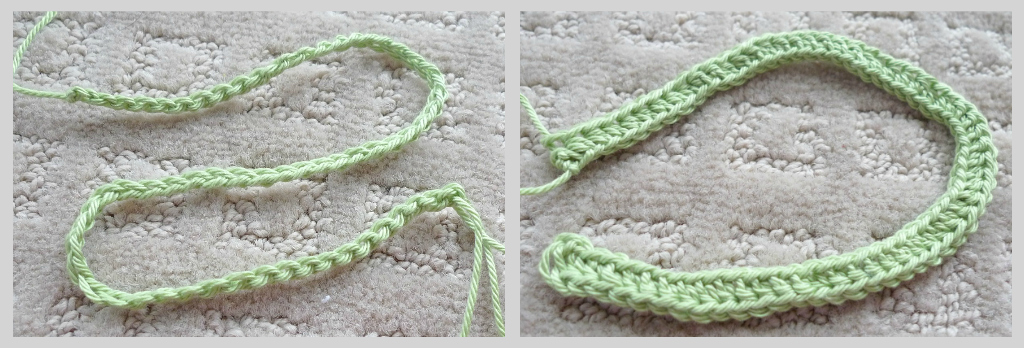
Next I worked on the scarf. I started with a green row of half double crochets, a white row of single crochets, and then another green row of half double crochets. These striped scarves add a nice pop of colour to the teddies!
I added some fringe to the ends of these scarves. You can watch a video on how to do this here or follow this series of pictures below:
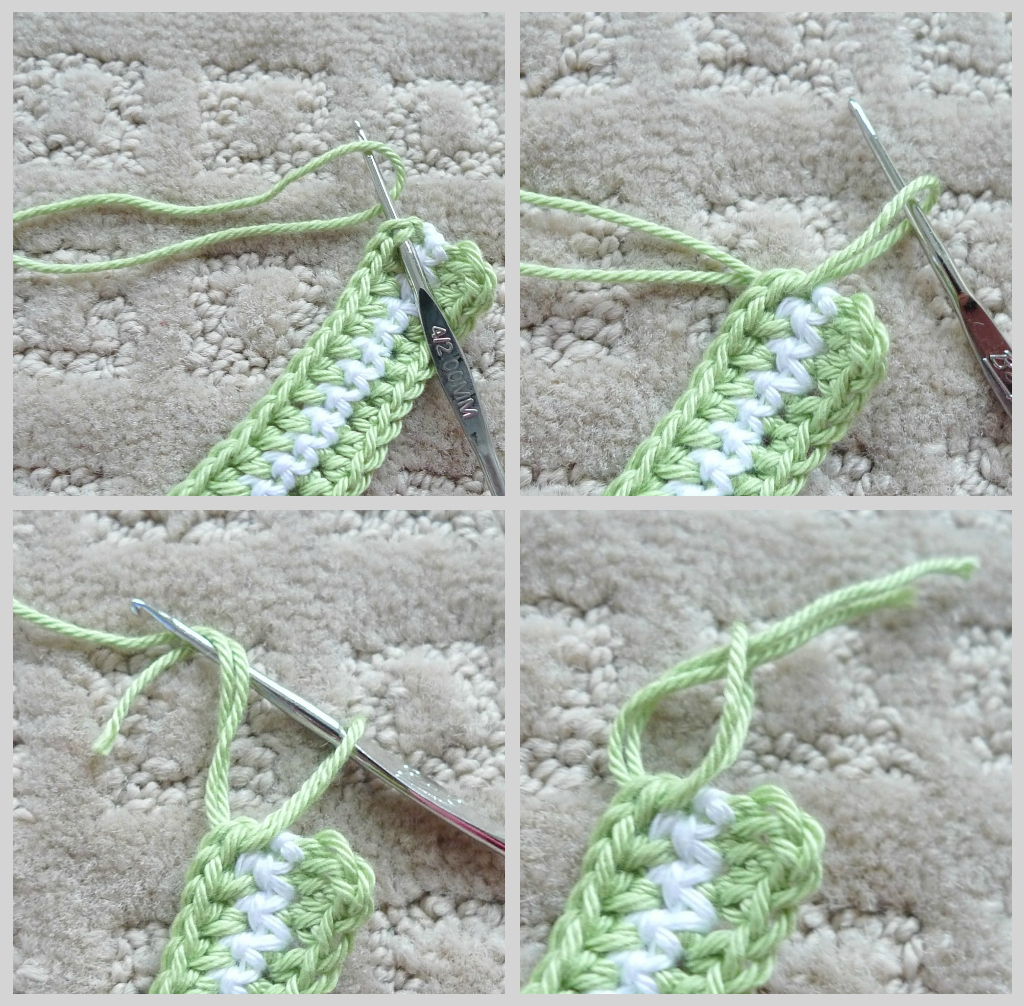
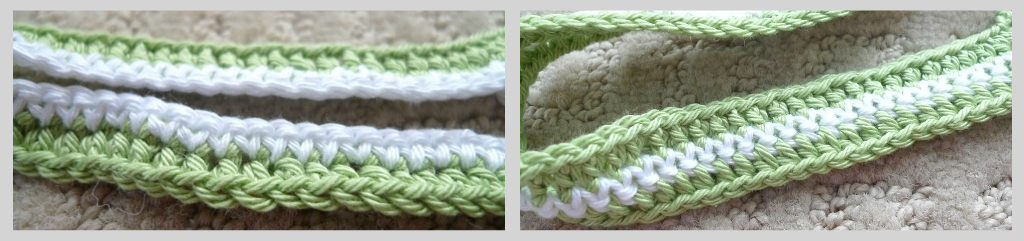
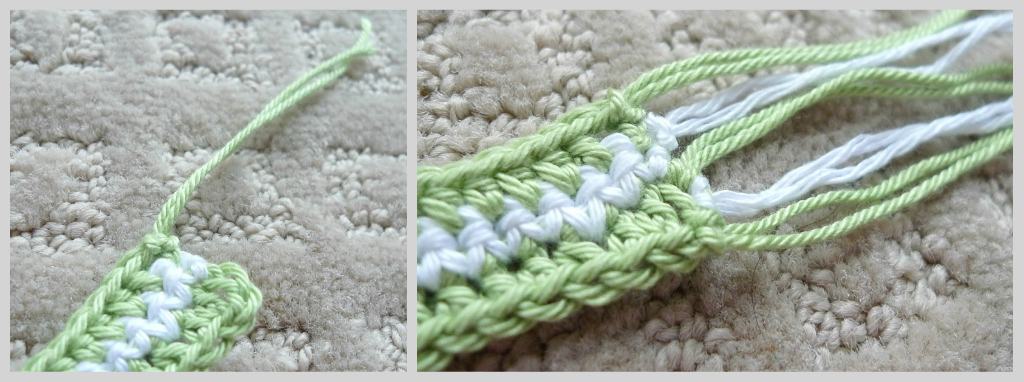
I added five strands of fringe on each side, alternating between green and white. I then trimmed the strands to my desired length.
Then we wrapped the scarf around our panda, overlapping the ends and making sure it was positioned very close to his eyes, nose and mouth (adding to the snuggliness look)! You can either sew or glue the scarf on. It’s nice that the scarf covers the transition from the white to black yarn of the body.

I crocheted some ears and then sewed them onto his head. We added the ears after the scarf to make the positioning easier.
Next we got ready to attach him to our tree! We used this black cord and ornament hooks to do so…
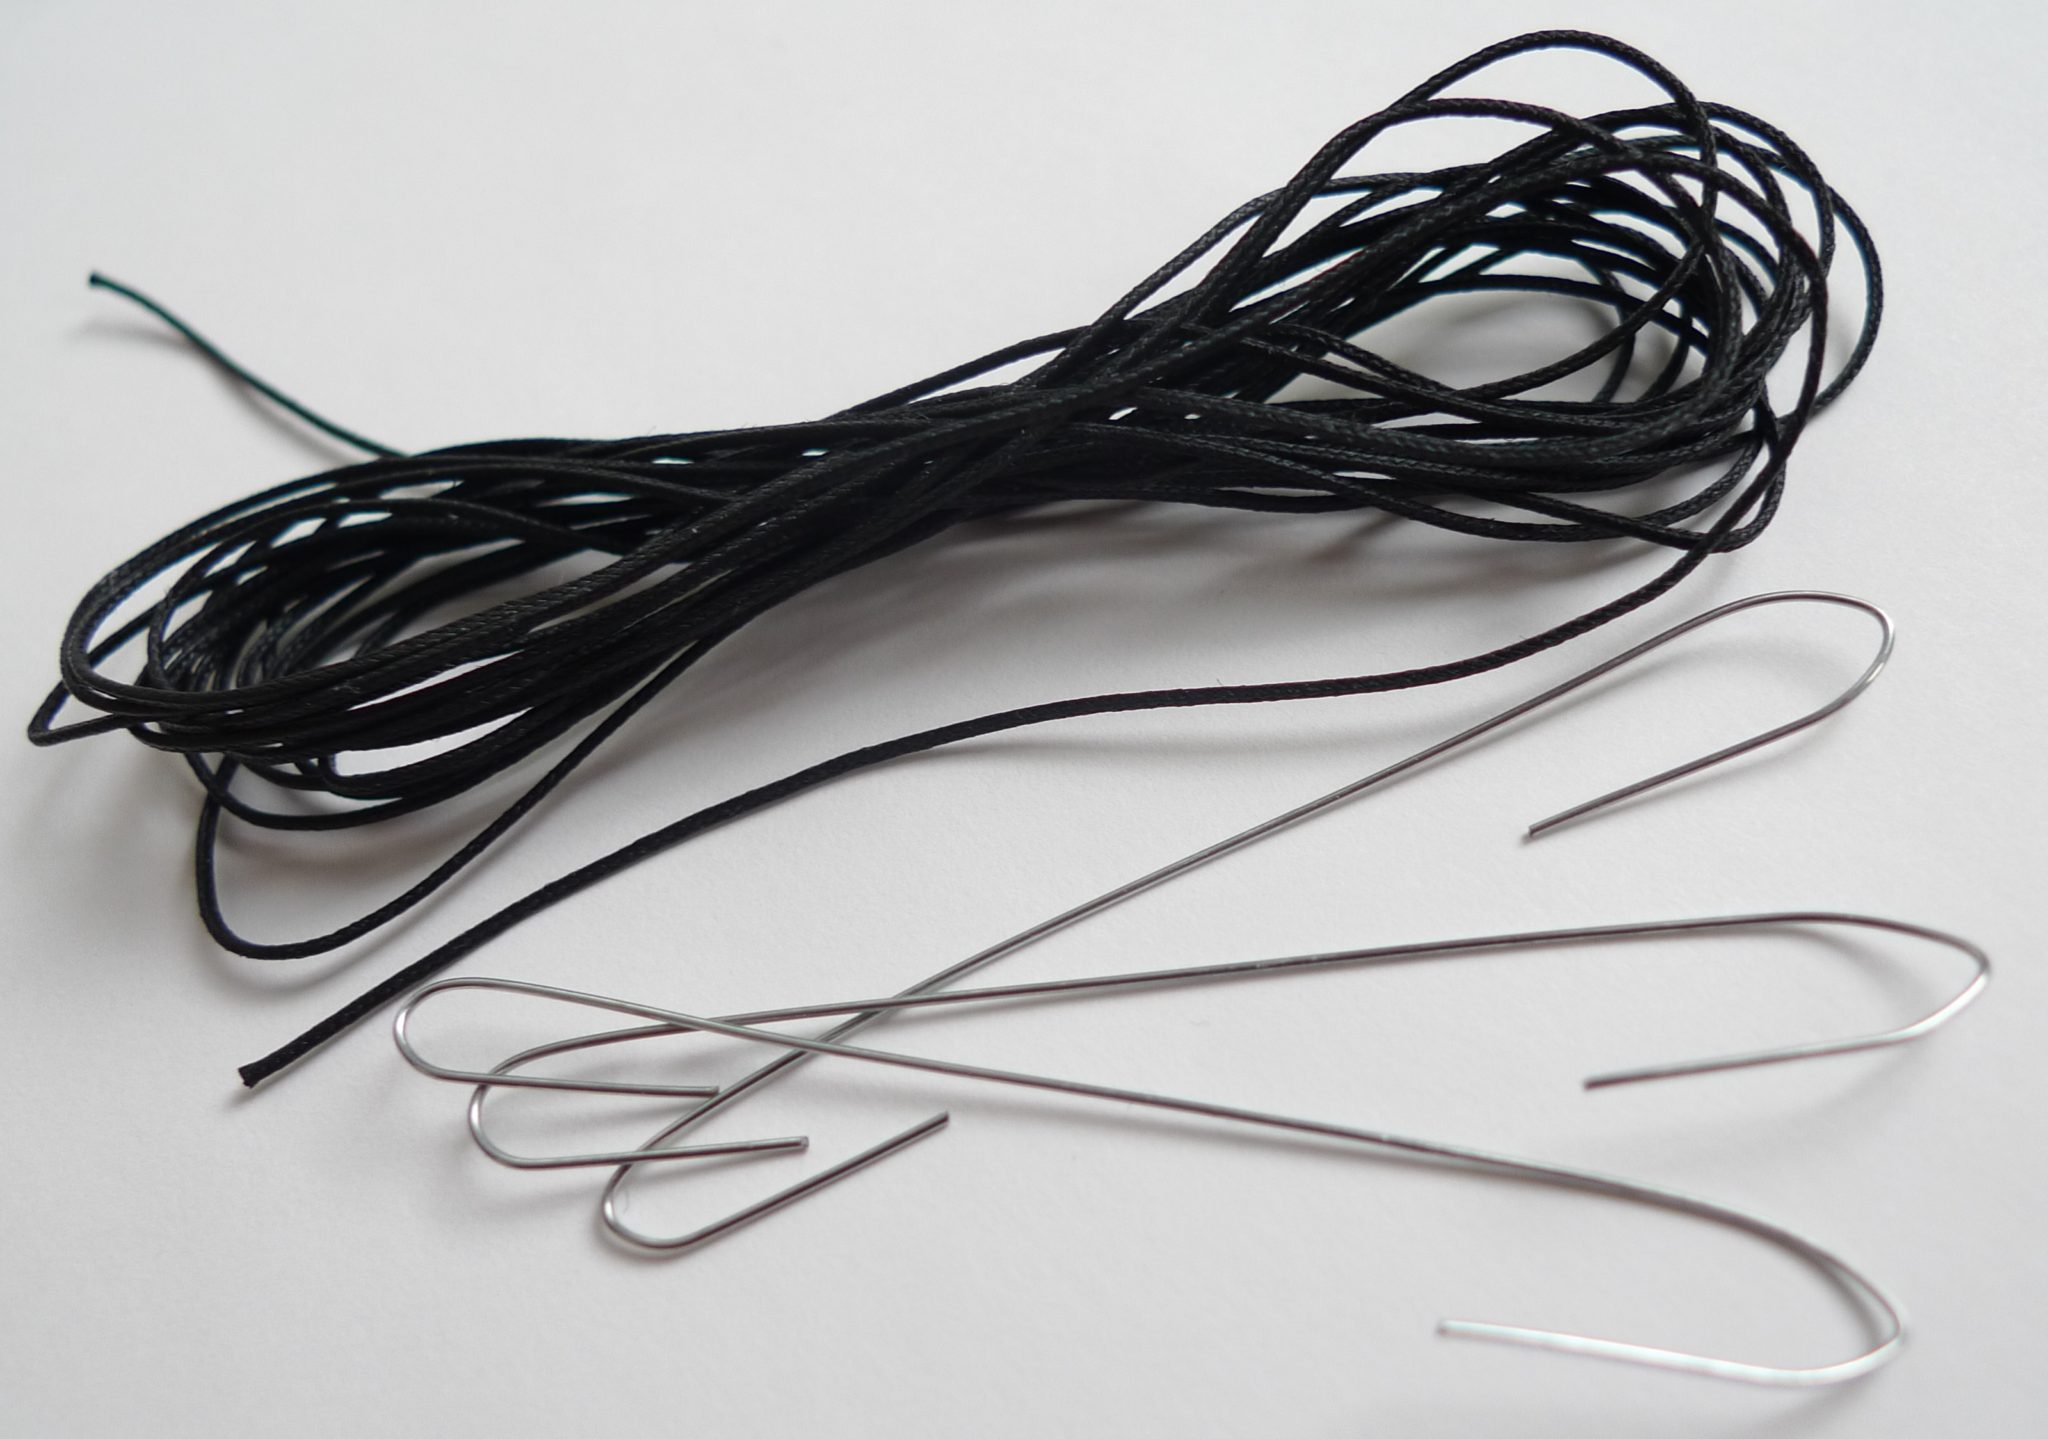
We used a needle to thread the black cord through…
And tied a knot on the top.
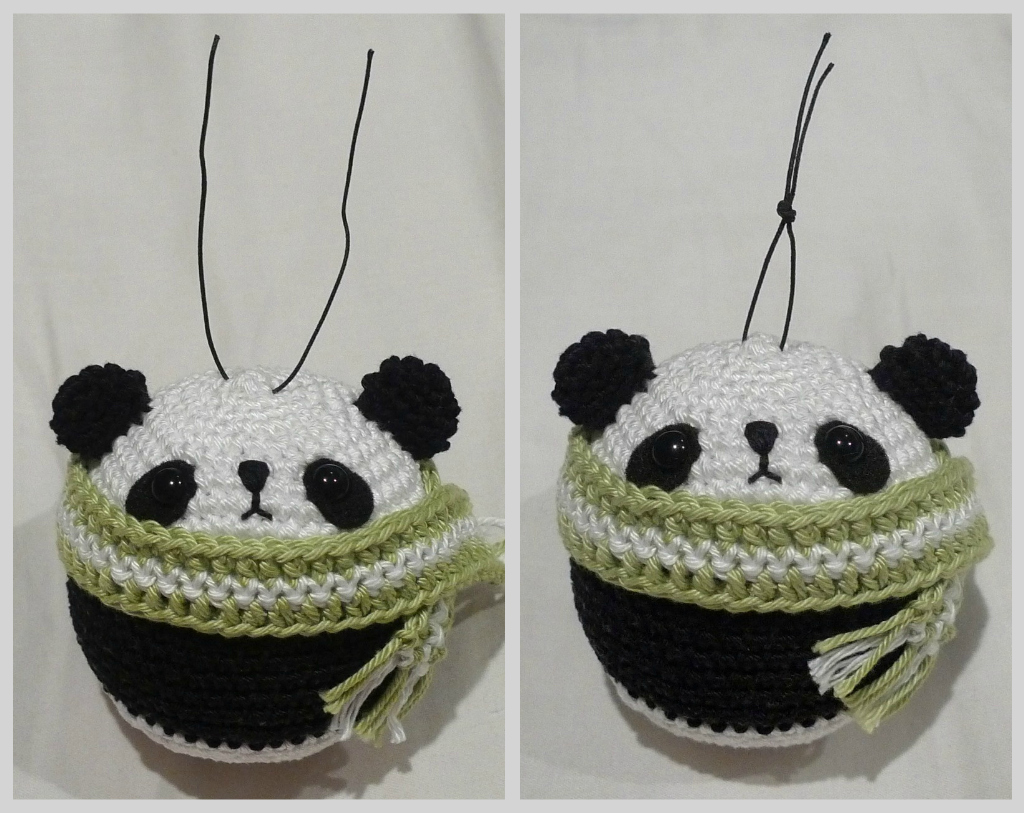
We then hid the knot within the panda’s stuffing. With this loop, he’s now ready to be attached to the tree with the ornament hook! Of course, you could also attach these ornaments simply by looping some yarn through their heads or making a loop with a series of chain stitches.

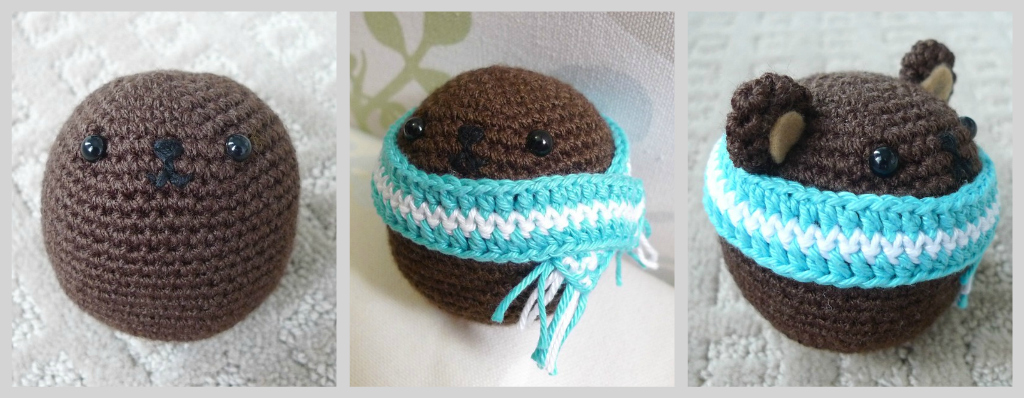
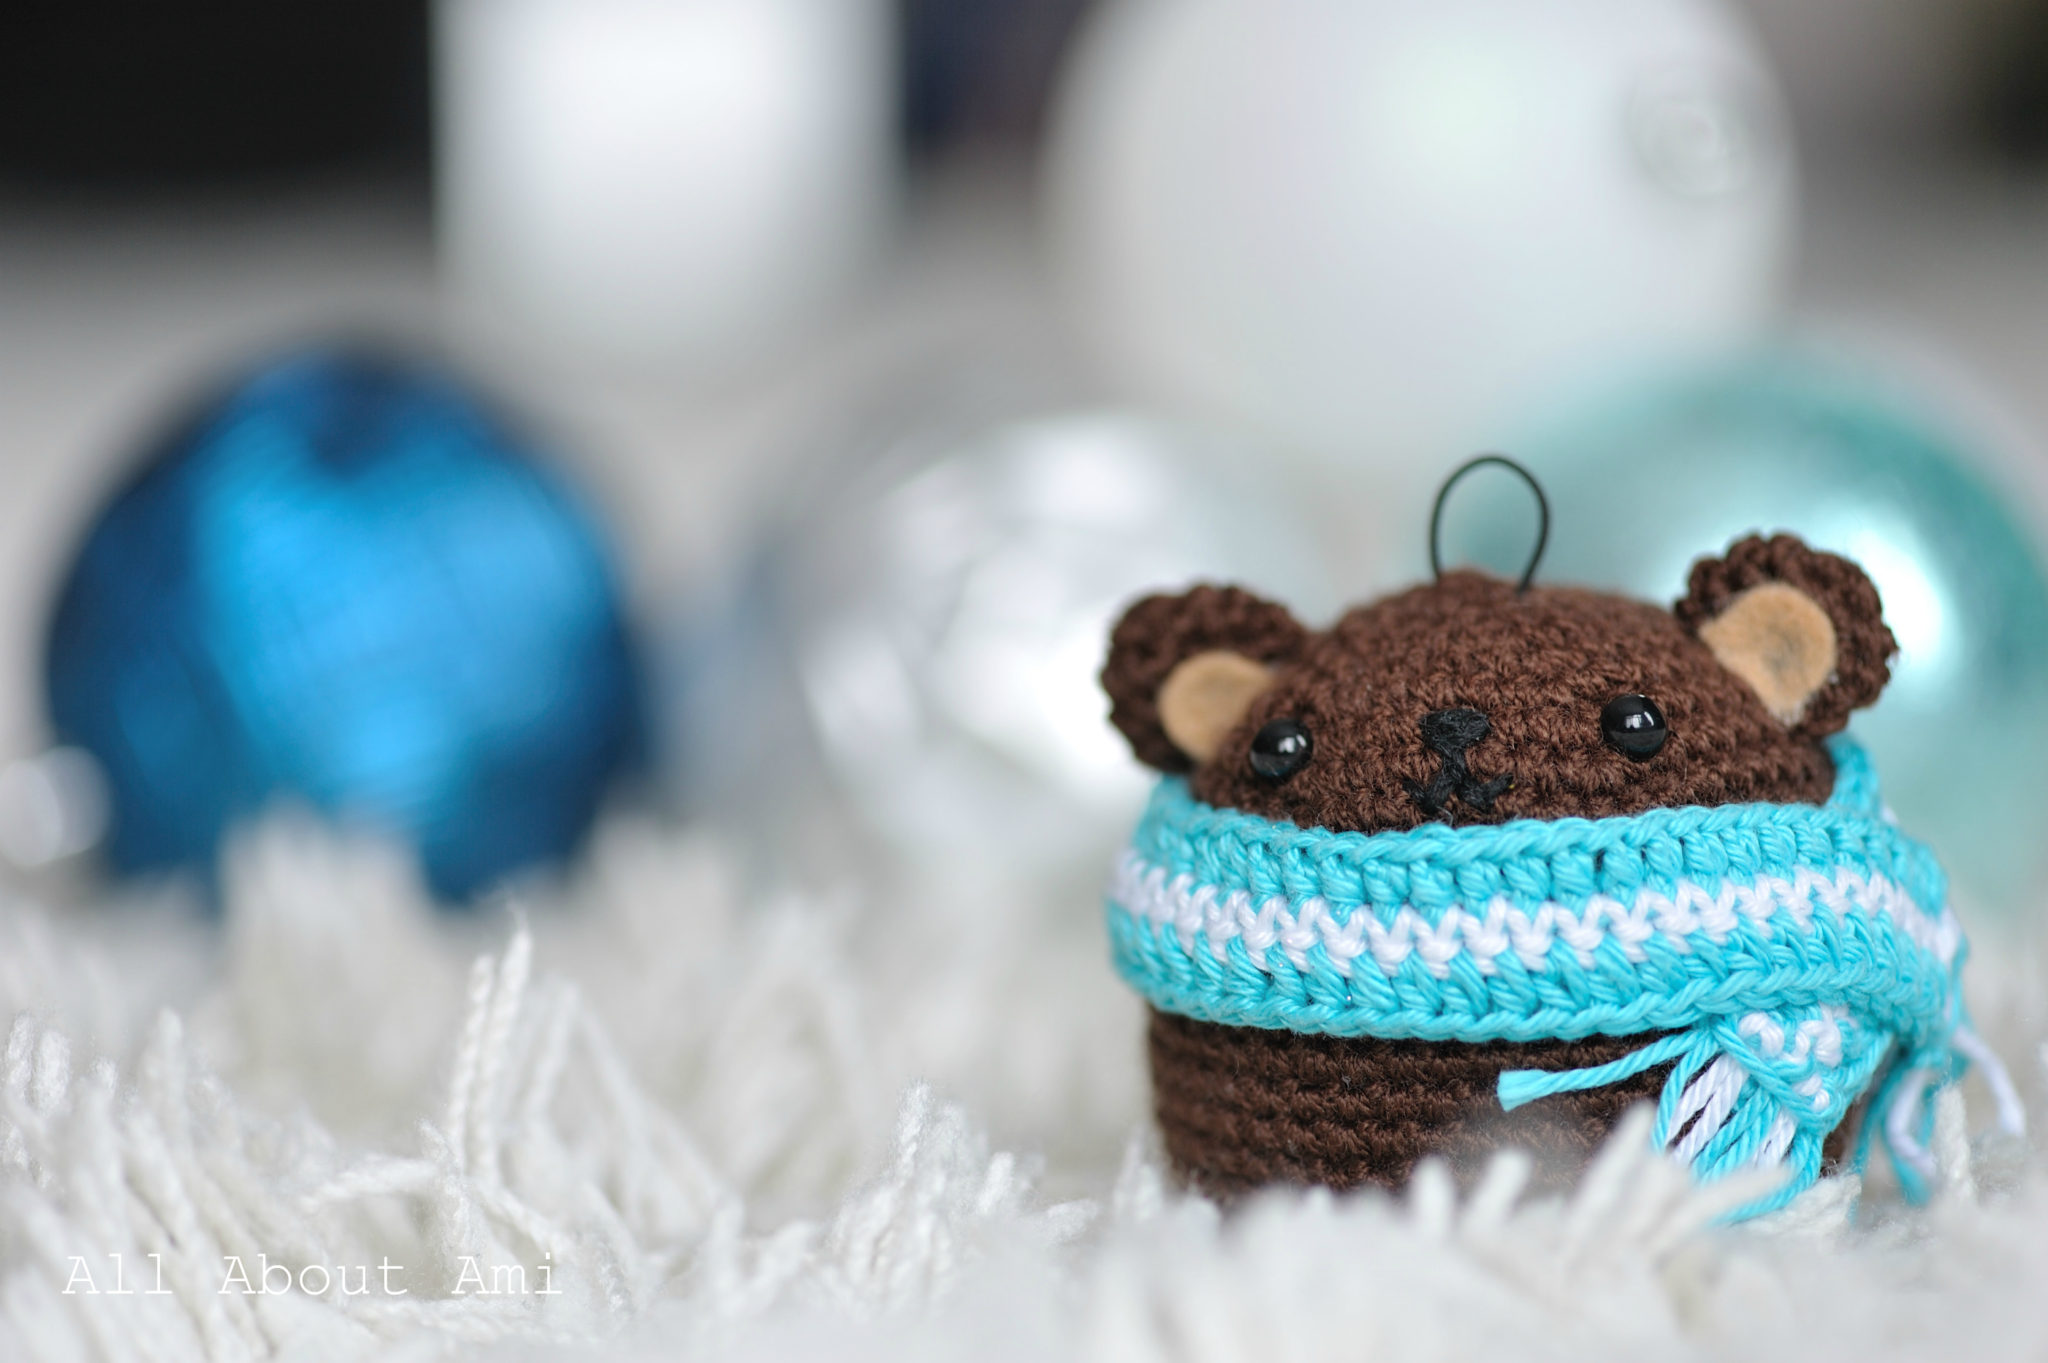
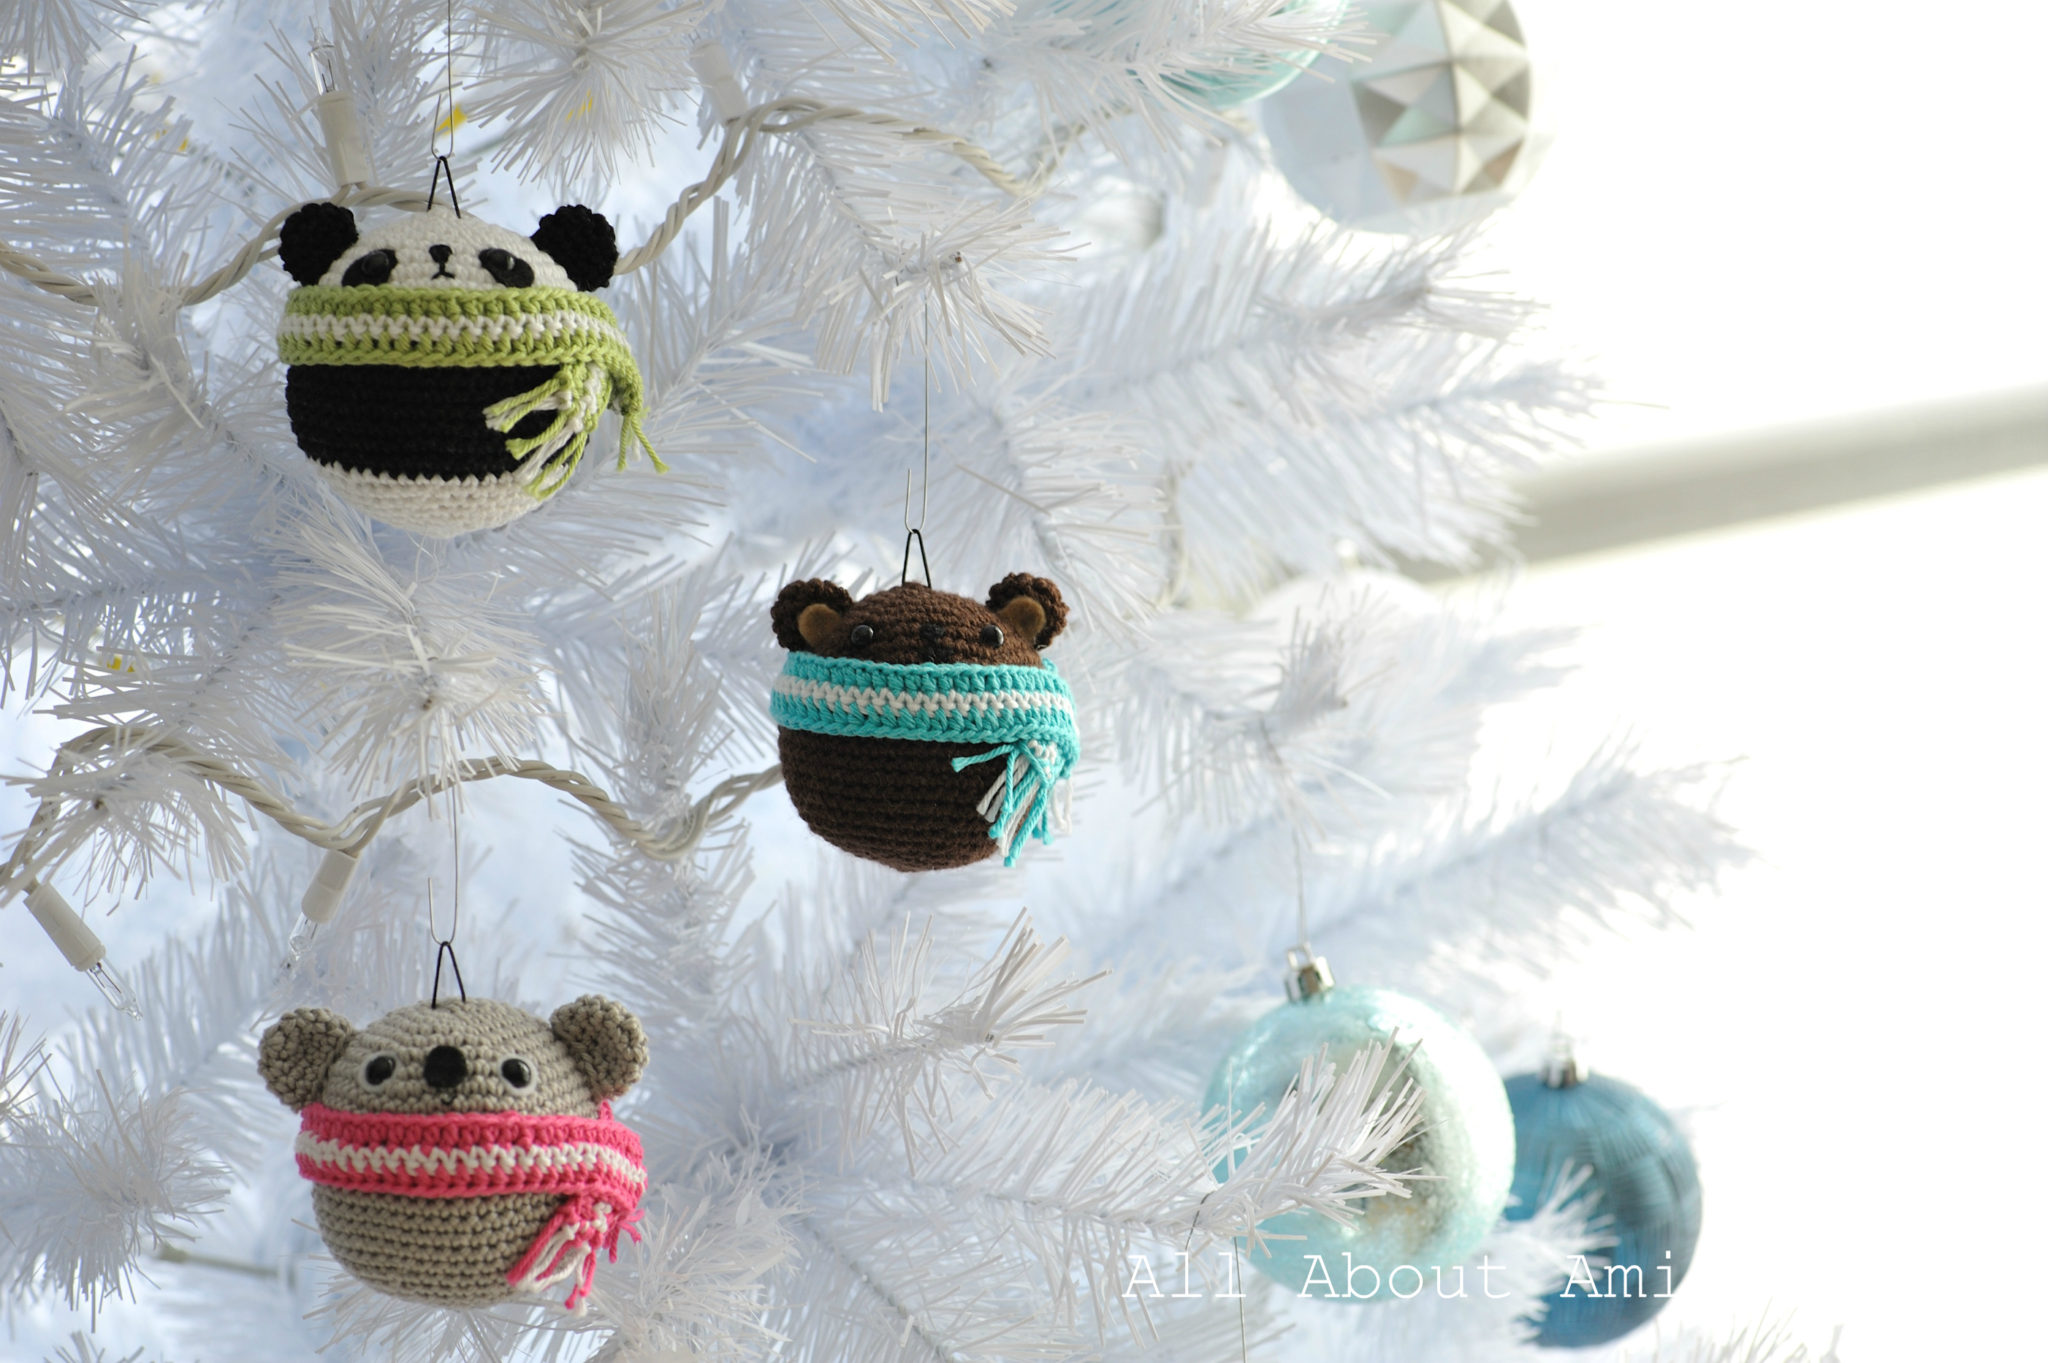
Here are some step-by-step photos of the brown teddy. I really like the colour of his scarf: it’s called “Aquifer”.
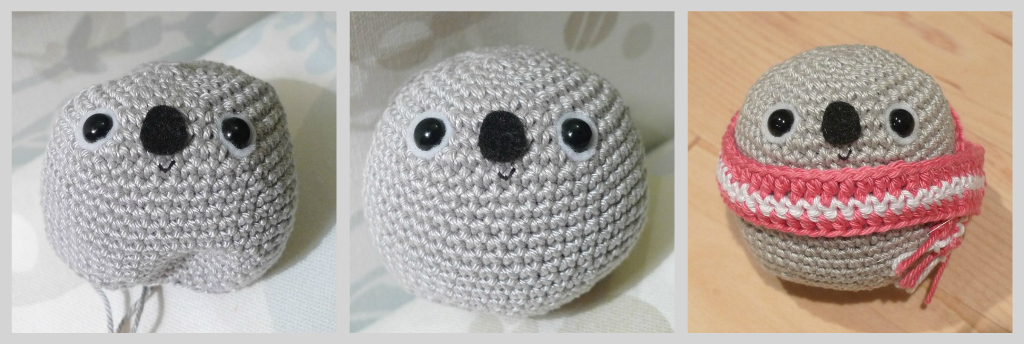
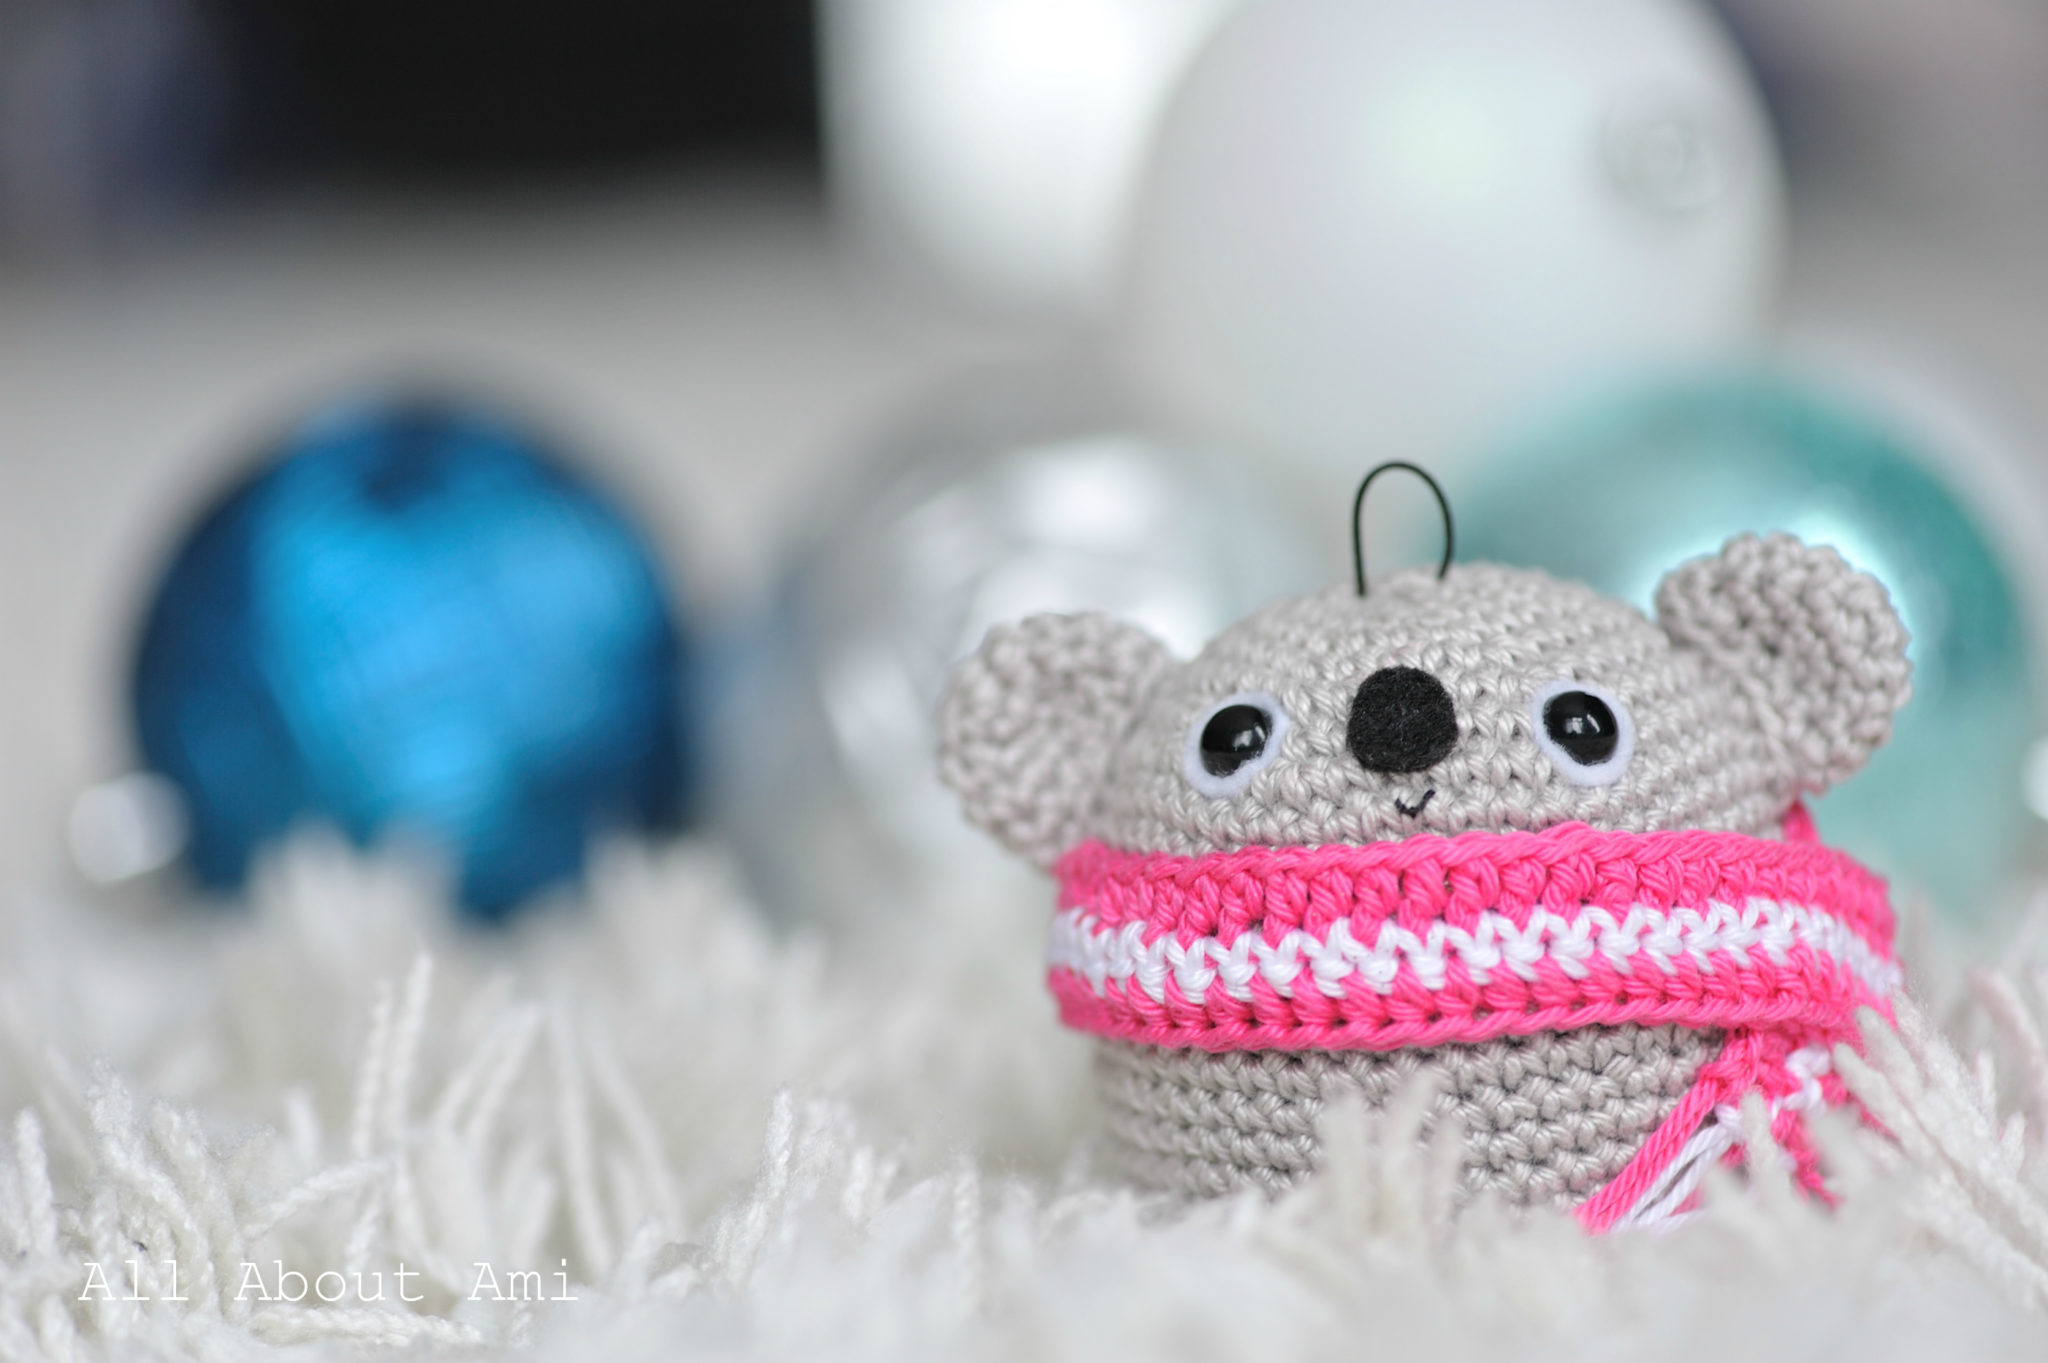
And here is the Koala ornament! Ryan used white felt around his eyes, black felt for his nose, and also gave him a tiny smile. Once again, I LOVE his scarf because pink is my favourite colour 🙂 Pink and grey make such a great colour combo!
Did any of you notice any differences in the quality of the sneak peek photos? Up till now, I’ve been using my point and shoot camera to take photos for my blog. But recently, Ryan and I got a digital SLR camera! Ryan has taken a keen interest in photography and has been learning how to use it over these past few days, soaking up information like a sponge. I have no doubts that he’ll be a great photographer as he is very creative and has a great eye. He’ll have to teach me how to use it too!
Now, may I present to you these beautiful photos that Ryan graciously helped me take 🙂 First up, we have Panda!
Next is Brown Teddy!
And lastly we have Koala! Koala has slightly bigger and more curved ears than the other two…
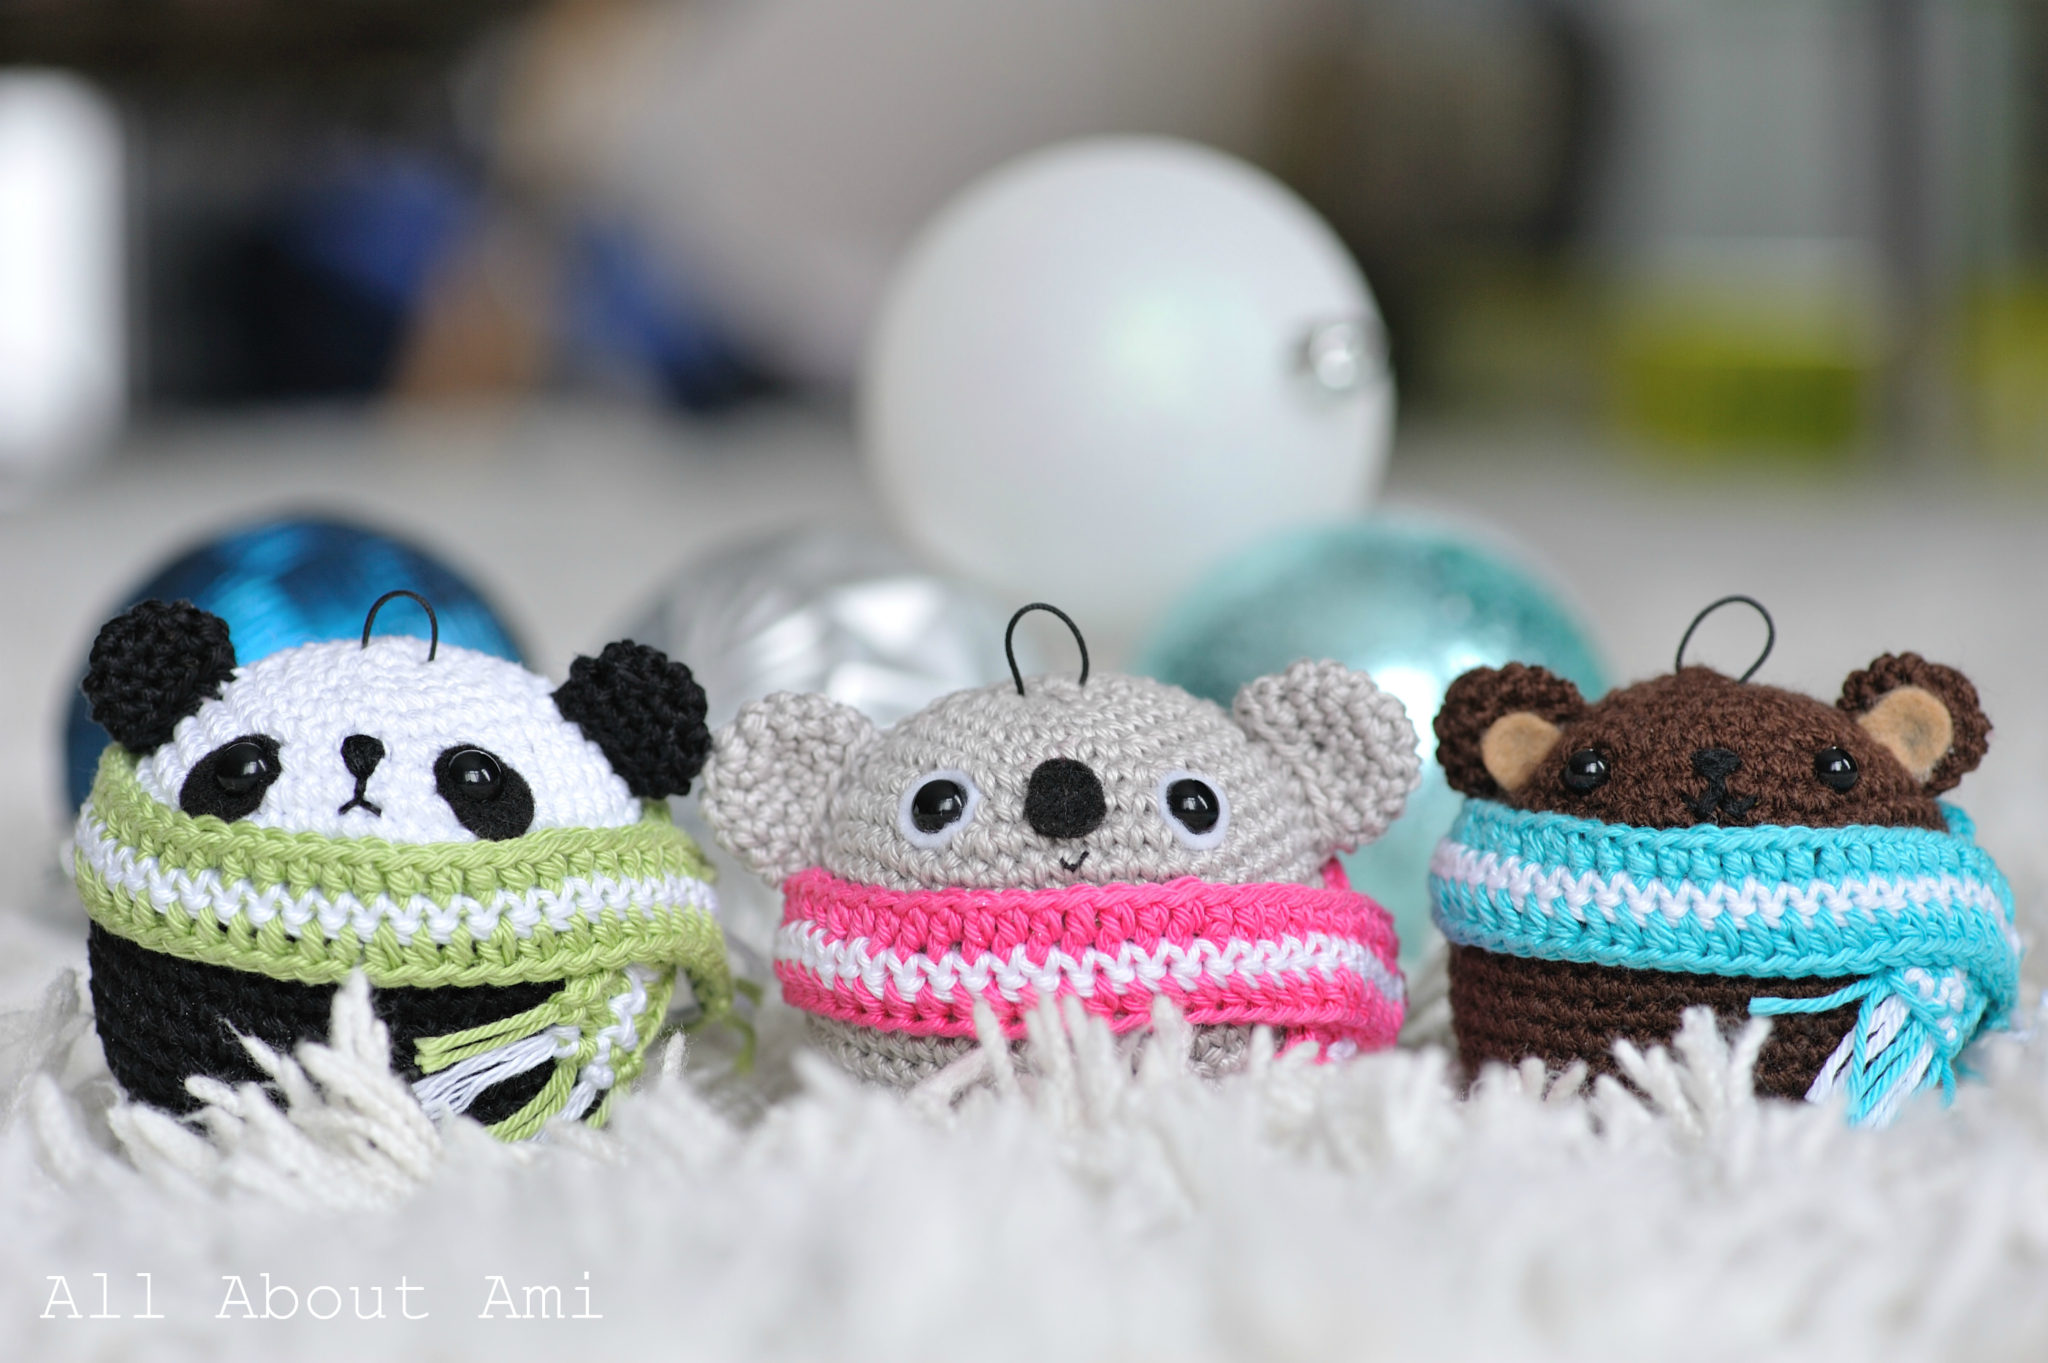
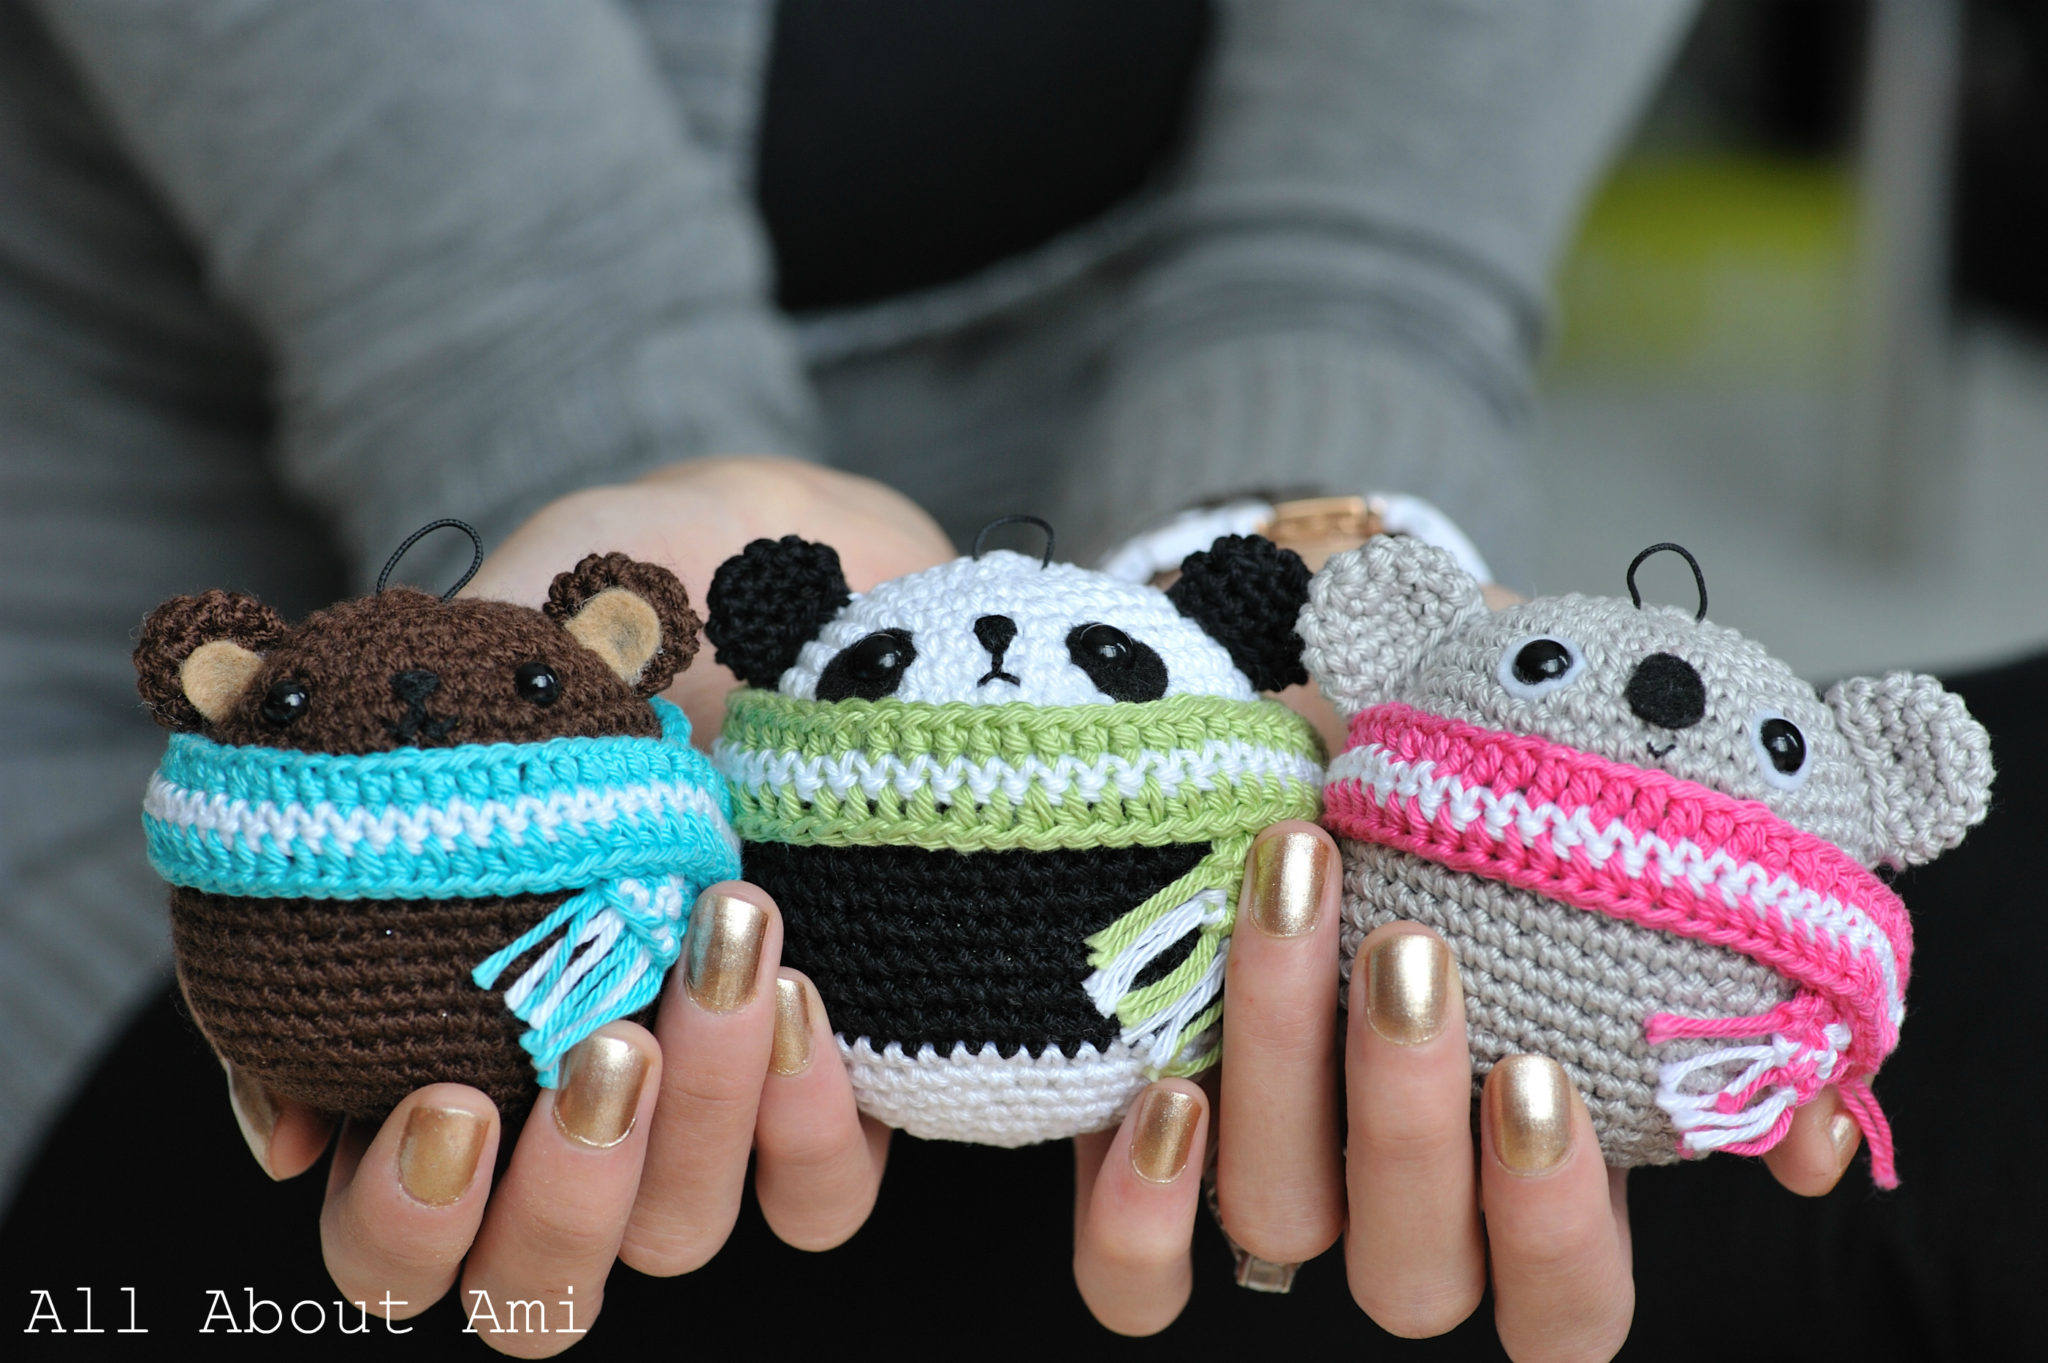
Here are my three teddy ornaments together! I love their different facial expressions and their colourful scarves together!
The actual ornaments from our tree are in the background. Don’t you love the roundness of all these ornaments?

The overlapping scarf and fringe gives the side a cute look 🙂
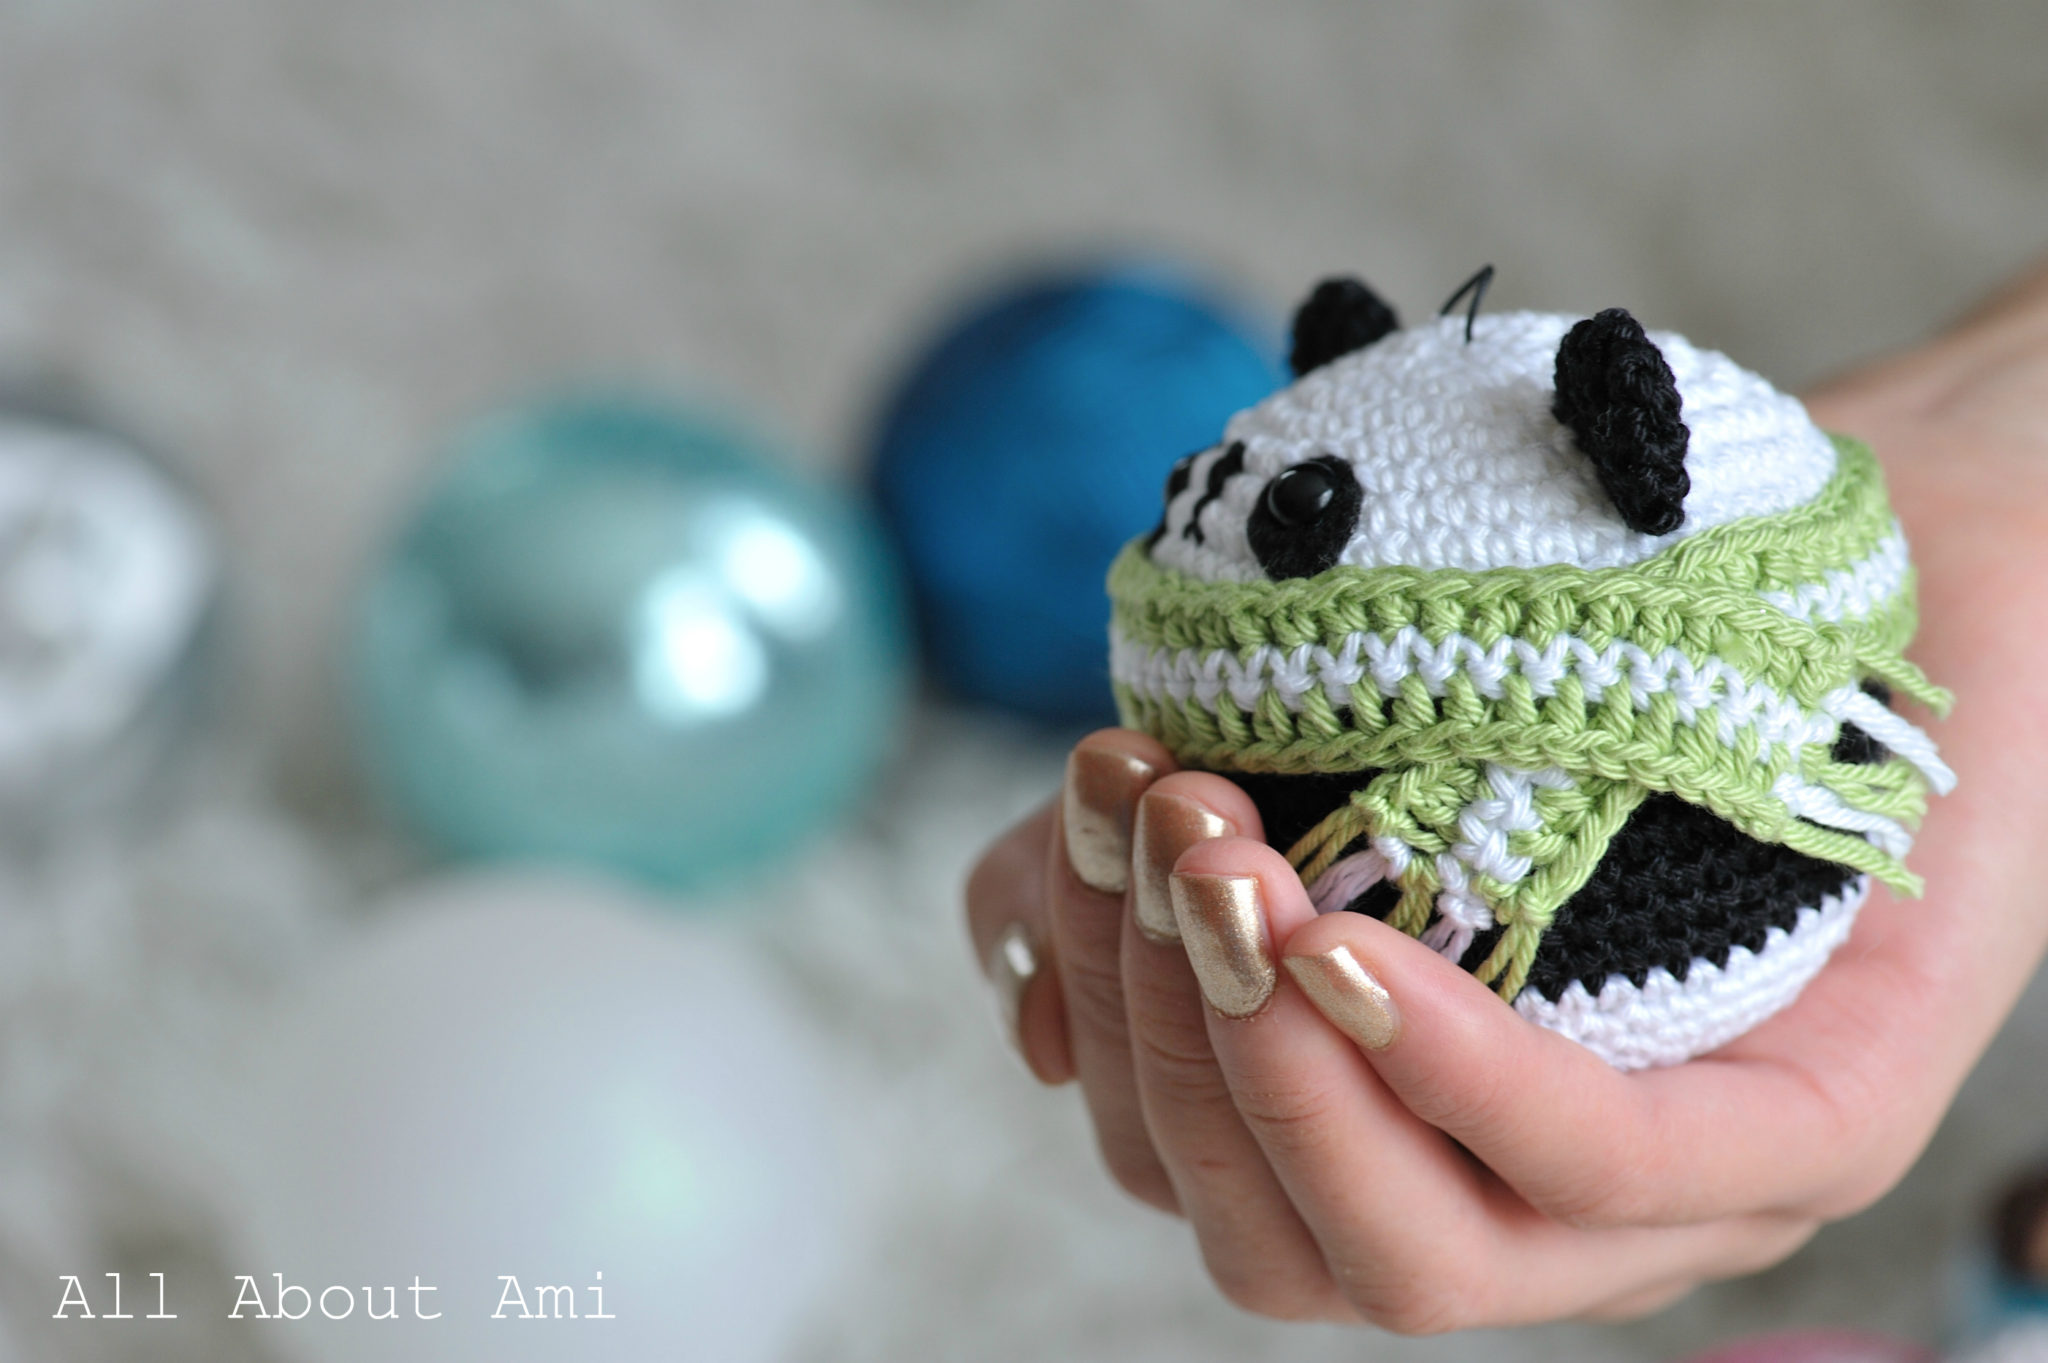
This is one of my favourite shots. I always try to take pictures of me holding my amigurumi so you can see the relative size. I’m obsessed with this gold nail polish at the moment because it’s perfect for the Christmas season with its beautiful shimmeriness!
And now to finally hang our amigurumi teddy ornaments!
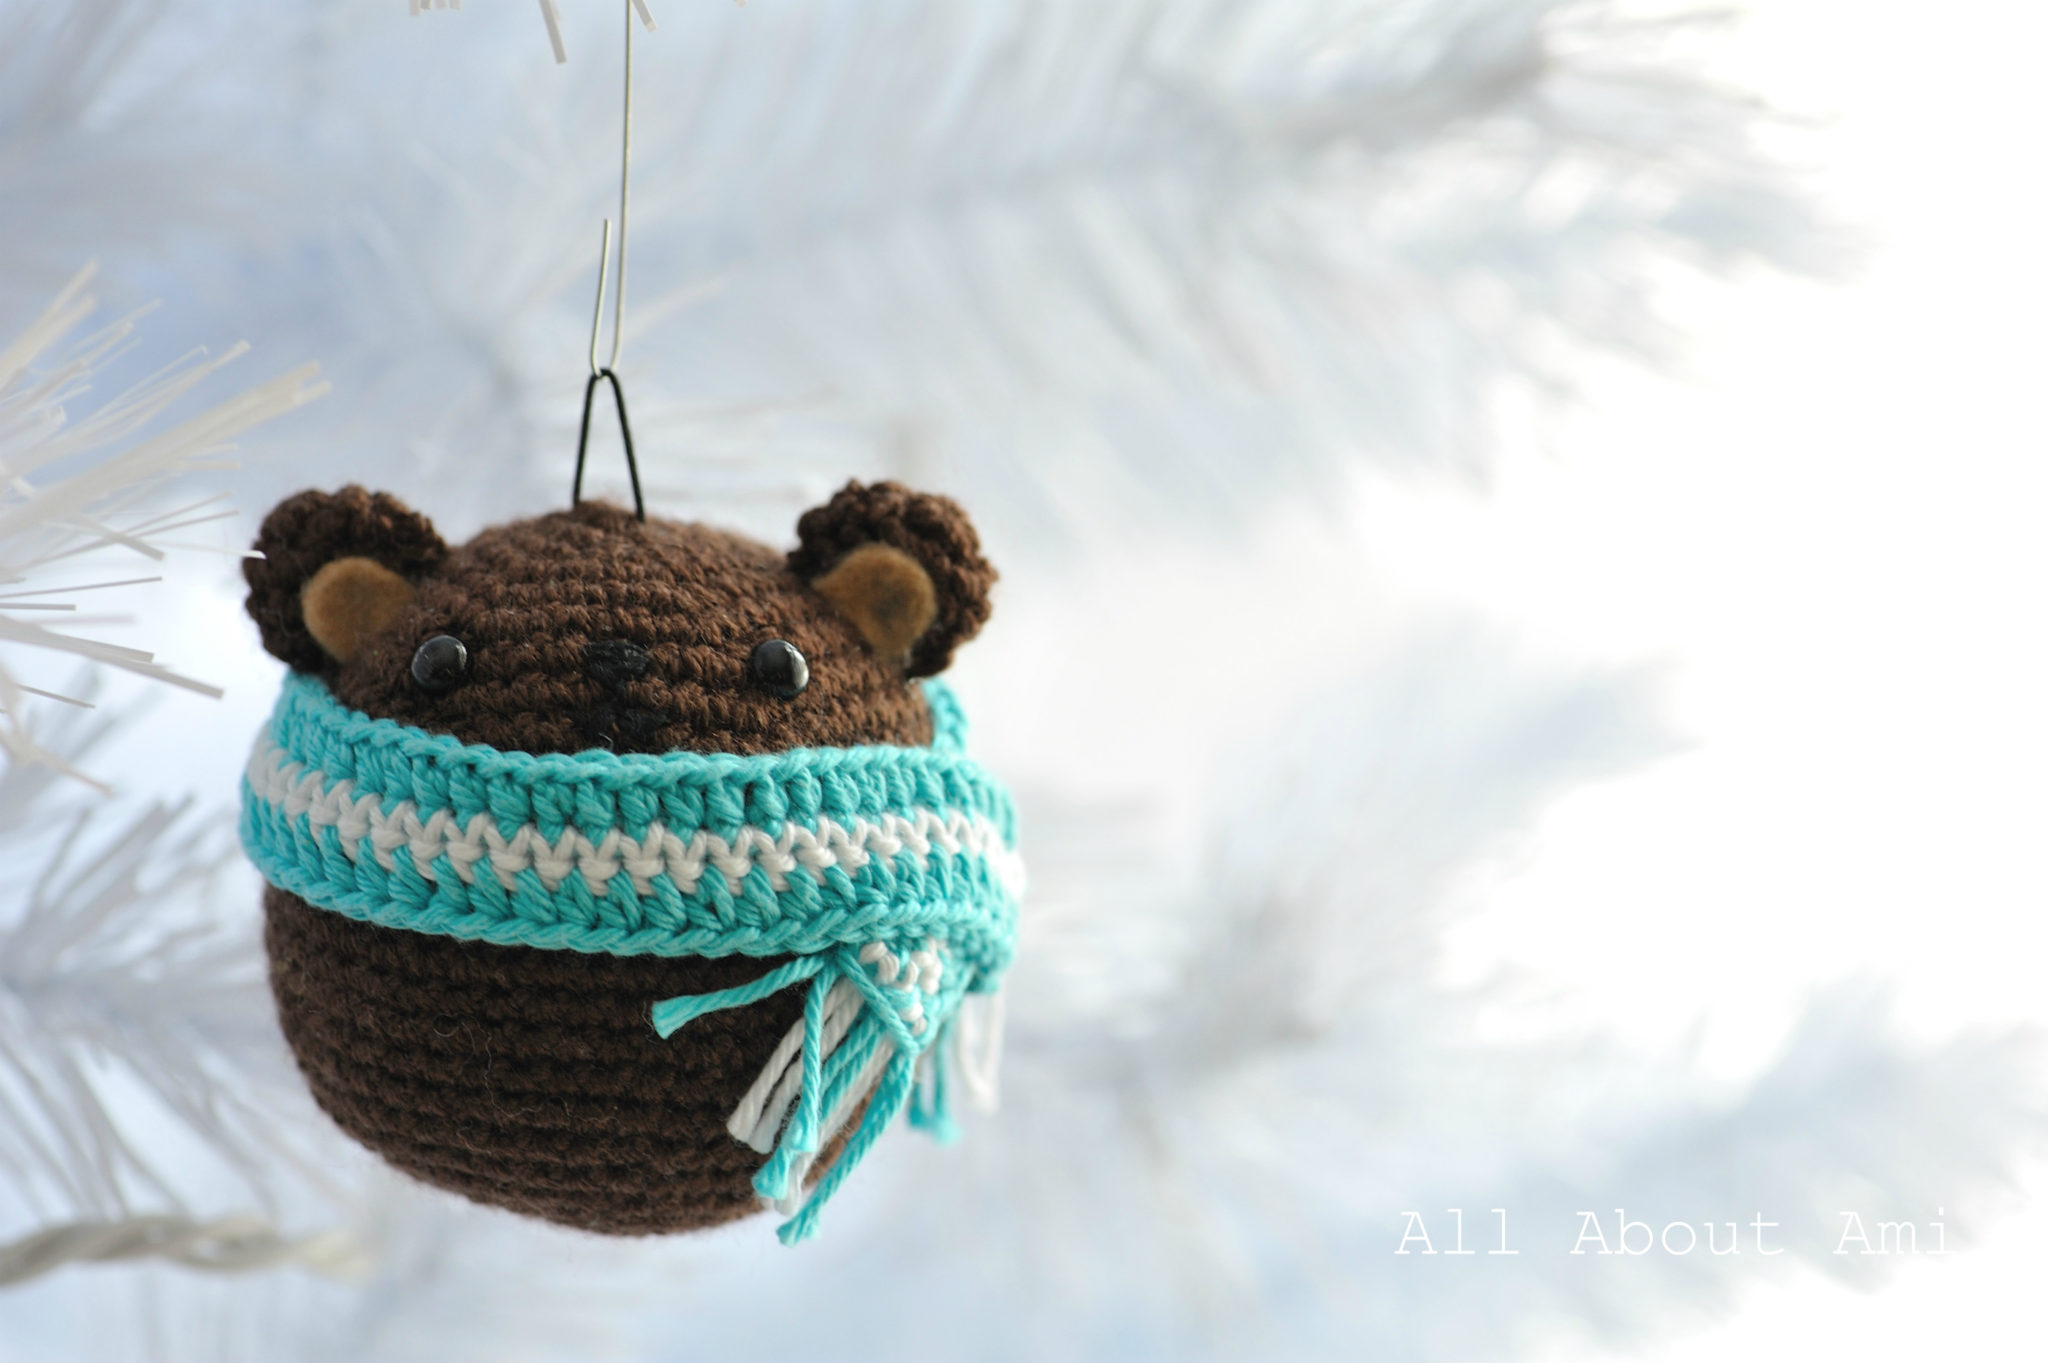
Using the black cord and ornament hooks adds a more discrete way of hanging them as the focus is more on the ornaments themselves (the cord and hook blend in).
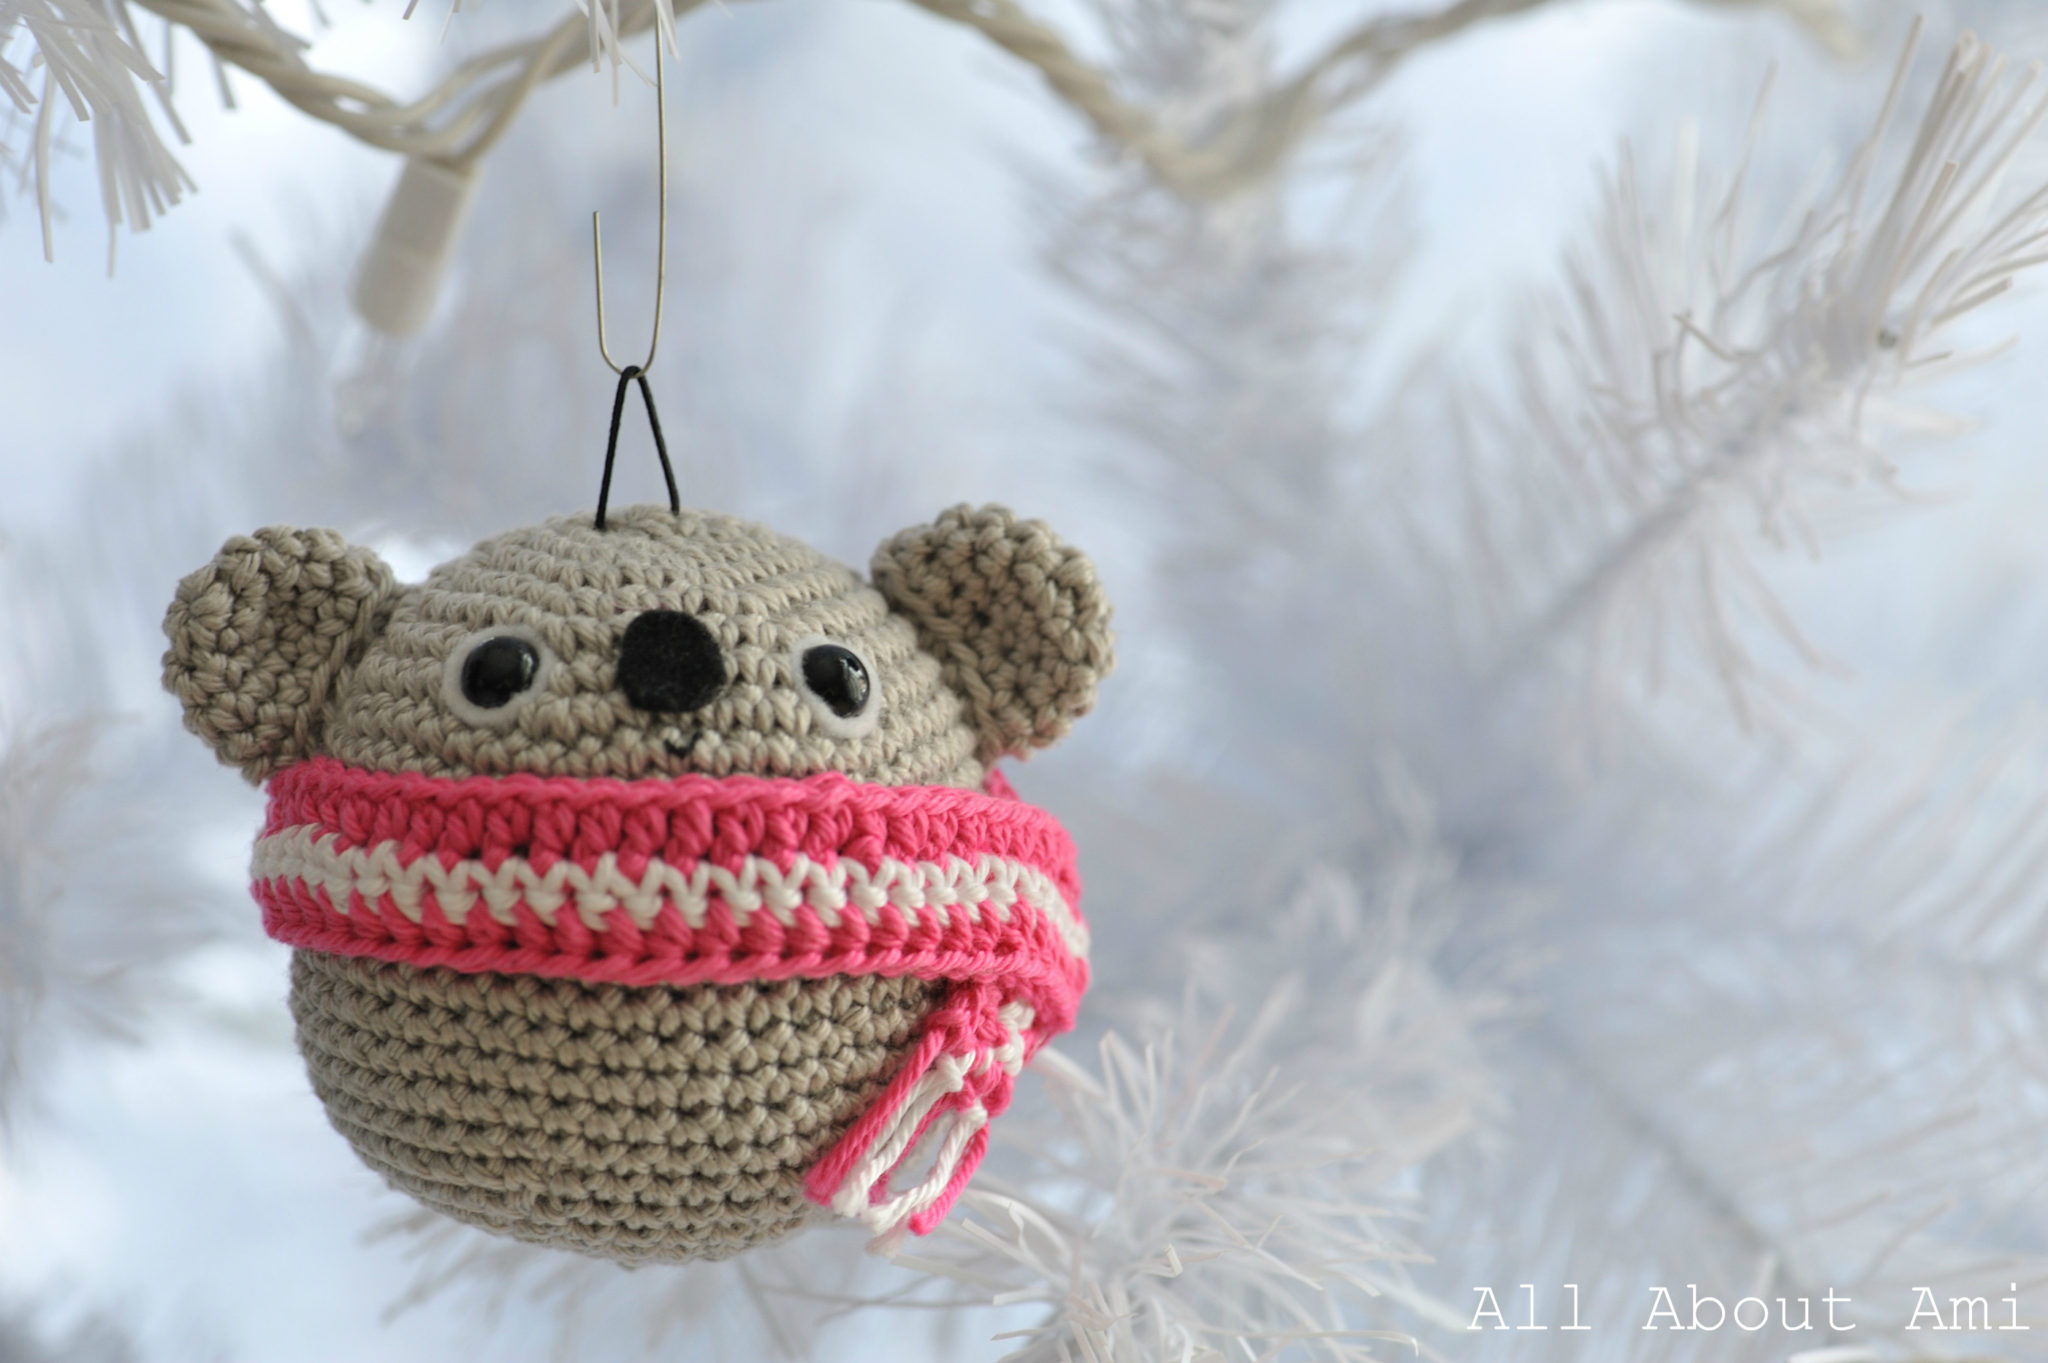
They all stand out so nicely against our white tree!
Last week I tweeted a picture showing our very first Christmas tree, and now you can see it with our special additions! Don’t the blue, silver and white ornaments + our new amigurumi teddies look stunning on our tree?
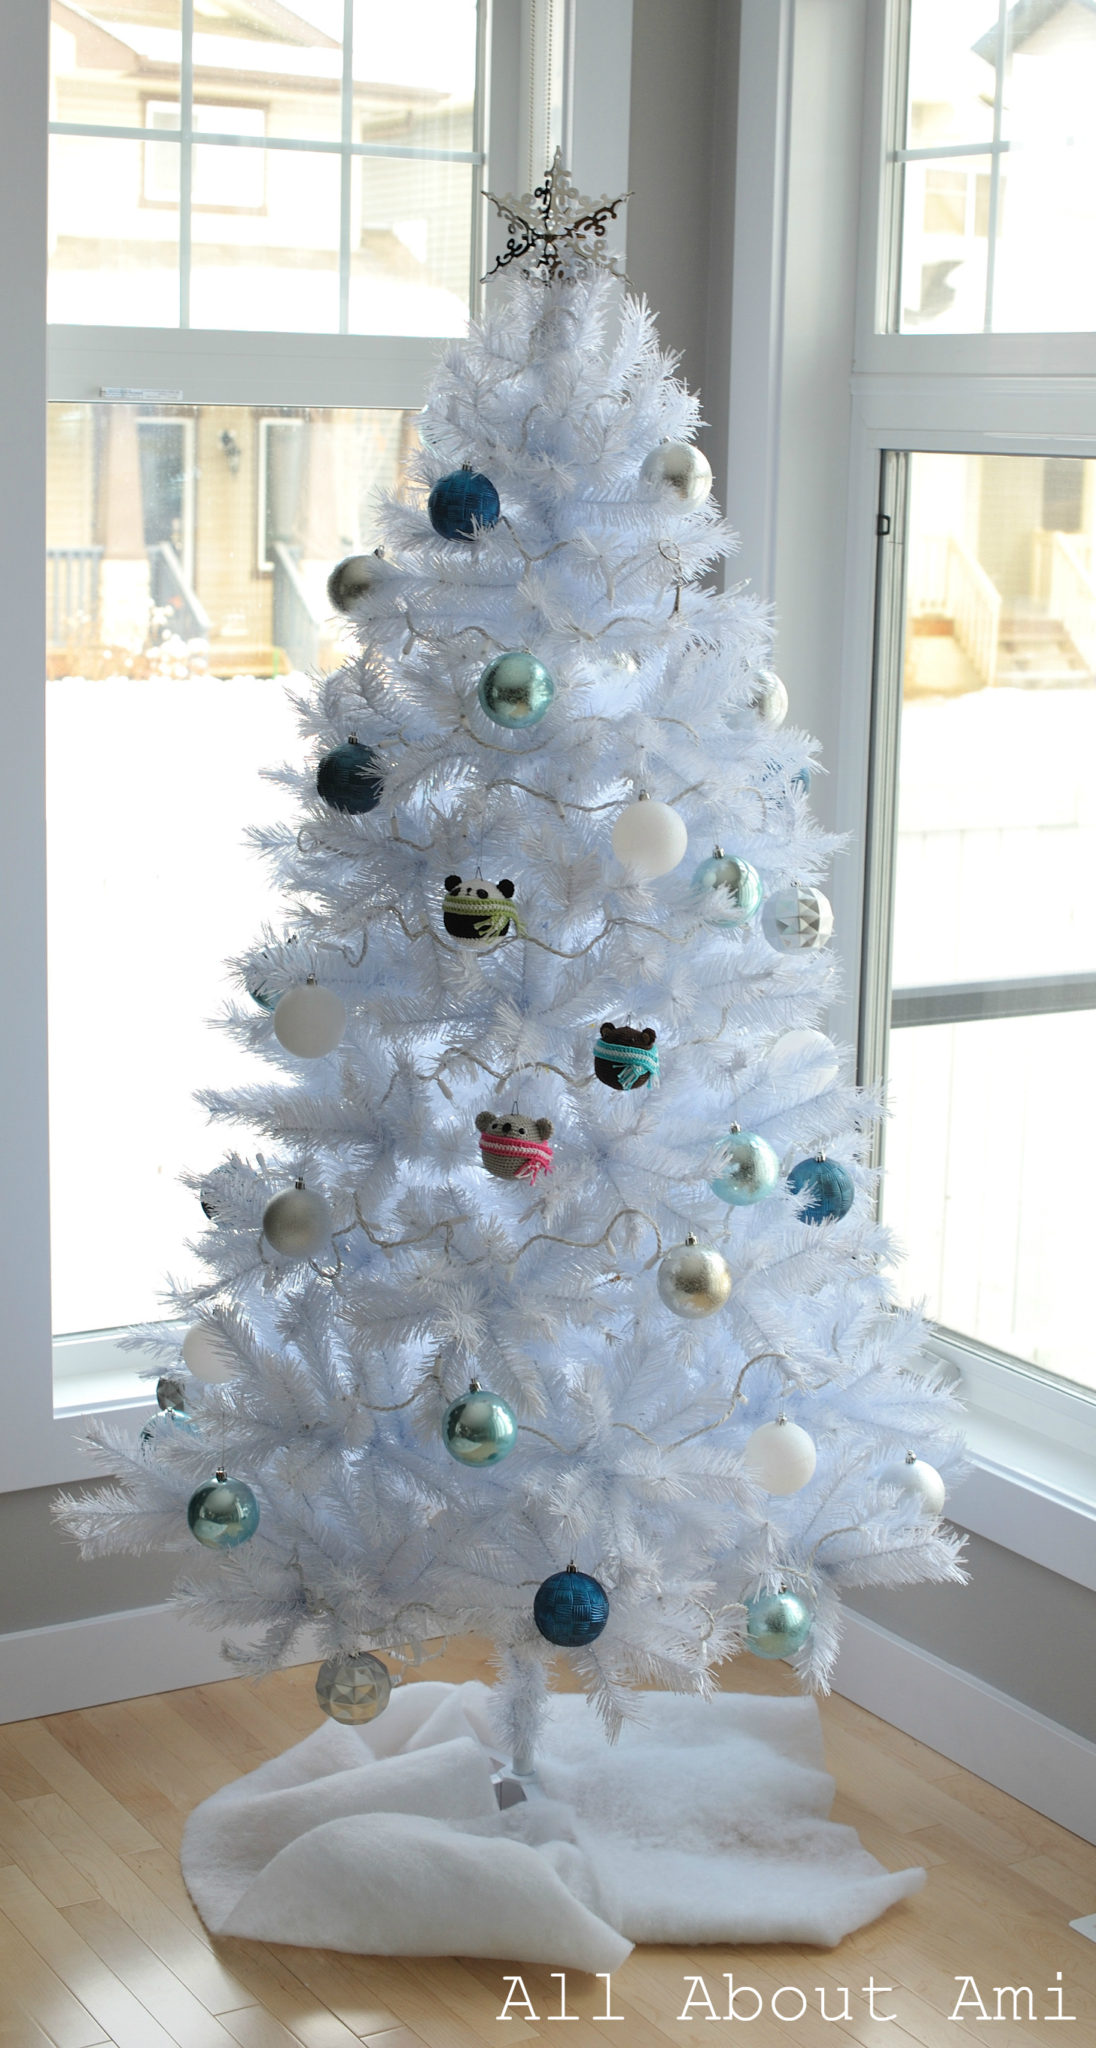
They all look so cute together! Maybe we’ll have a new Christmas tradition where we design some new amigurumi ornaments every year 🙂 Then we’ll eventually have a fully “amigurumi-fied” tree! How cute would that be?
I hope you all like these teddy ornaments we designed and created! They’re relatively quick to make since you only have to attach ears and a scarf (no arms, legs or tails). I wanted to post them in early December so you would all have enough time to make them for your own Christmas trees! These crocheted ornaments would certainly add a splash of cuteness and craftiness to any tree. They’d make pretty cute stocking stuffers as well! ***The free pattern can be found HERE!***

I had to end off with a photo of me wearing a colourful scarf with these three cuties 🙂 Thanks for reading and for your wonderful response so far to these teddies! Leave a comment below and let me know who your favourite teddy is and whether you’ll be making any for your own tree! We love reading each and every single comment 🙂
[Update #1: People have been sending me photos of their own teddy ornaments, and I’ve compiled them all in a Crochet Corner post! Check out everyone’s own rendition of my teddy ornaments here.]
[Update #2: I’ve added a “Bunny Ornament” to this collection, and you can check out the step-by-step post and free pattern HERE!]
![]()