I have so many fond memories of playing “The Legend of Zelda: Ocarina of Time” on the N64 back in the day (in 1998 to be exact!!!). Time sure flies by. I remember staying up late during the summer nights as my brother and sister led me with the player’s guide, instructing me on where I should go and what I should do. We loved the storyline and the music, and we shrieked with excitement as we fought bosses together and became annoyed at Navi the fairy whenever she told us to “Listen!”.
When I first became interested in amigurumi, I scoured the internet for pictures and ideas for my first projects. Ryan stumbled upon an amigurumi Link which we both thought was absolutely adorable. The original pattern was by Becchin (found here), an incredible Japanese amigurumi artist with beautiful, intricate work. Tanoshimou kindly translated the pattern (found here) so the rest of us could make our very own Link’s!
When I first looked at the pattern, I knew it looked somewhat complicated, so I decided to put it on the back-burner as I tried my hand at more simple projects (e.g. Jigglypuff) since I was a beginner at amigurumi. I am so glad this Link project was not my first. I probably would’ve become very frustrated and possibly might’ve given up. I knew I could tackle this project now since I had quite a few amigurumi projects under my belt. And so, I excitedly began this project which had been on my to-do list for months!
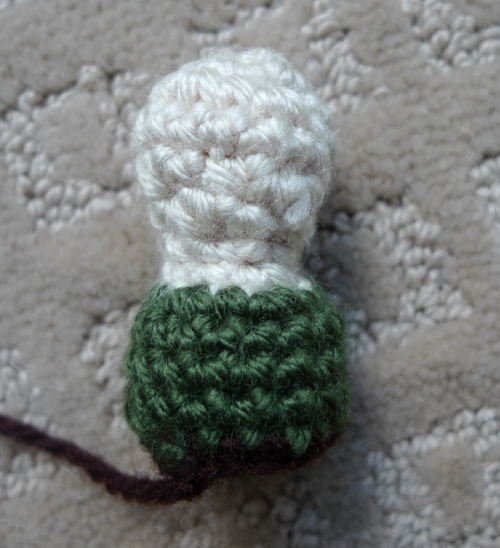
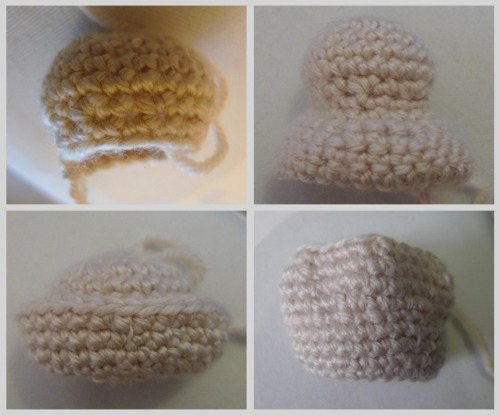
This Link is unique because his head can pivot and rotate. The head is actually removable and pivots around a ball joint, which I thought was such a brilliant idea. Thus, I first started by crocheting the ball joint and upper body.
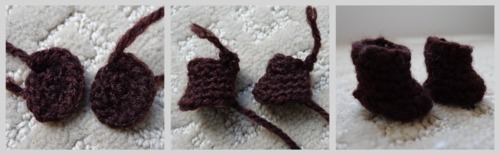
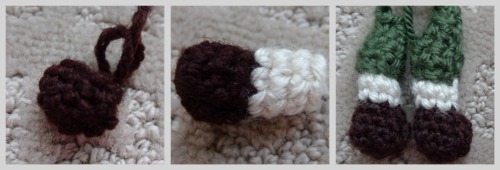
Next, I worked on Link’s brown boots, comprised of two parts: the soles and the tops. They had to be sturdy enough so that Link could stand upright in them!
Next, I crocheted two legs and joined them together, switching to green yarn in the last row.
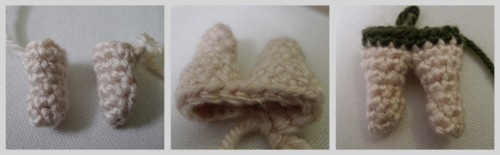
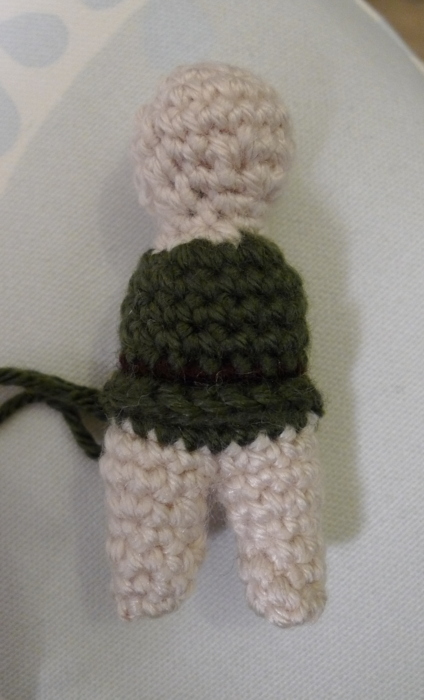
Then, I attached the legs to the ball joint/upper body.
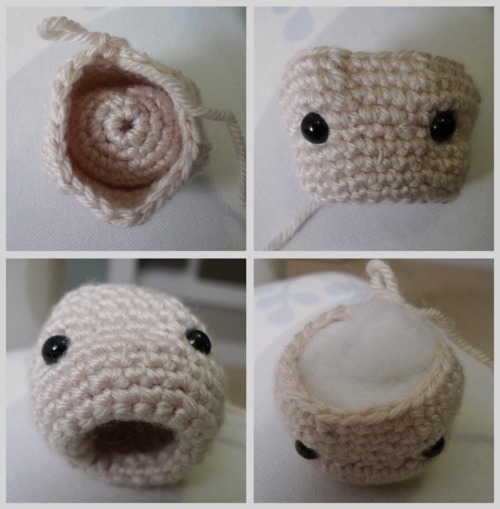
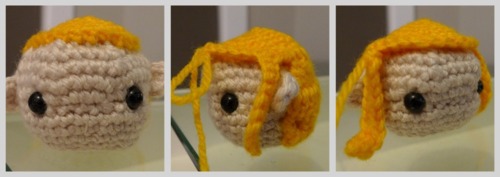
Next up was the cool part: the removable head! At first, I was a little confused about how this all worked, but as you can see in the pictures below, the part that flares out (in the second pic) flips upwards and wraps around the ball that is ontop of it.
And so, adding the eyes and stuffing the head was a little bit different than normal since the base was hollow.
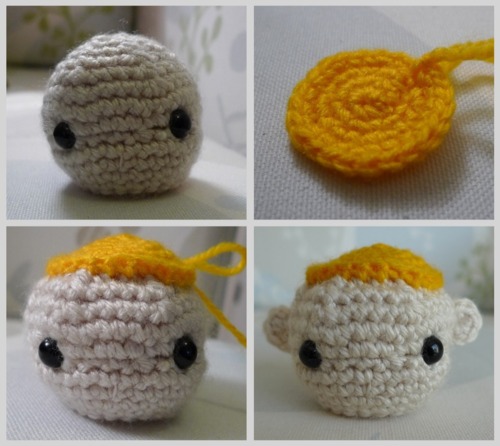
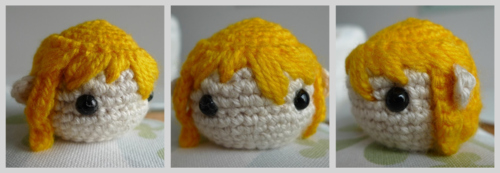
Once his head was complete, I worked on making the top part of his hair and also attached some ears.
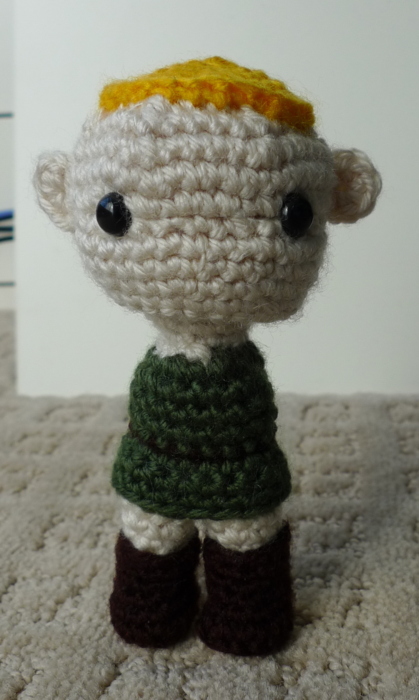
This is what I had completed so far…
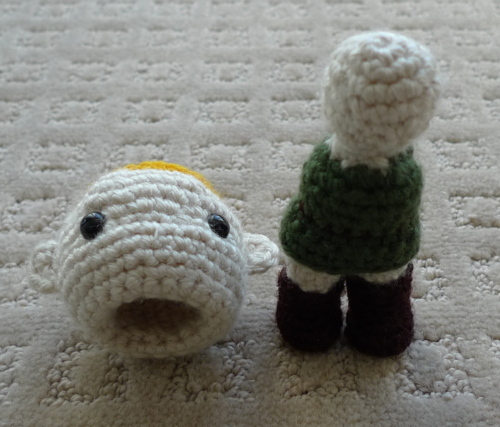
Now with his head on the ball joint! It looks like Link has a buzz cut…
Next up were his arms.
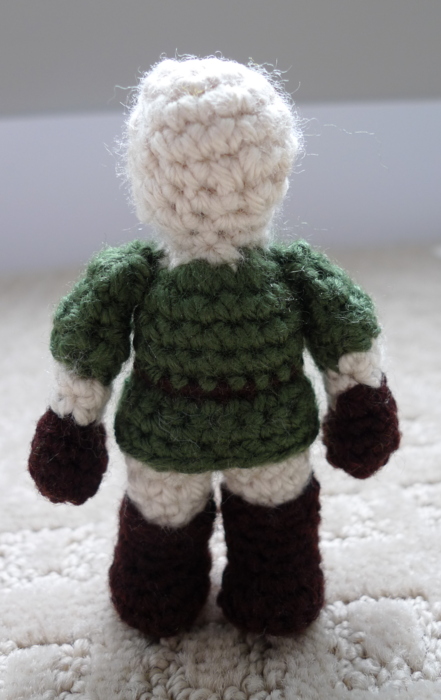
Now with his arms attached! It’s funny how he actually looks proportional here (with the ball joint being a proportional head). But of course amigurumi are characterized by their oversized heads!
Then came a challenging part: the hair! I used double crochets to go down the back of his head.
For the front part, I chained long strands on either side of his face (in front of the ears) for his sideburns.
Ryan helped me with the bangs and did an absolutely fantastic job stitching them on with a yarn needle. Here are some different angles showing his bangs. I think attaching hair with this method is such a great idea as it gives a very clean-cut look.
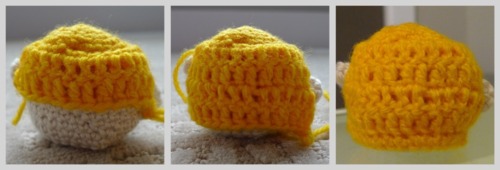
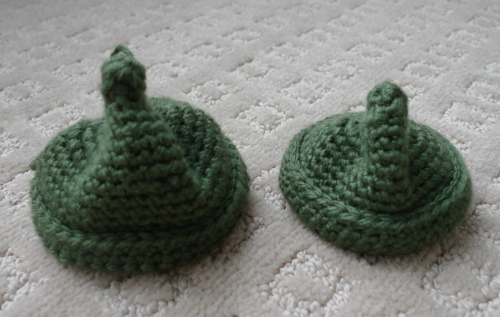
I thought the pattern for the pointy hat was clever since you increase the stitches on certain sides (I’m so used to increasing evenly around a circle). However, for some reason, I found that the hat pattern that was written out produced a hat that was way too big (see hat on the left below). Someone also commented about this, so I’m glad I’m not the only one! Thus, I had to modify the pattern (see hat on the right), otherwise it looked like Link was absolutely swimming in his hat. I talk about how I modified the hat in my accessories pattern post here (right before the materials section).
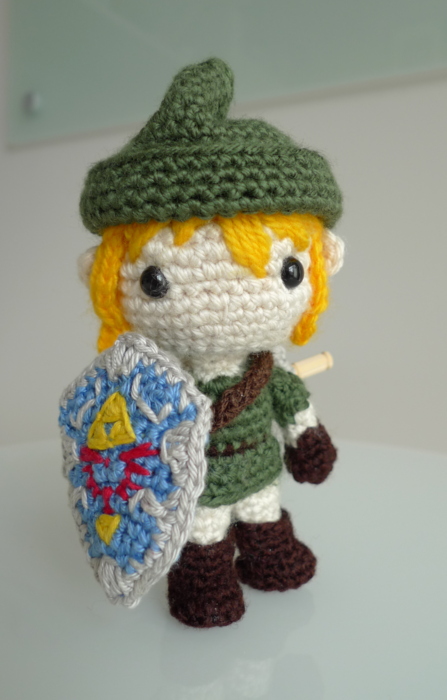
I was so excited to see if this hat fit. Here he is!

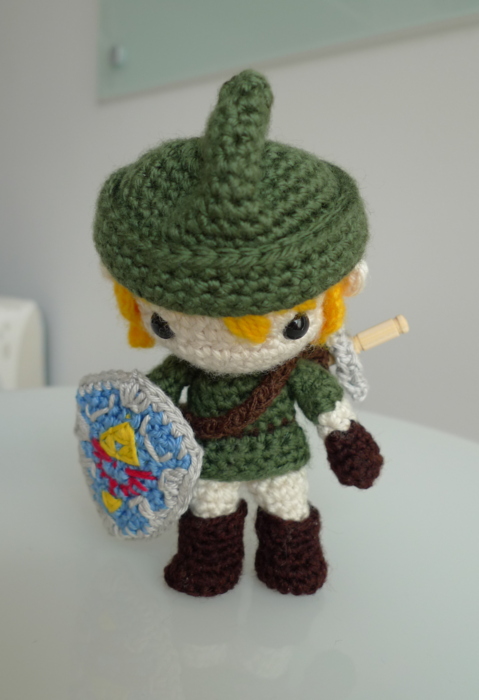
A few more pics from various angles…

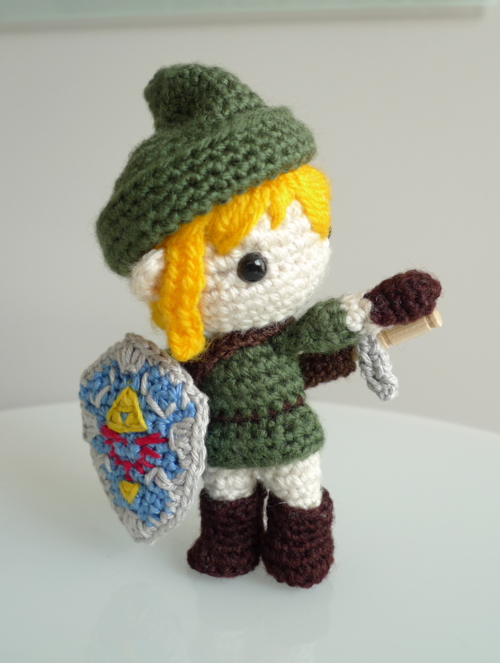
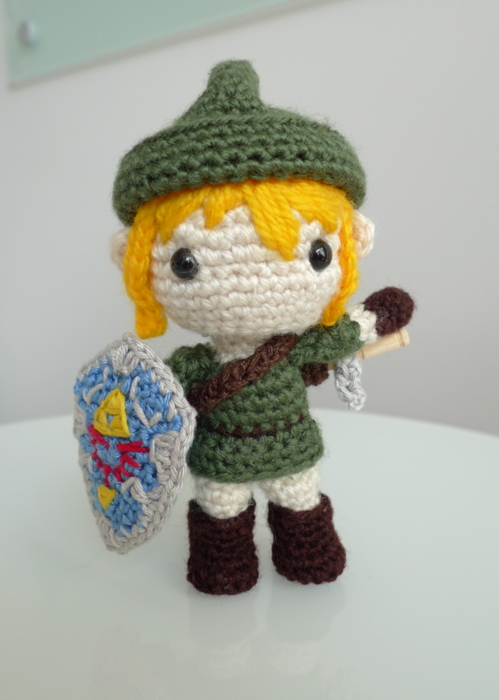
I knew Link the warrior wouldn’t be complete without his accessories….like his Hylian shield and his sword! And so, we made up our own patterns to create them. Ryan was the one who actually embroidered the designs onto the Hylian shield for me, and I was blown away by how accurate and intricate it turned out! To check out step-by-step photos and patterns of how I made each accessory, click HERE. Here’s a pic of Link with them!
Now with sword in hand!
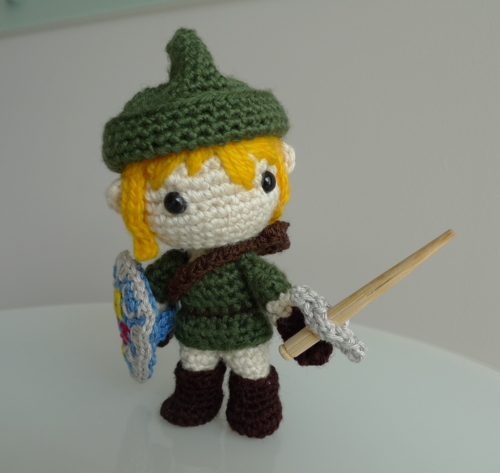
From more angles…

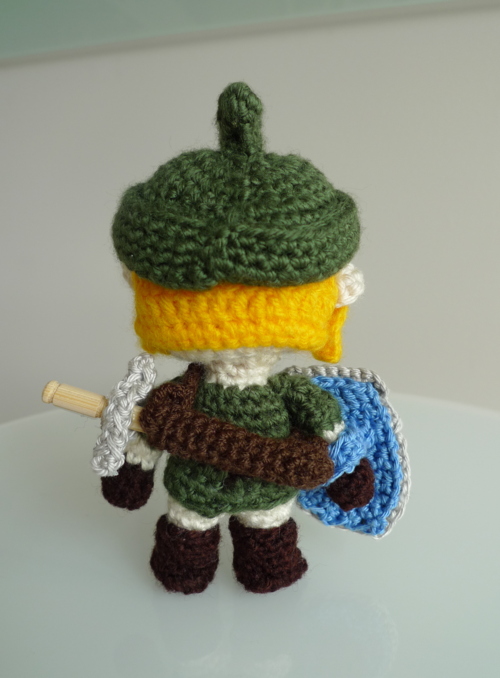
From behind you can get a better view of his sword and sheath, and how his shield attaches to his arm.
Since Link’s head is pivotable, it’s fun to pose him just like our old action figurines 🙂 For example…
“Oh no! What’s going on over there?!?”
“Zelda’s been captured by Ganondorf. *Sigh*.”
“Have no fear! Link is here! Ganondorf’s no match for me!”
Haha, you get the point. Here are a few pics showing Link’s relative size in case you’re curious.
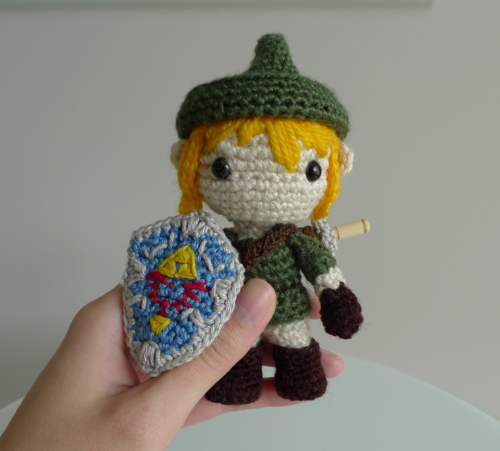
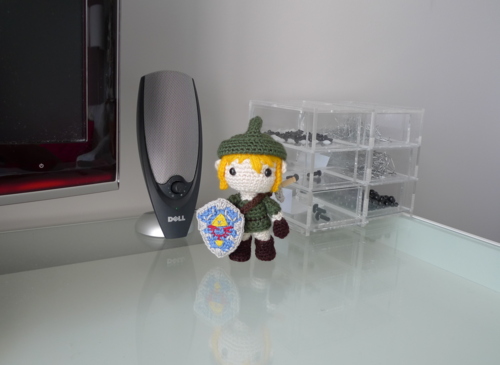
Here he is on guard at the corner of my desk.
I am so happy with how Link turned out. Becchin’s pattern is very intricate, from his pivotable head to his removable boots. Link is incredibly sturdy as it amazes me how he can stand all by himself. If you are or know of any Legend of Zelda fans, you should definitely give this pattern a try. Once again, the pattern for the Hylian shield, sword and sheath can be found HERE. Let me know what you think of this Link and if you played “Ocarina of Time” back in the day too! What are some of your favourite video games?
{Update: If you are looking for a free Zelda amigurumi pattern, check out Mia’s Atelier HERE!}
![]()