![]()
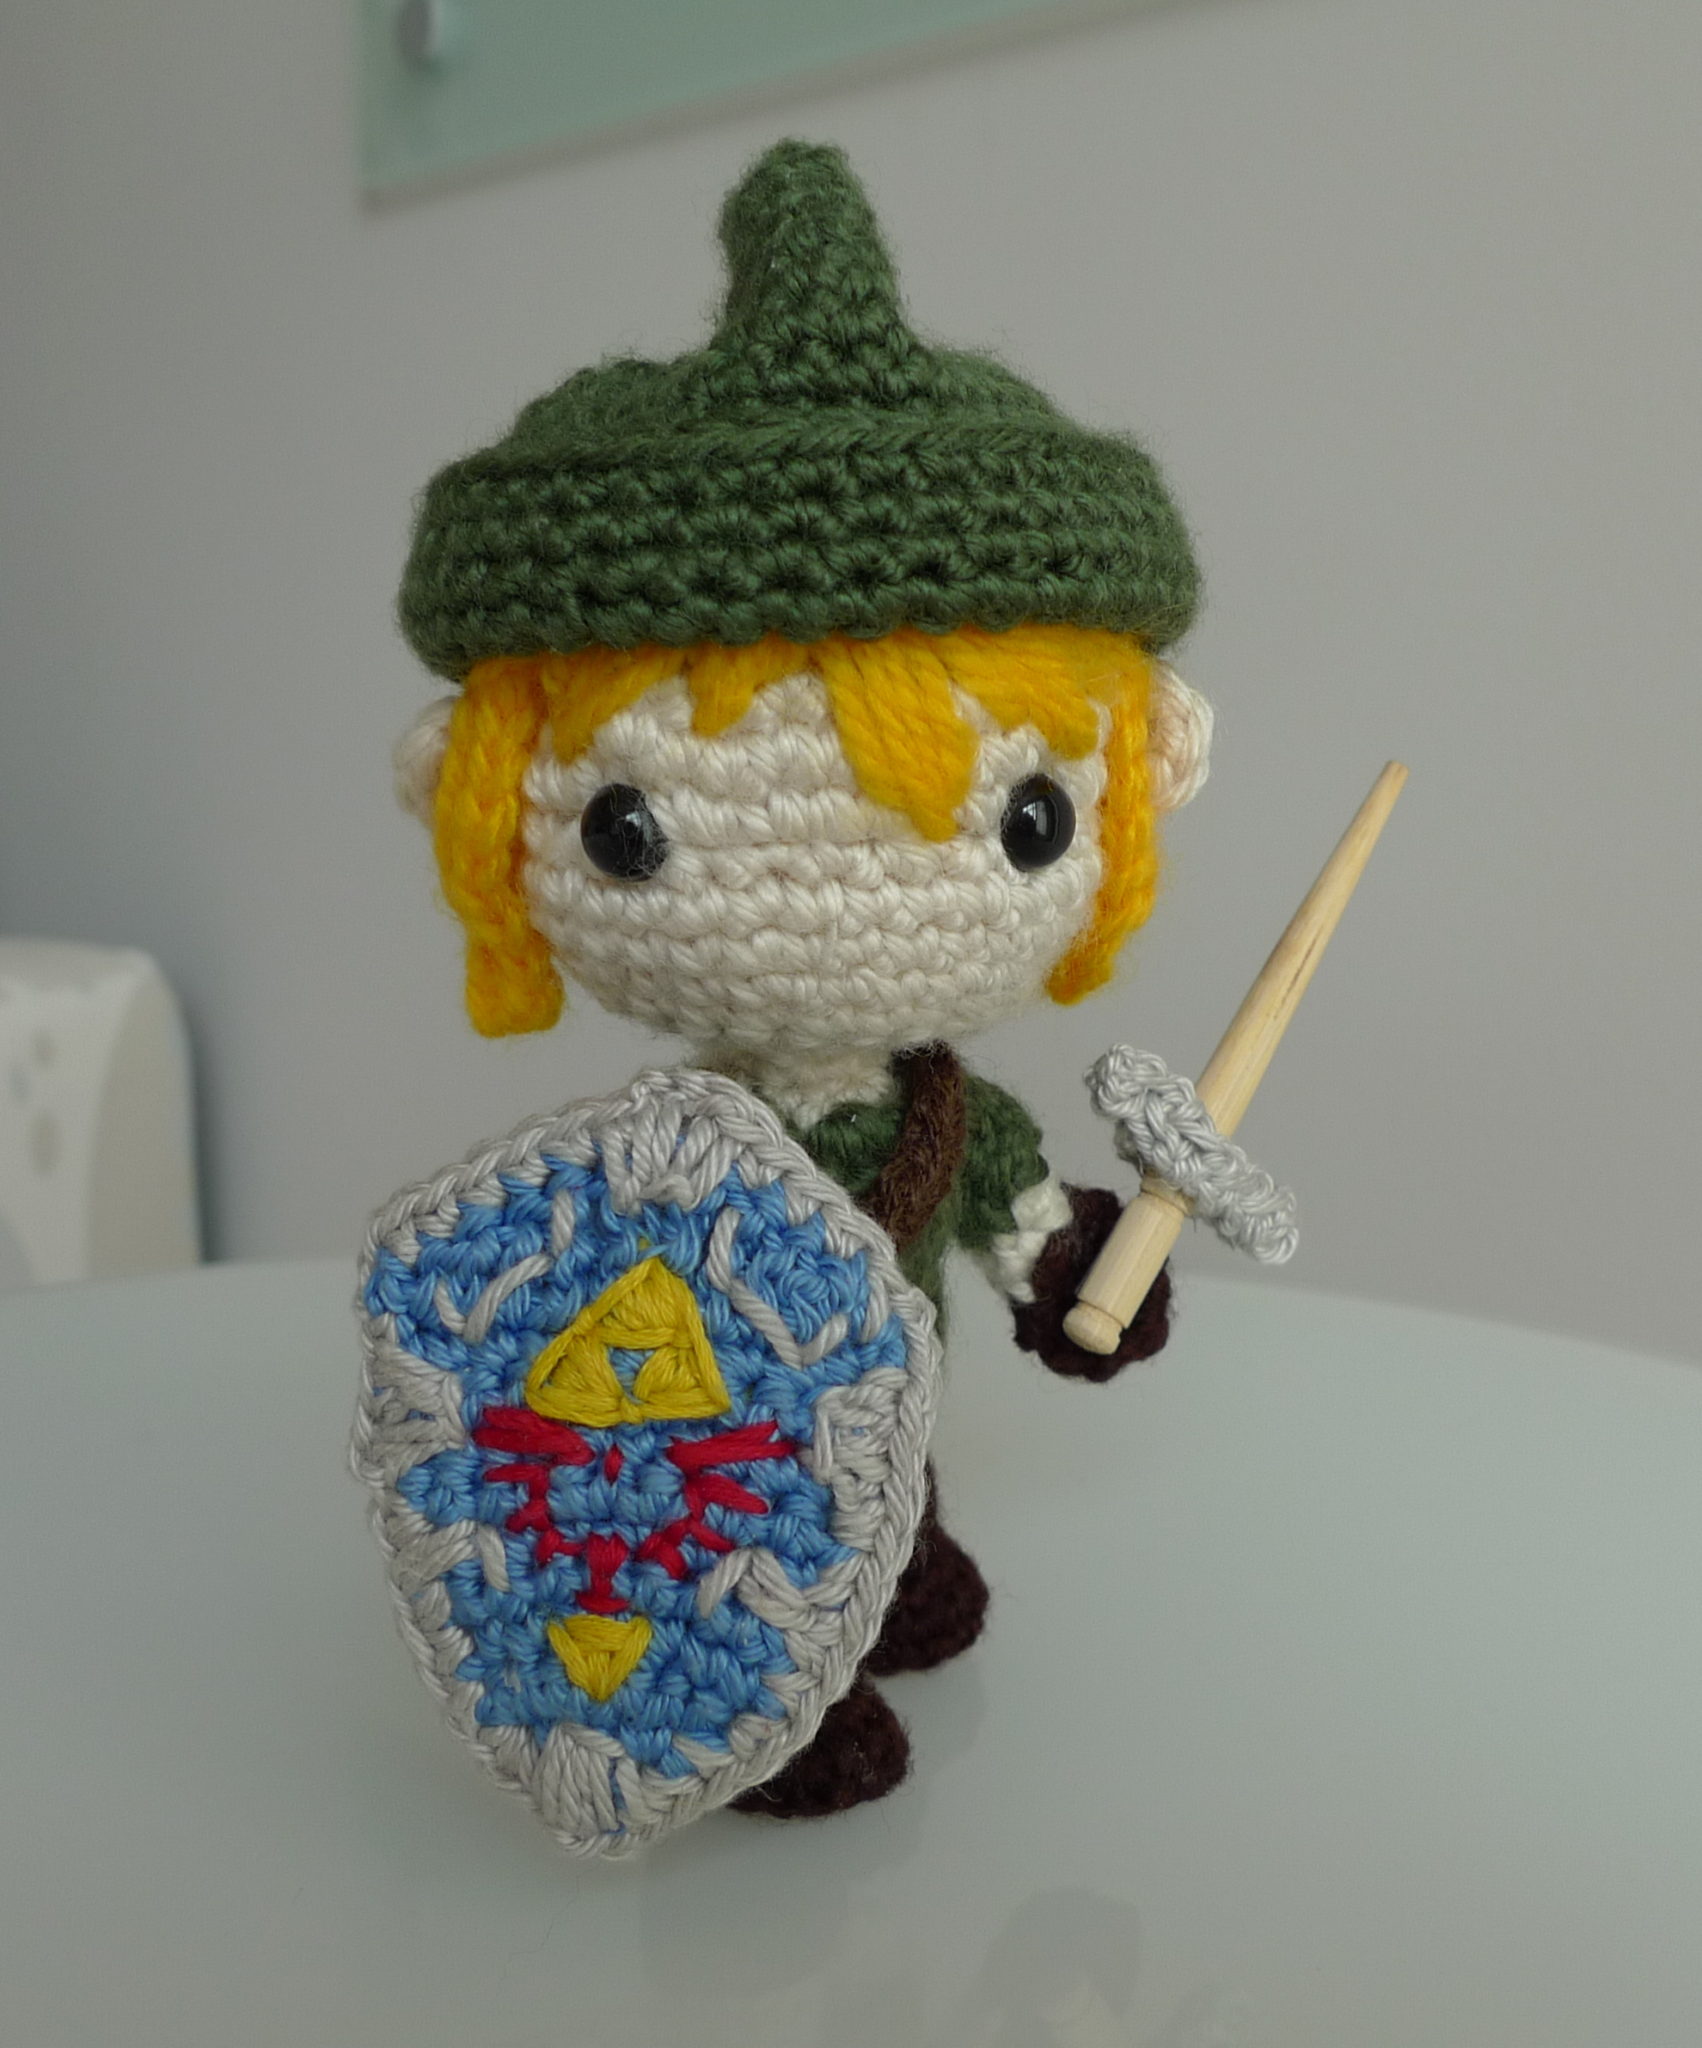
Link was crocheted using an original pattern by Becchin, translated by Tanoshimou. Check out the following links (haha, no pun intended) to help you make your own hero of Hyrule:
- Becchin’s ‘person core’ page that Link is based on: he has great step-by-step photos (click here)
- Becchin’s photos of Link as well as a very useful video showing the process (click here)
- Tanoshimou’s translation of Becchin’s pattern into English (click here)
- MY step-by-step blog post to see how I used the above resources to make this adorable Link (click here)
I followed Tanoshimou’s pattern except for the hat, as I found the pattern written out produced a hat that was far too big for Link. I kept single crocheting 42 all the way around from rows 12-18, went counter-clockwise for row 15, and then went around clockwise for rows 16-18 (I did not take it past row 18).
Now onto my pattern for Link’s Hylian Shield, Sword, and Sheath!
Materials:
- blue and grey yarn (for the shield) and brown yarn (for the sword and sheath)- I used Patons Grace
- yellow and red embroidery floss
- 2.00 mm Clover Amour crochet hook
- Yarn needle (bent tip helpful for attaching amigurumi parts- see HERE)
- glue gun
- chopstick
Note: I worked in continuous rounds (vs. joined rounds).
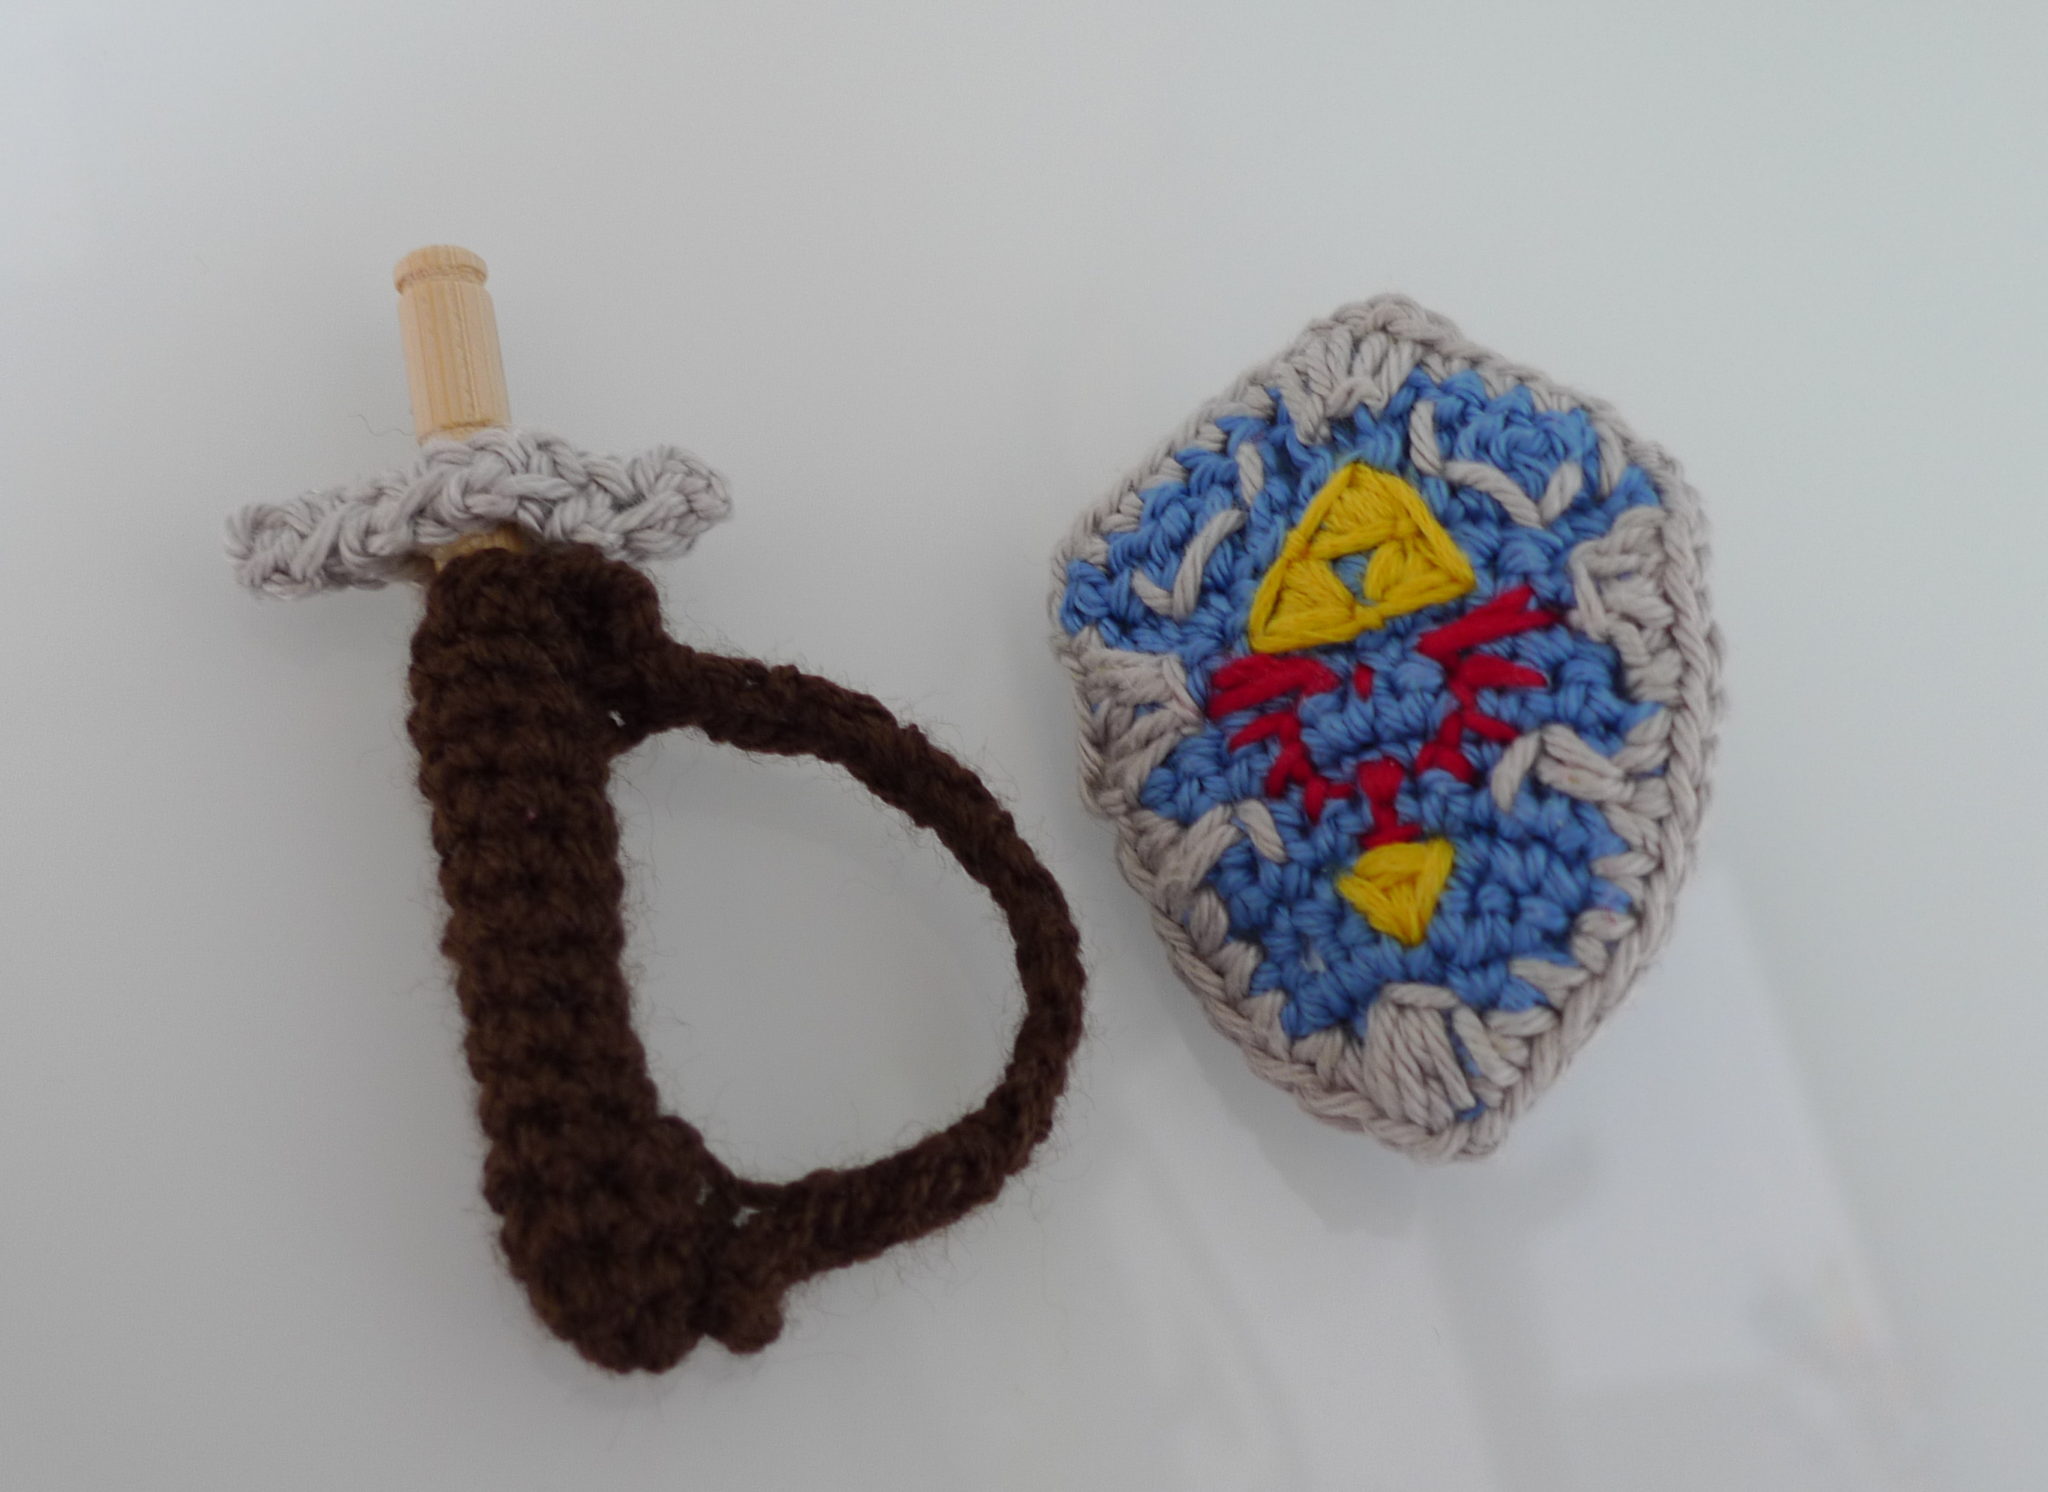
SHIELD:
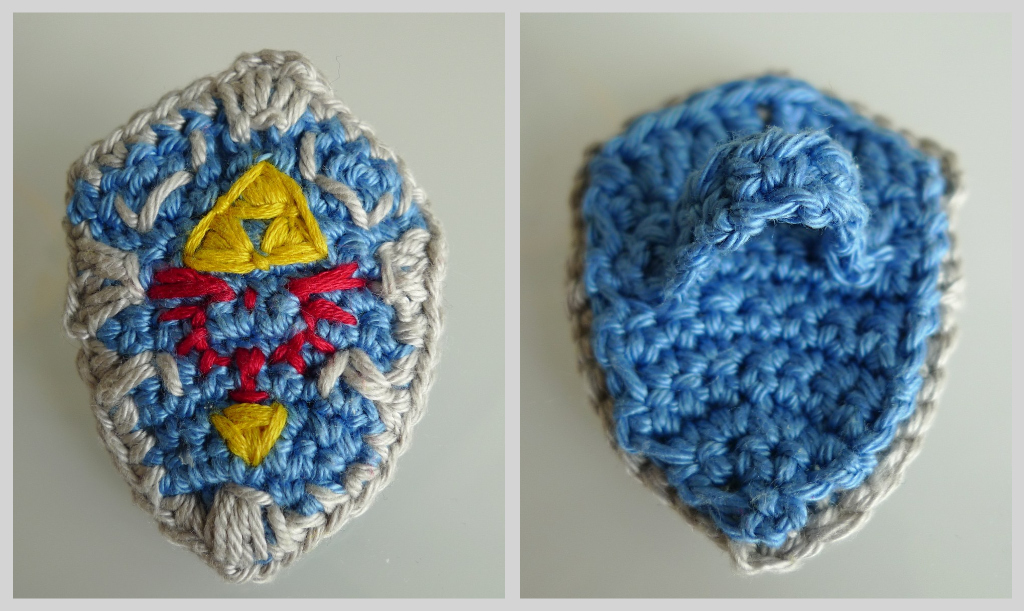
The shield consists of the (1) front part, (2) back part, and (3) strap.
(1) Front part
Using blue yarn,
R1: Ch 2, 2 sc in second ch from hook, turn. (2)
R2: Ch 1, *sc 2 in next sc*, rep 2 times, turn. (4)
R3: Ch 1 *sc 2 in next sc*, rep 4 times, turn. (8)
R4-6: Ch 1, sc 8, turn. (8)
R7: Ch 1, sc 3, *sc 2 in next sc*, rep 2 times, sc 3, turn. (10)
R8-10: Ch 1, sc 10, turn. (10)
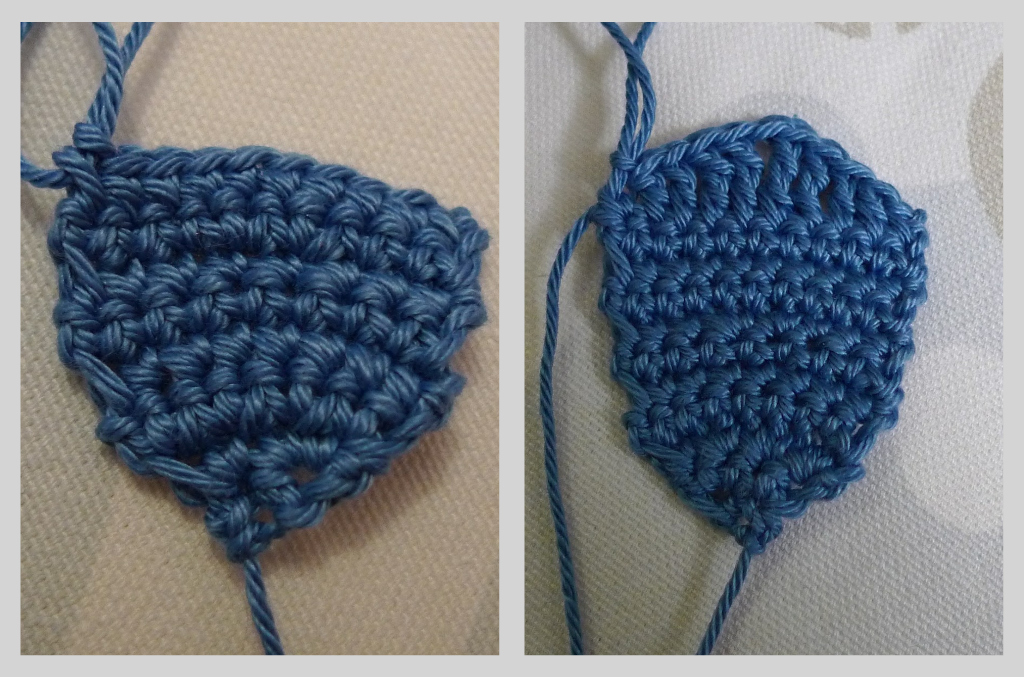
R11: Ch 1, sc 1, dc 1, dc 1, tr 1, tr 1, ch 1, tr 1, tr 1, dc 1, dc 1, sc 1.
Fasten off and weave in end.
Resulting shape should look like this:
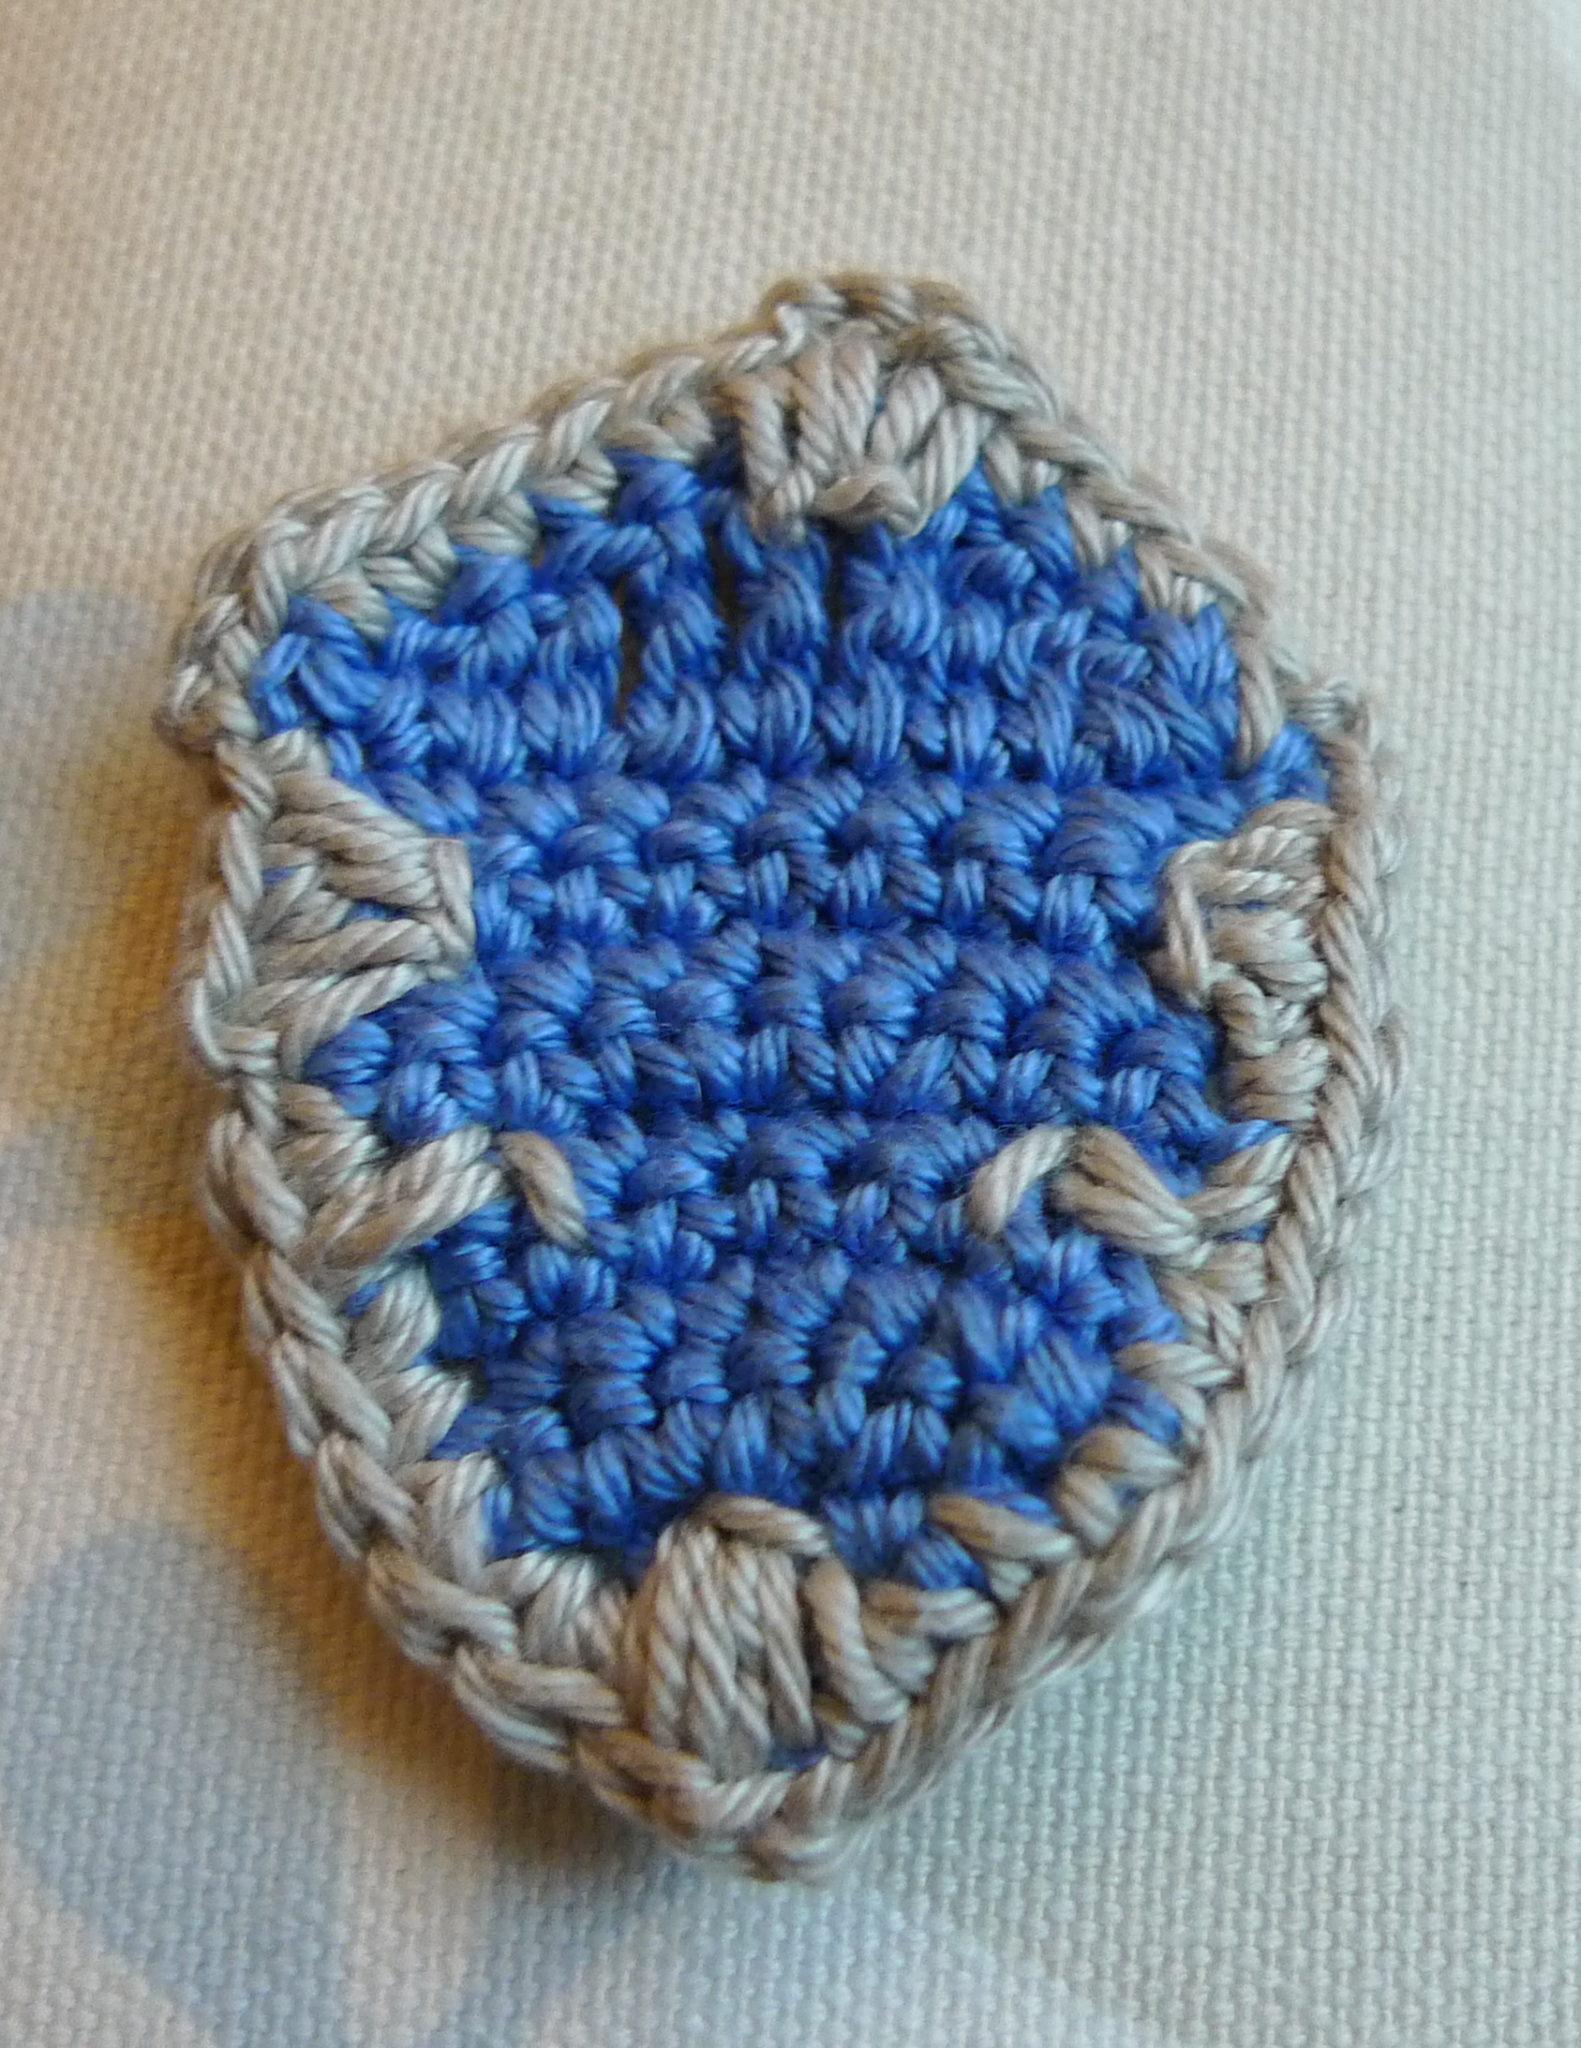
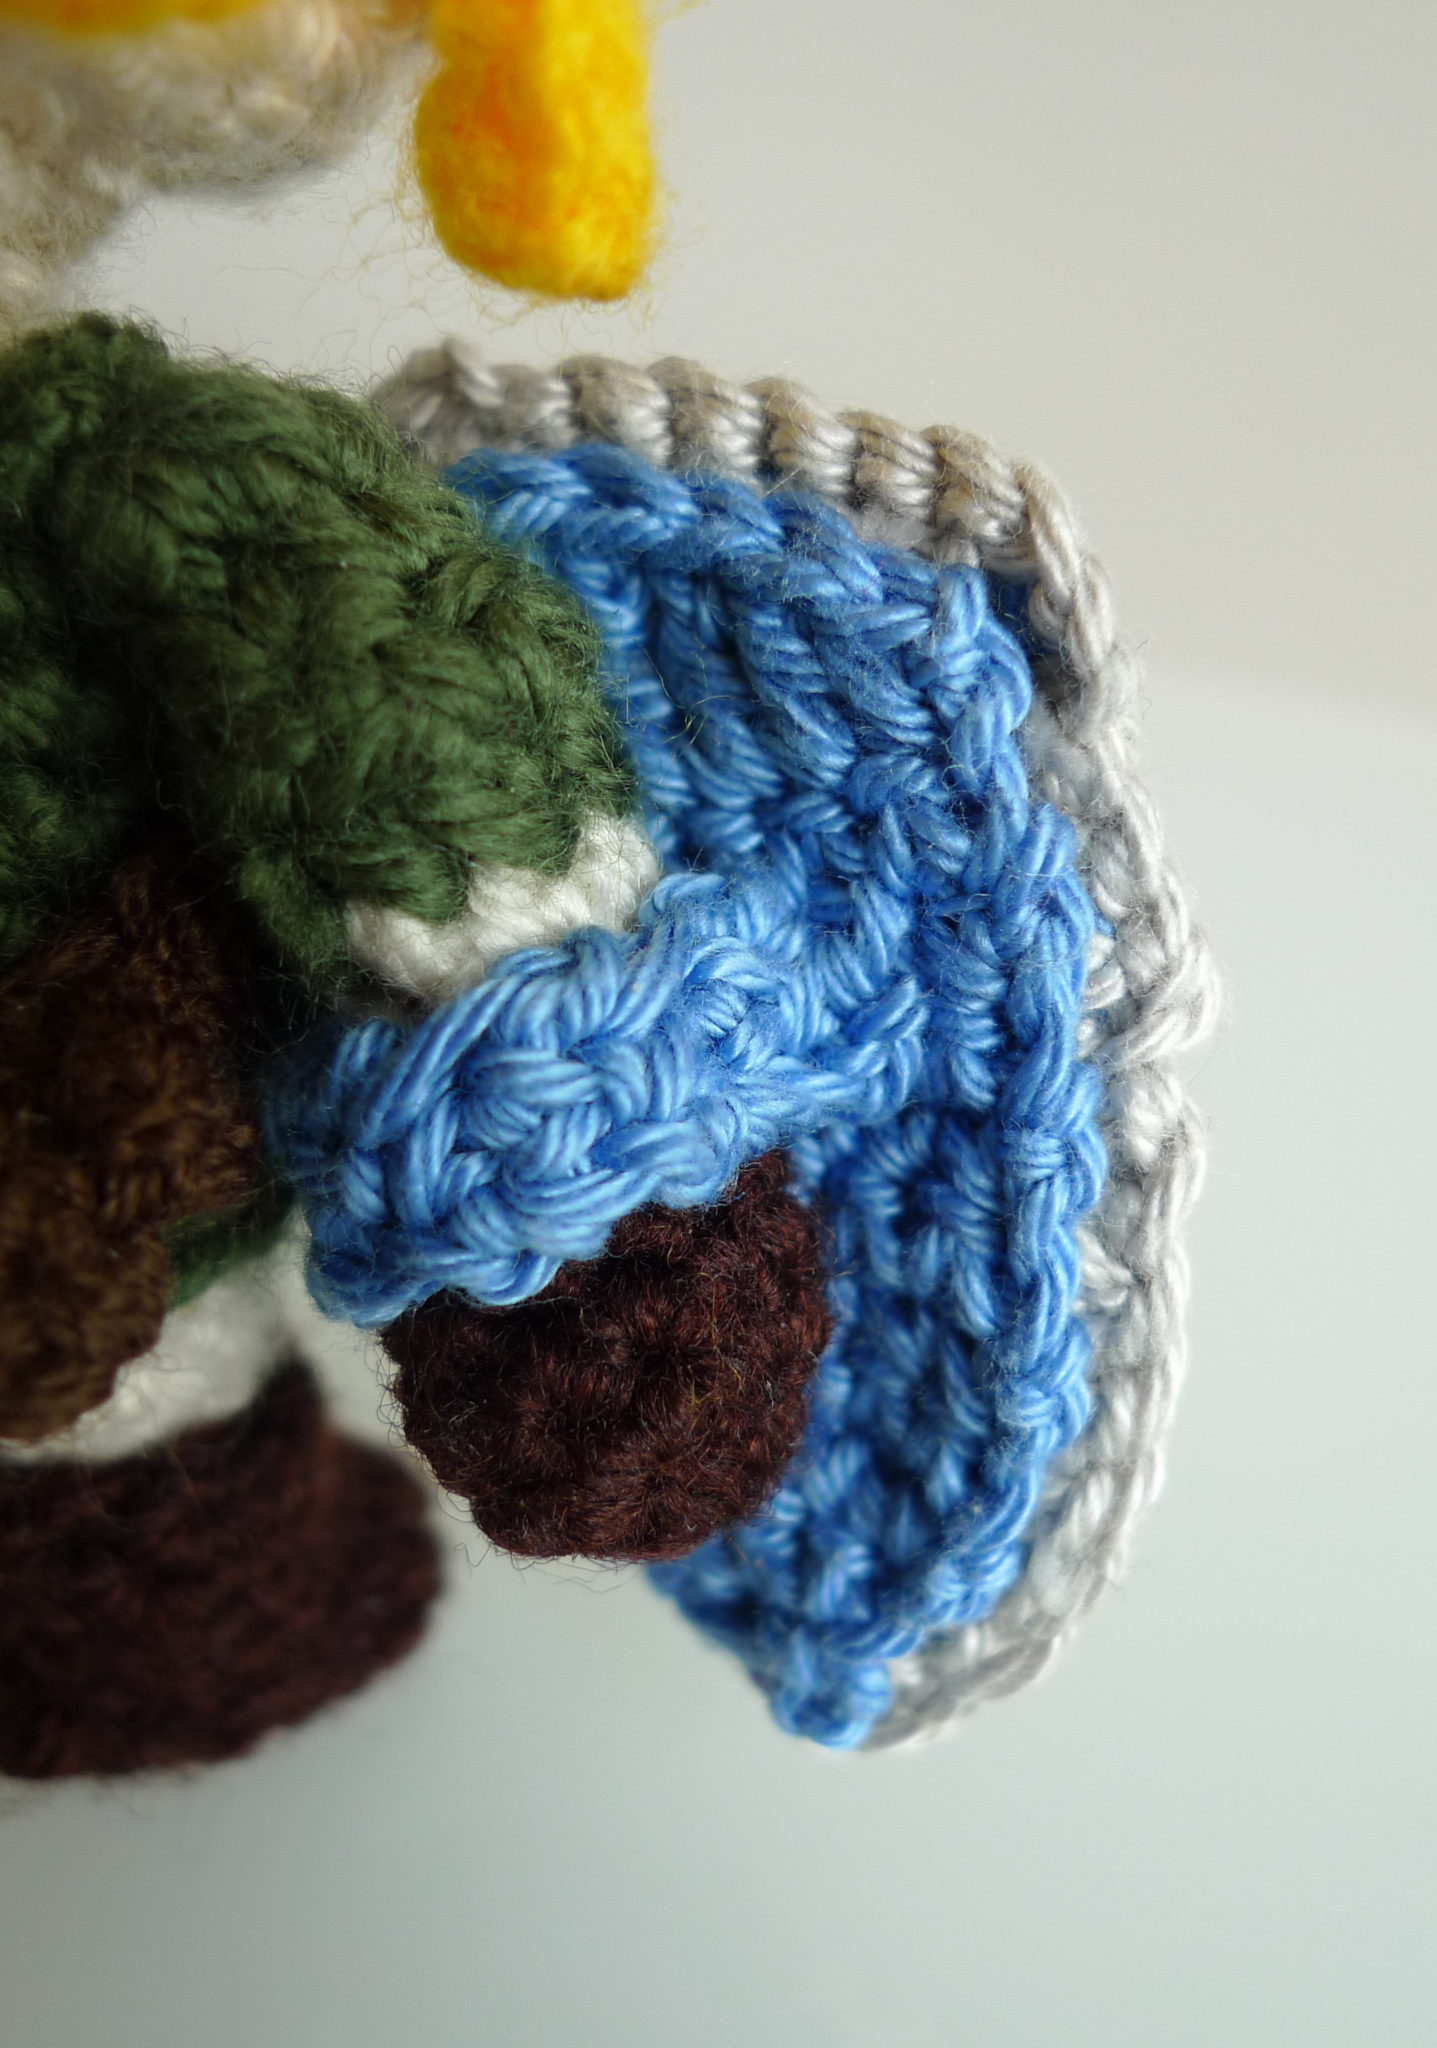
Using grey yarn, single crochet around the border of the shield. Chain 2 at bottom corner. Chain 3 at top corners (see below diagram).
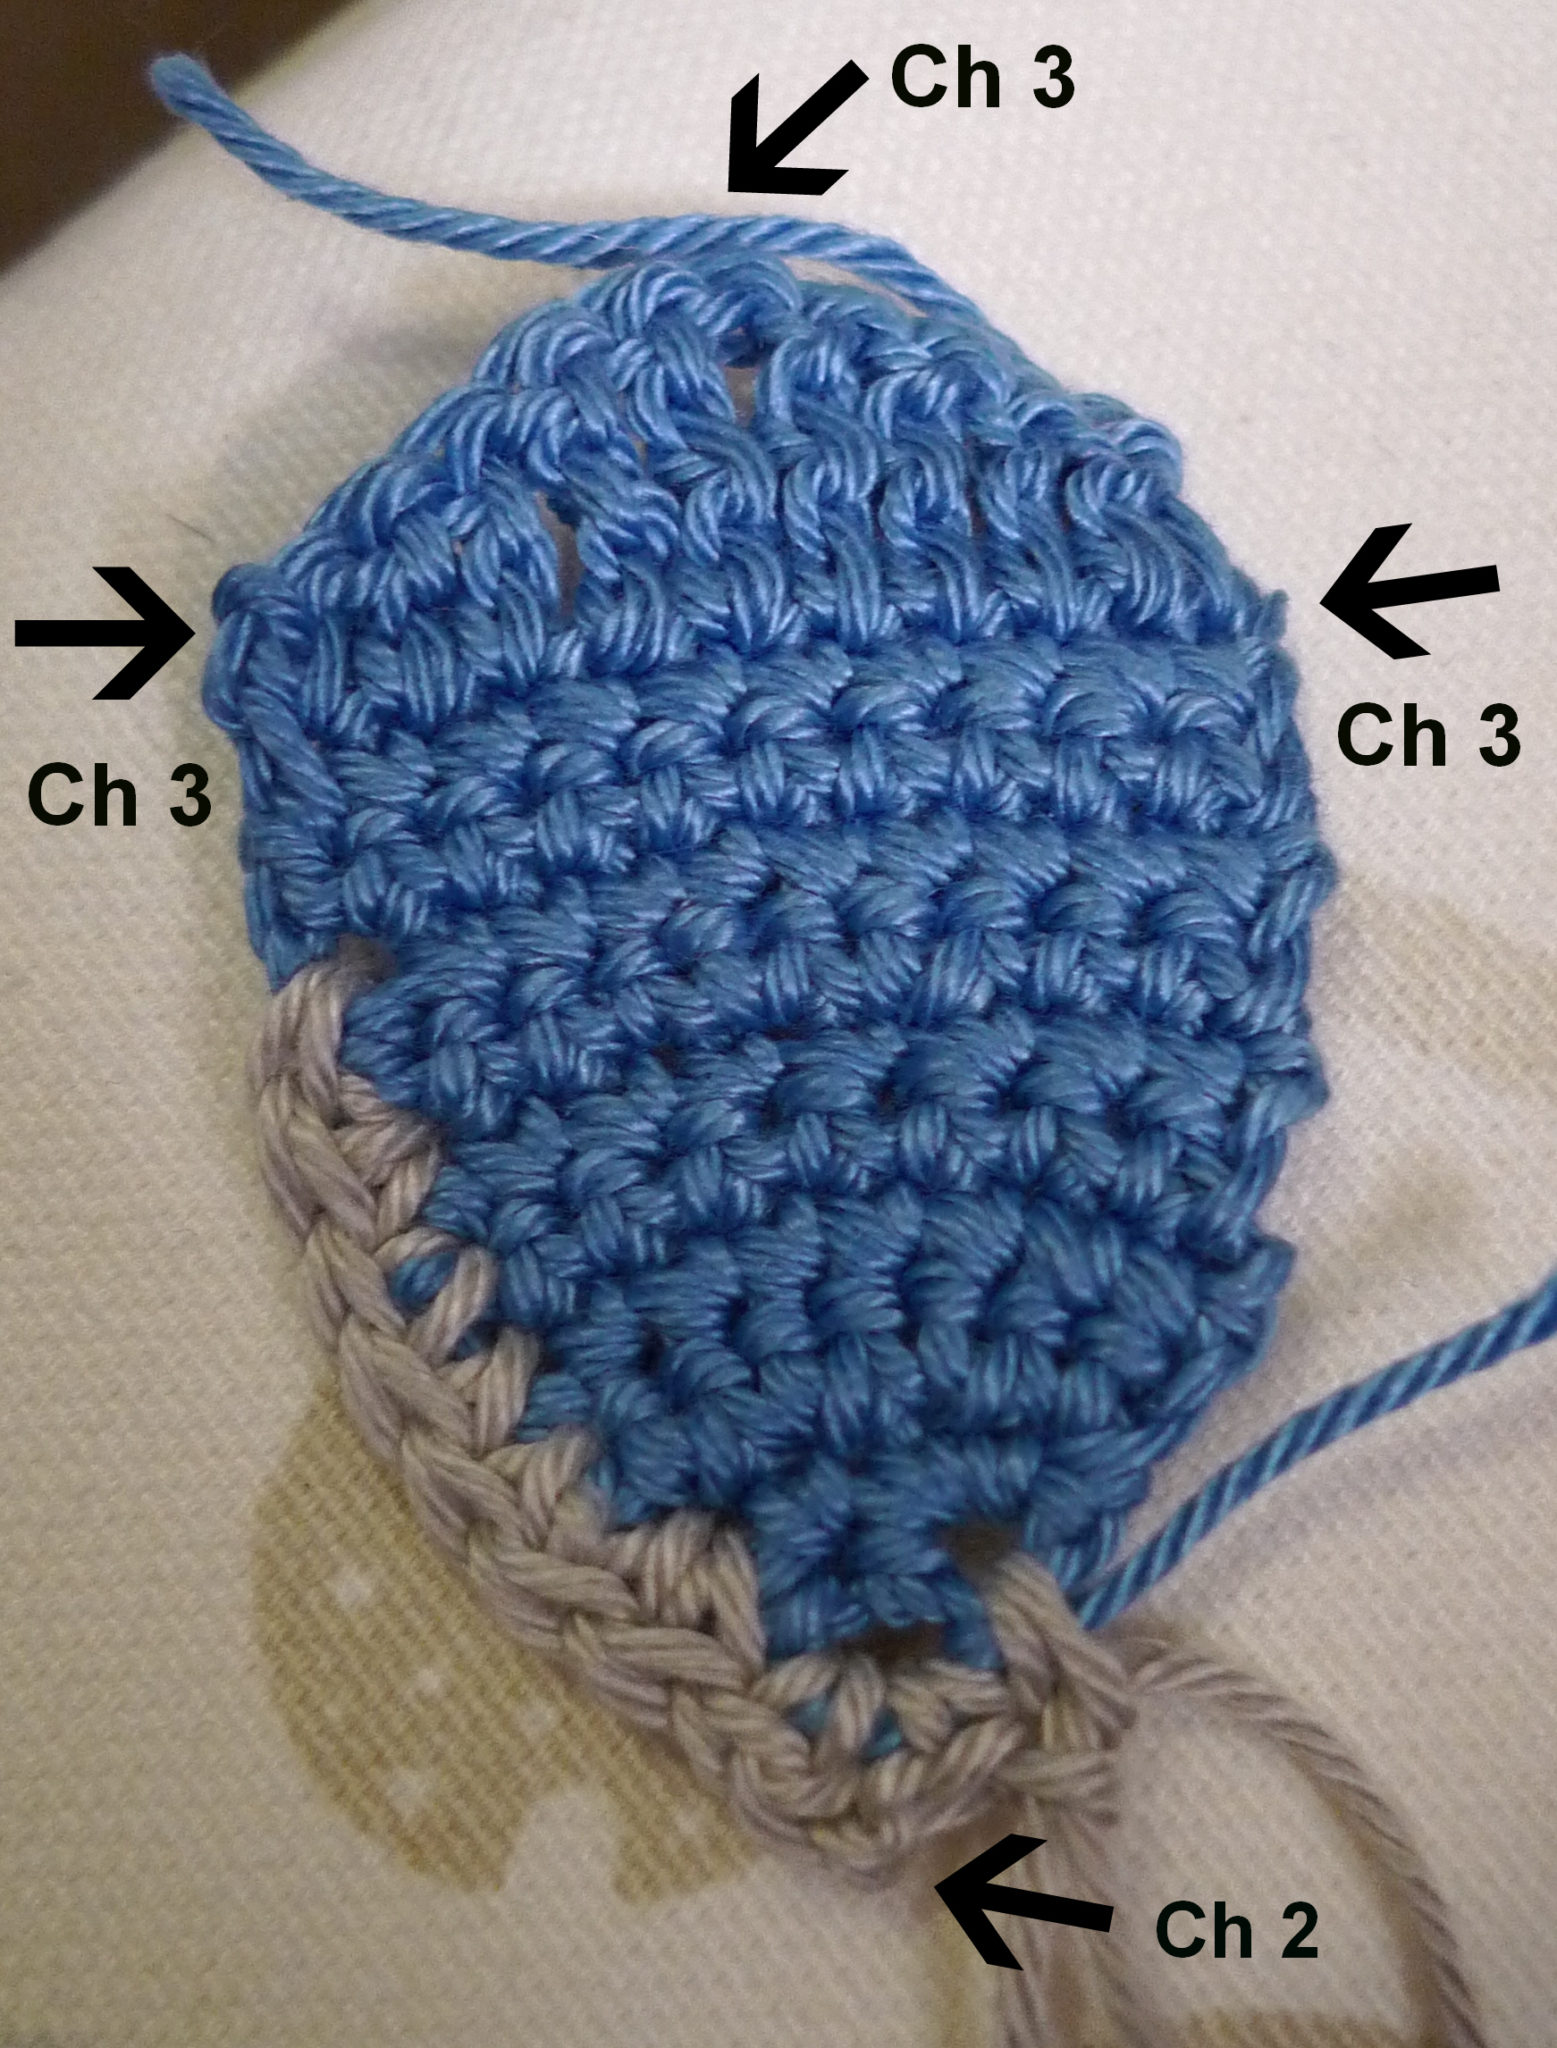
Result after single crocheting around border:
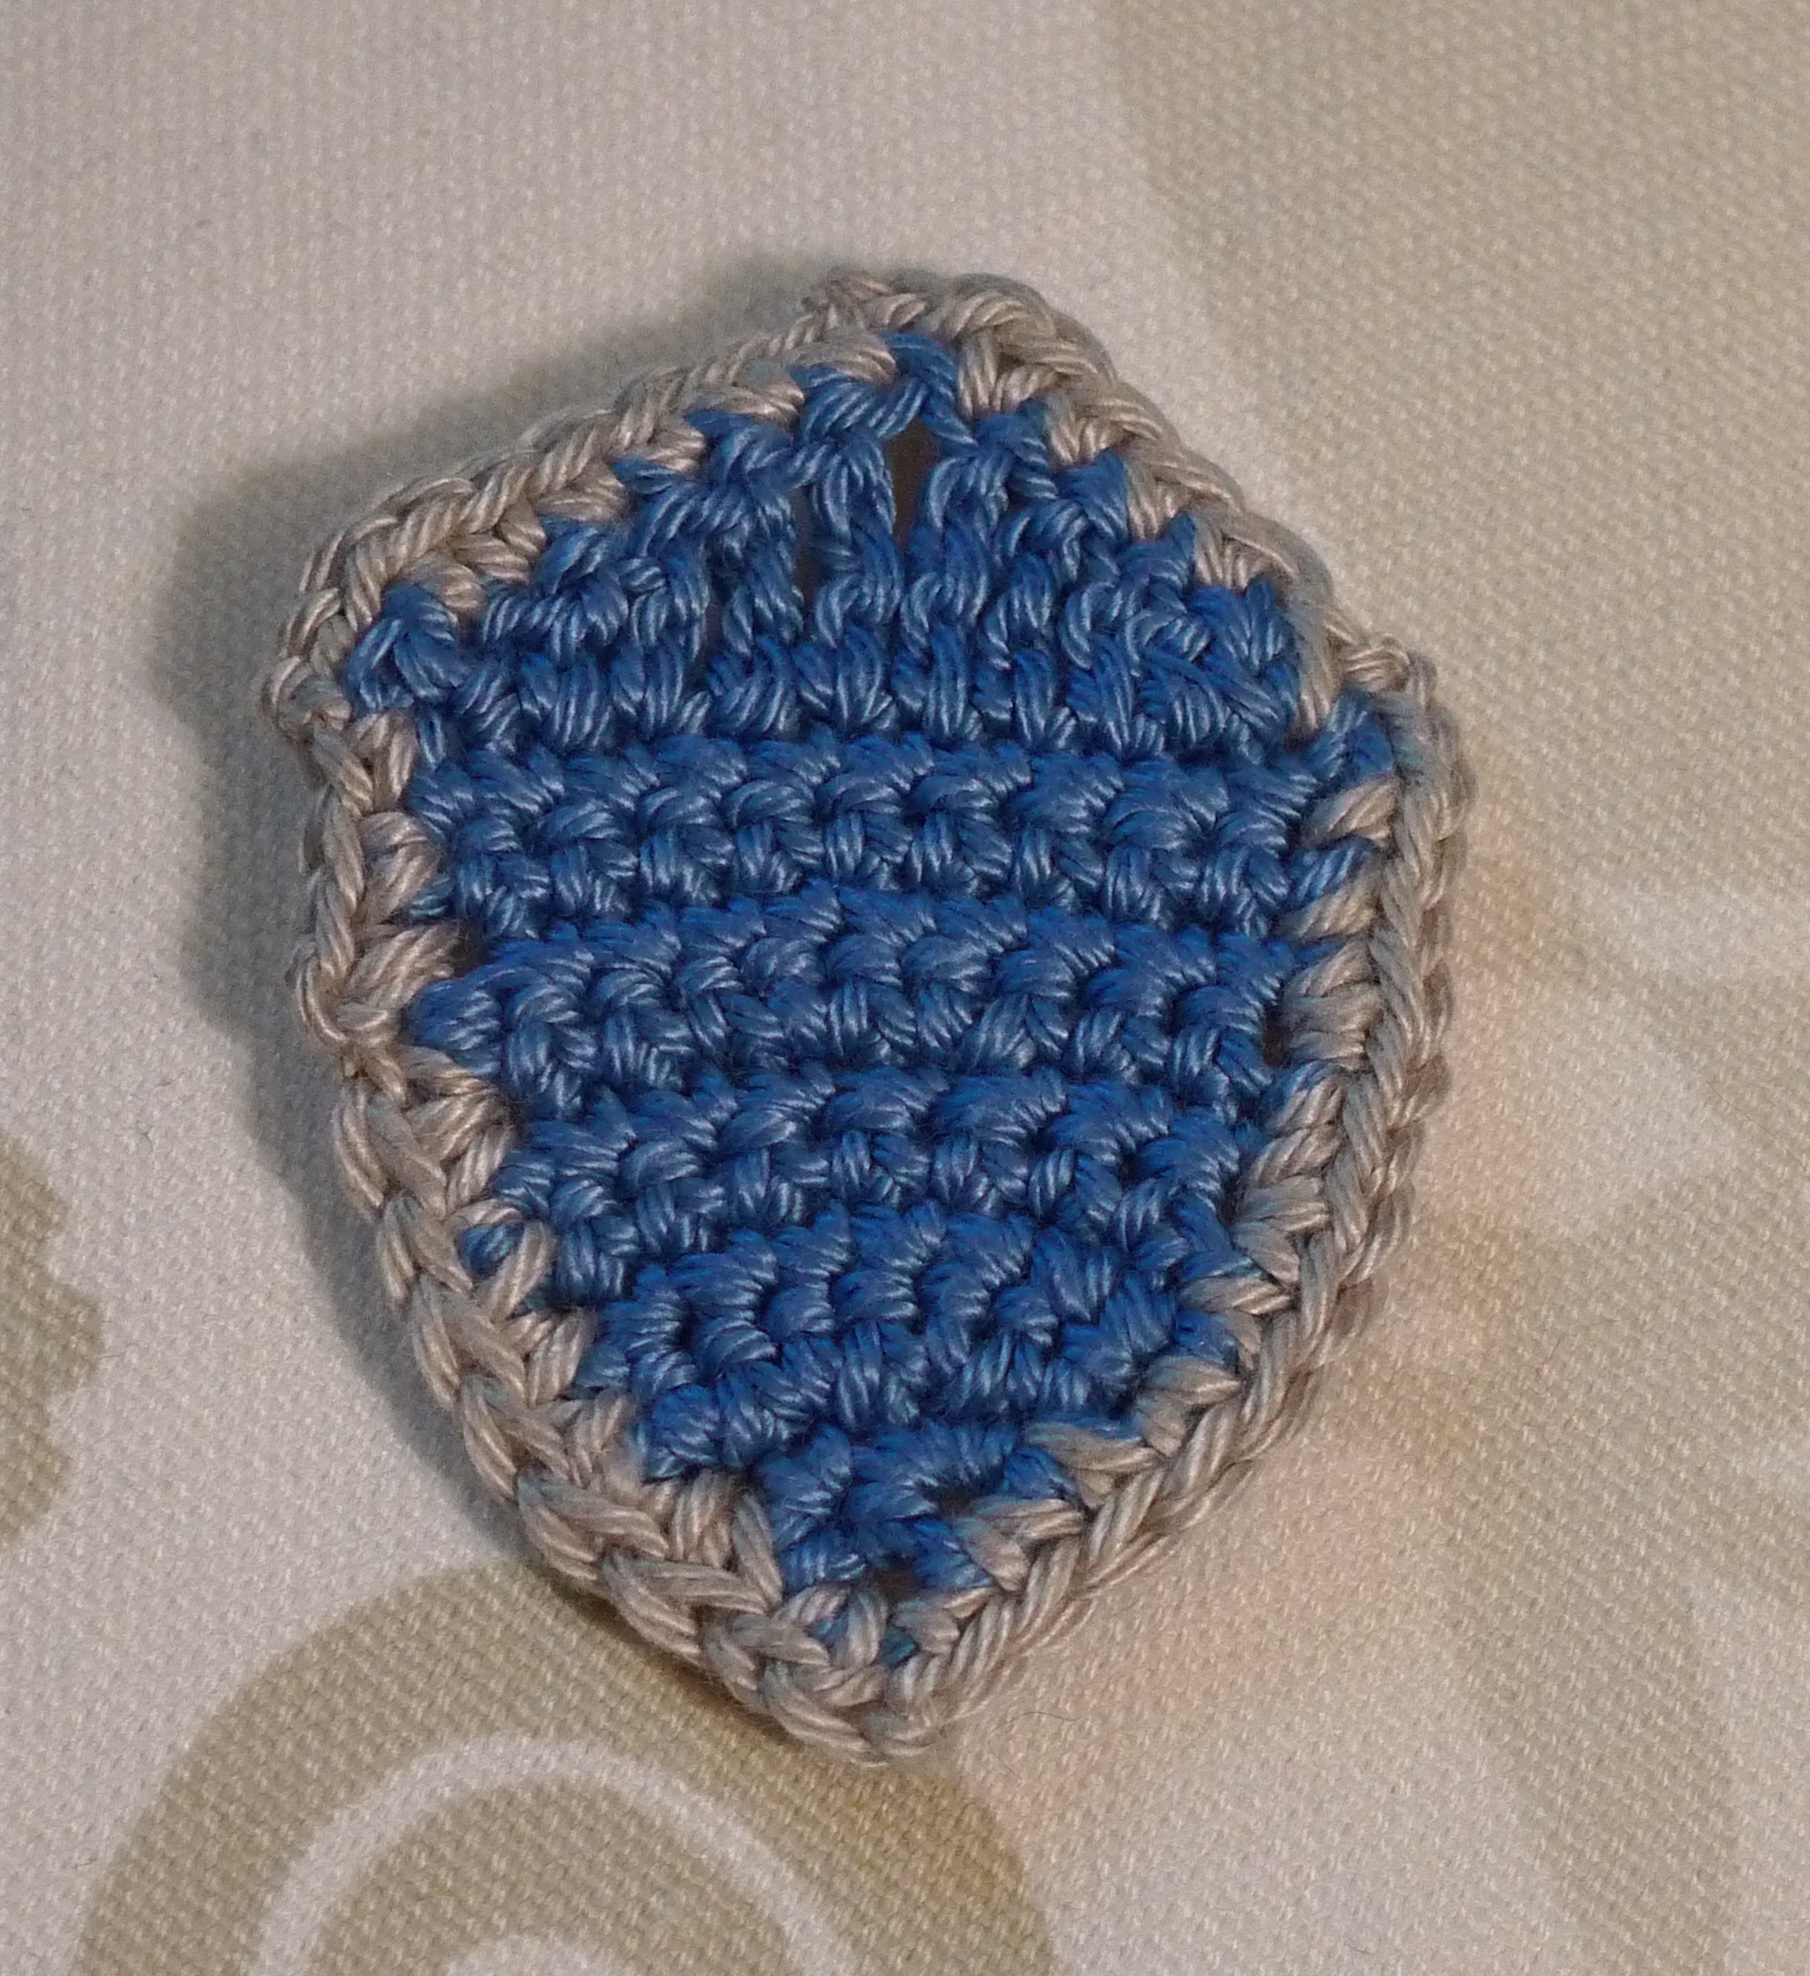
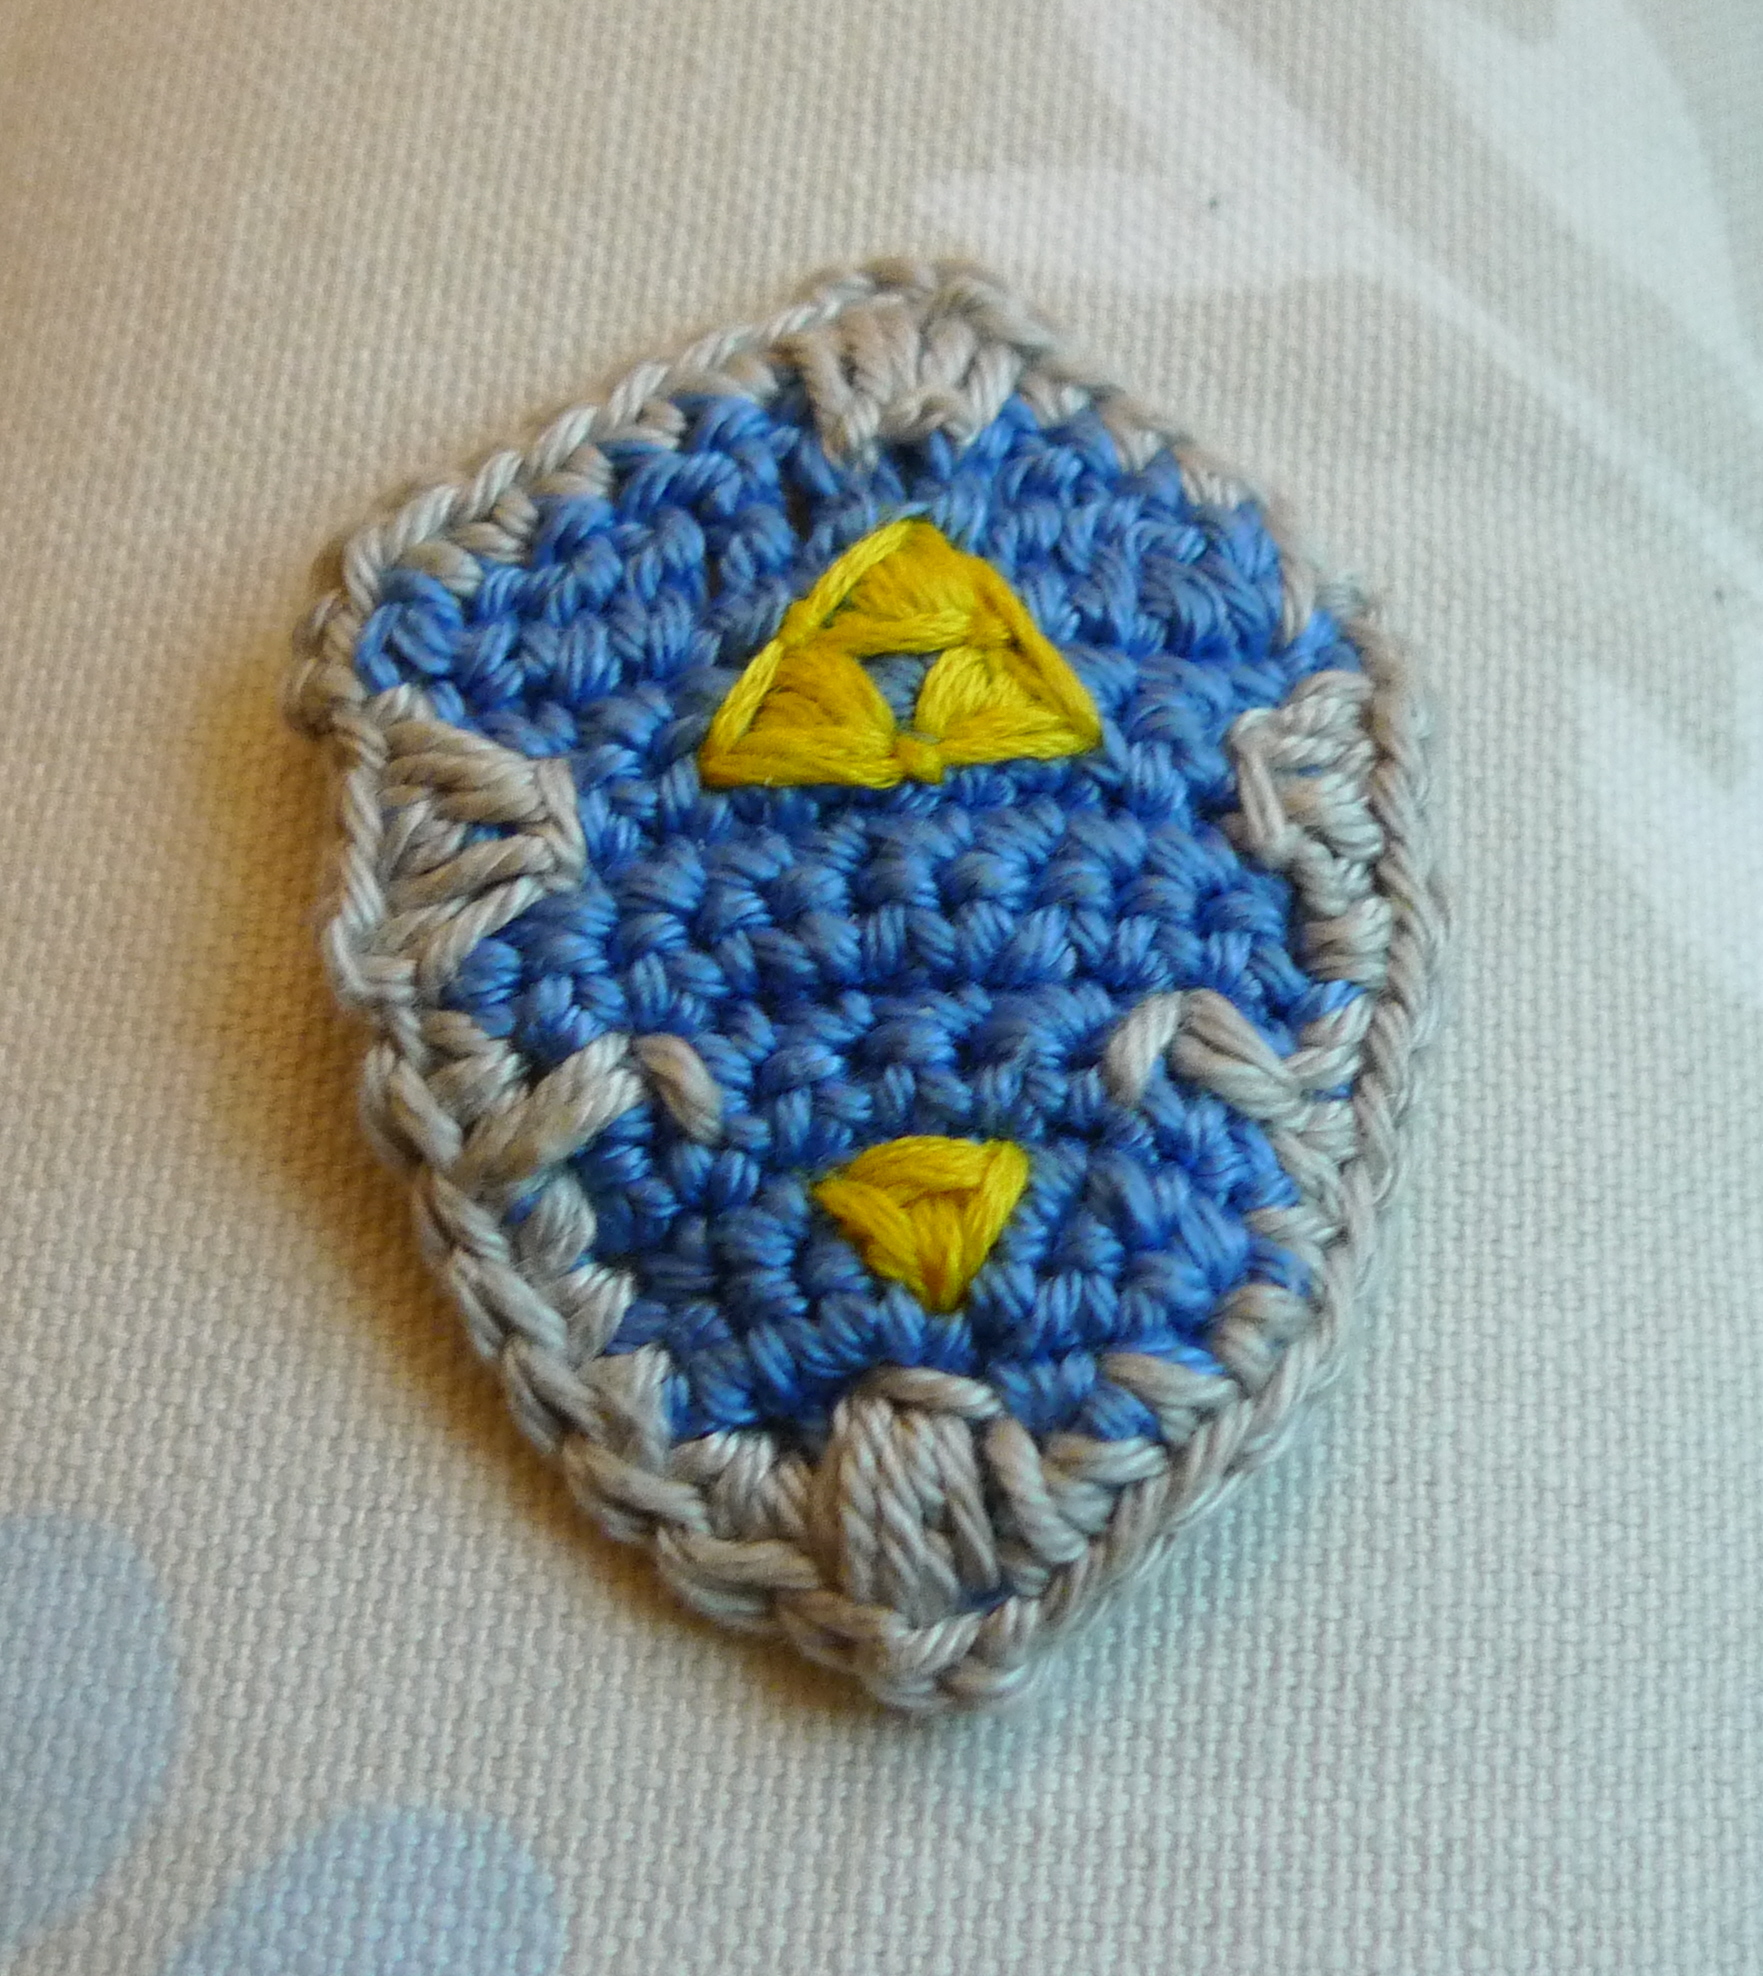
Using grey yarn, embroider the following design along the edges with a yarn hook:
Using yellow yarn, embroider the Triforce and a triangle.
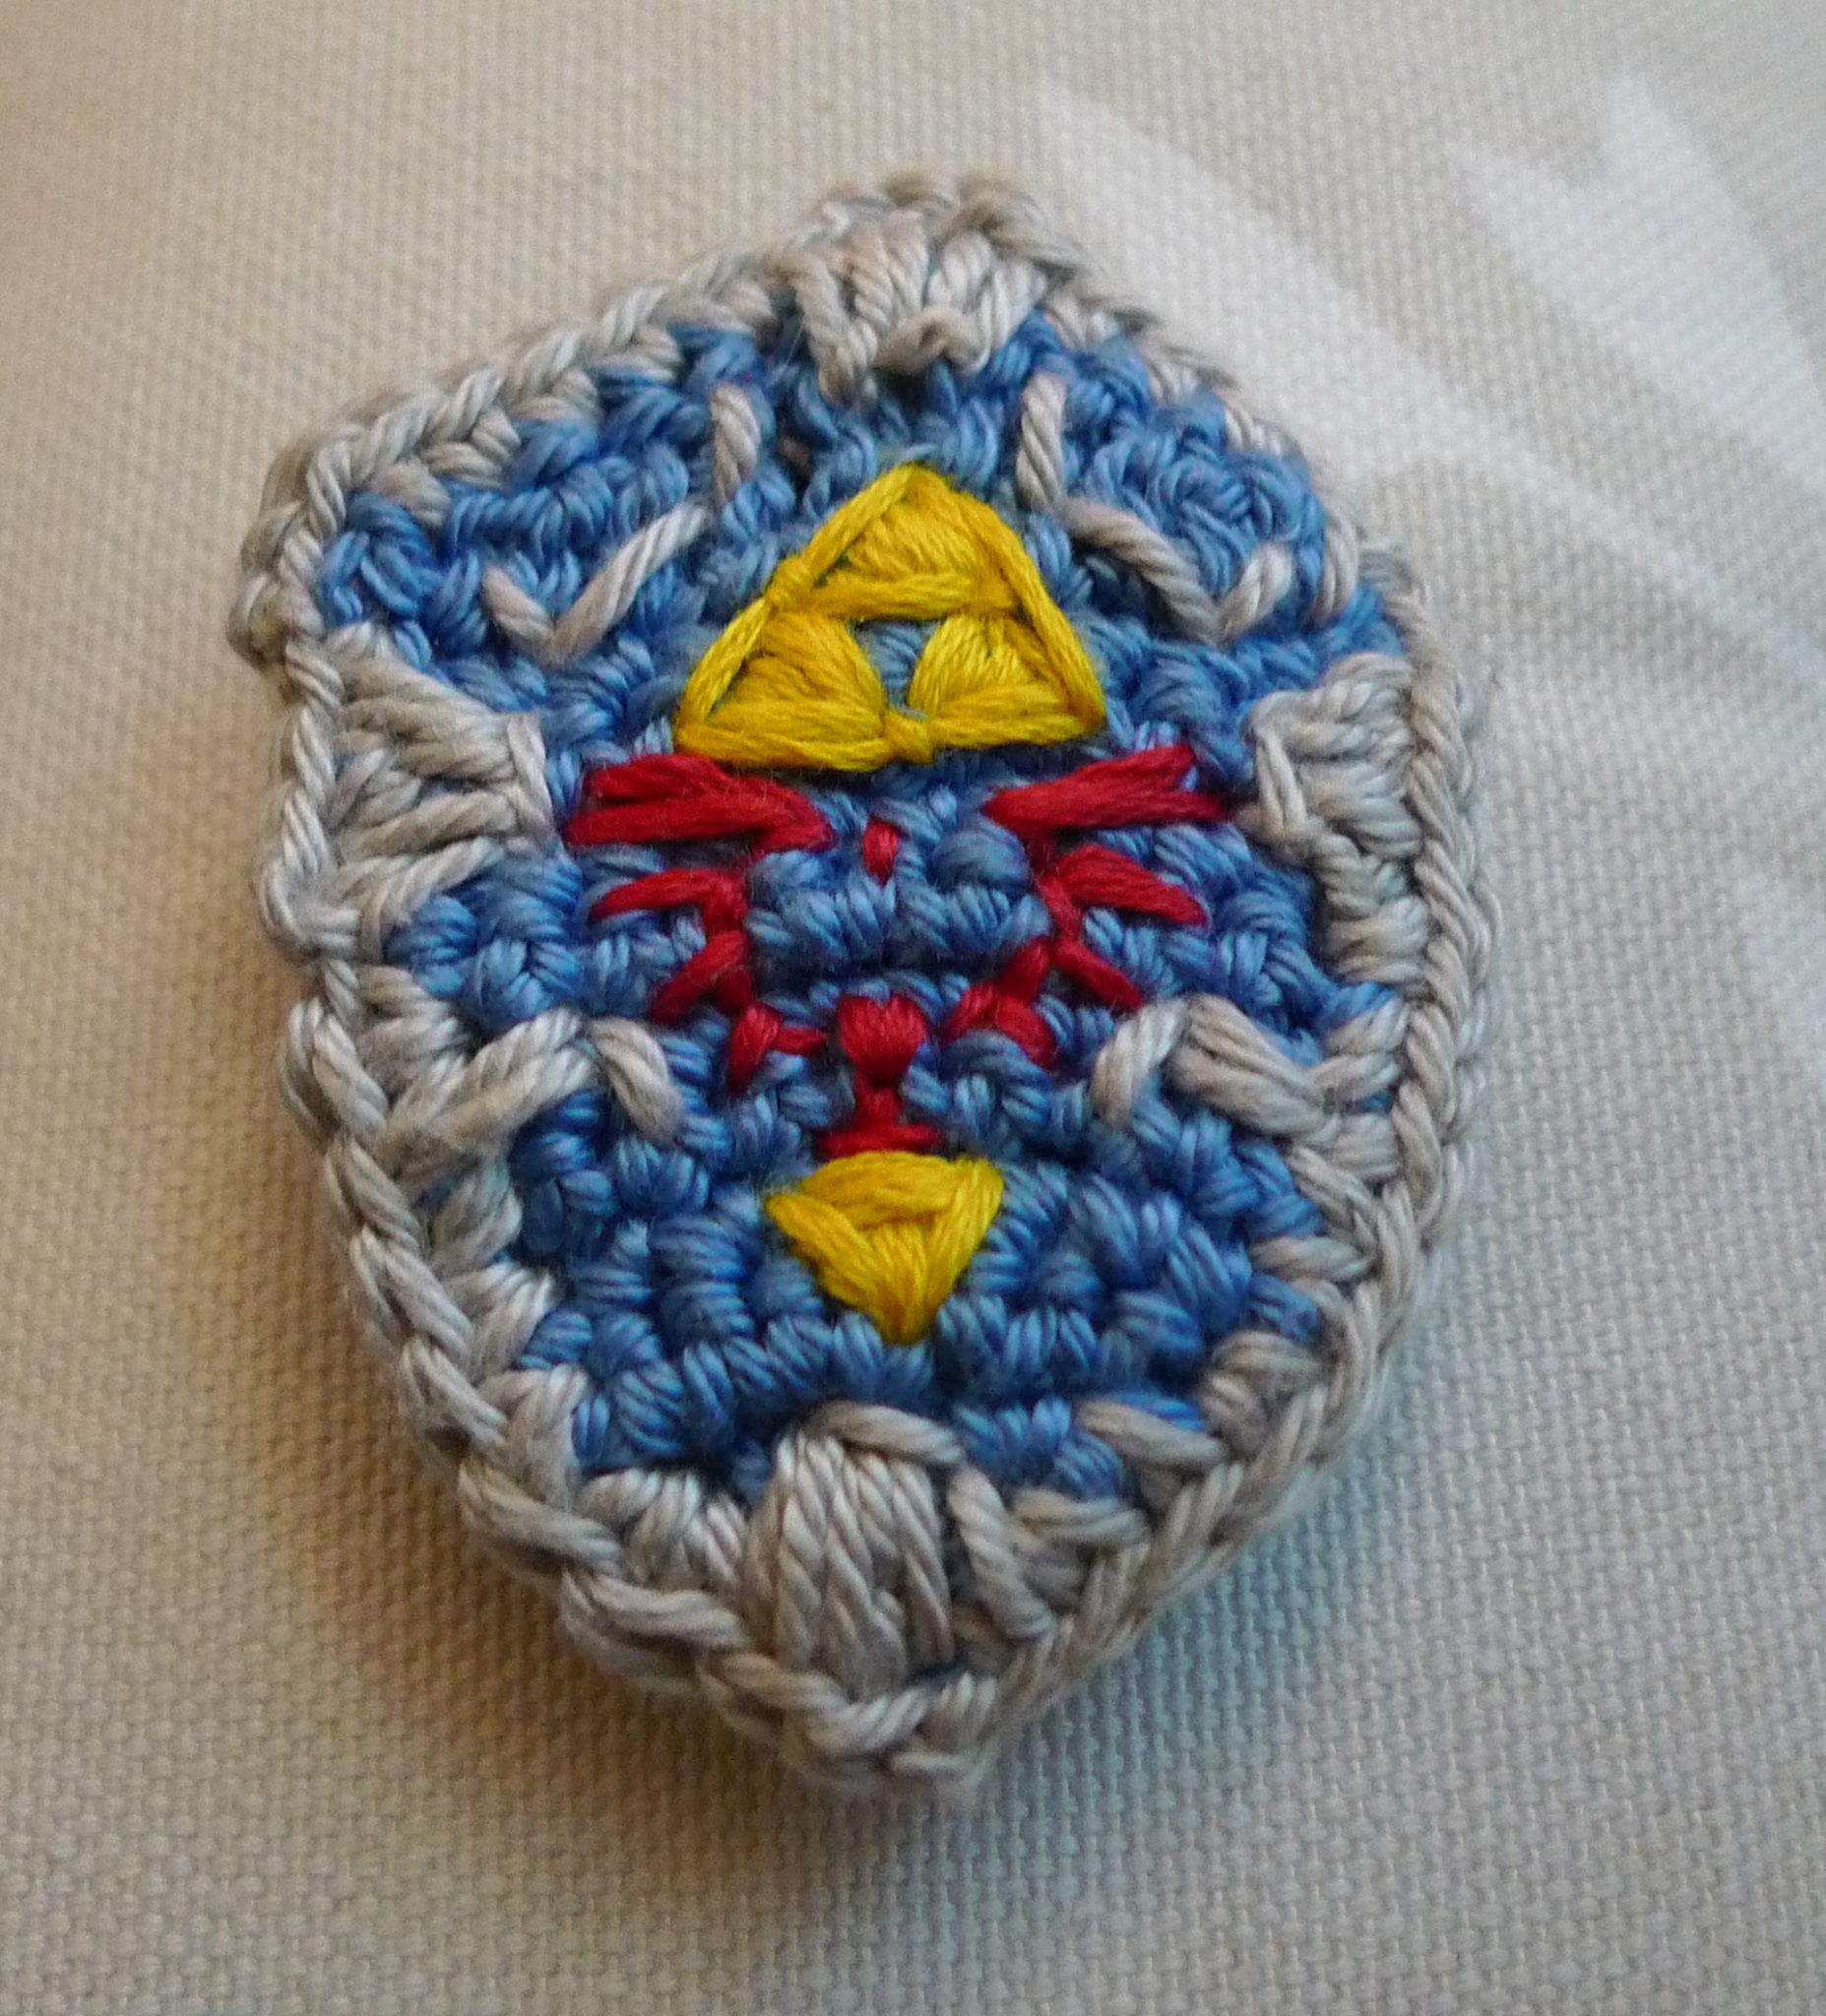
Using red yarn, embroider the Eagle design.
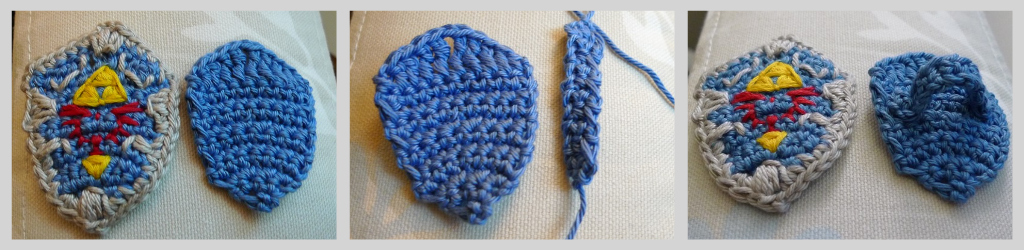
(2) Back part
To make back of shield, follow same pattern above (i.e. Rows 1-11) using blue yarn. Do not use grey yarn to single crochet around the edge and do not embroider any designs.
(3) Strap
Using blue yarn,
Ch 3.
R1: Sc 2, starting in second ch from hook, turn.
R2-12: Ch 1, sc 2, turn.
Attach strap onto back of shield (NOT the embroidered one).
Glue gun (or sew) front of shield to back of shield.
Hylian shield attaches to Link’s arm like so:
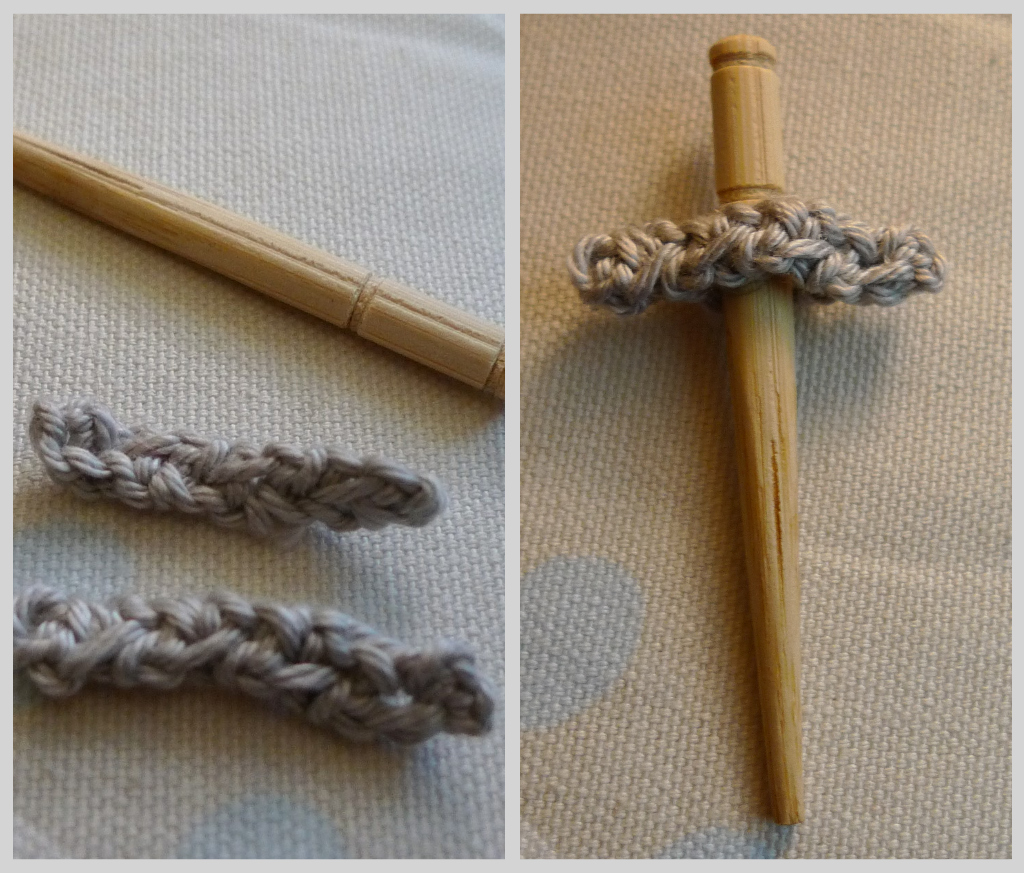
SWORD
The sword consists of the (1) blade and (2) cross-guard.
(1) Blade
Cut off tip of chopstick (blade should be about 2.5 inches or 7 cm). Using scissors, carve notches into the chopstick.

(2) Cross-guard (make 2)
Using grey yarn,
Ch 2
R1: Sc 1, starting in second ch from hook, turn.
R2-8: Ch 1, sc 1, turn.
Finish off, weave in ends.
Glue gun 2 cross-guards together around the blade.
SHEATH
The sheath consists of the (1) tube and (2) handle.
(1) Tube
Using dark brown yarn,
R1: Ch 2, 6 sc in second ch from hook.
R2-13: Ch 6.
Fasten off and weave in ends.
(2) Handle
Using dark brown yarn,
Ch 2
R1: Sc 1, starting in second ch from hook, turn.
R2-19: Ch 1, sc 1, turn.
Finish off, leave long end for sewing.
Sew both ends of handle to tube.
Place sword in sheath to see if it fits.
Now you’re made a Hylian shield, sword, and sheath for Link!
Now Link is prepared for battle!!! If you have any questions or find any errors, feel free to contact me. Thanks and good luck!

***See the SPANISH translation of this pattern HERE by “El taller de Aracne”!
{Update: If you are looking for a free Zelda amigurumi pattern, check out Mia’s Atelier HERE!}
This pattern is an original pattern by Stephanie Lau of All About Ami (May 2011). Please do not claim this pattern as your own. If you wish to share this pattern, you may link to this pattern but please do not reprint it on your site. You may keep a copy for your own personal use but please DO NOT sell the pattern or distribute it.
You may sell products made from this pattern but please clearly credit the design to me, Stephanie Lau of All About Ami, and provide a link to my blog www.AllAboutAmi.com. Permission is NOT granted for mass production or factory manufacturing of any kind. Thank you for being respectful and for your understanding!