Note: This is Part 2 of the step-by-step photo tutorial of the Wildrose Market Bag. We will crochet the sturdy straps.
- The free crochet pattern with exact written numbers and round counts can be found HERE.
- The beautifully-formatted, inexpensive PDF containing the written-out pattern and all the step-by-step pictures (total of 14 pages) can be found on Etsy HERE!
- The convenient Lion Brand Yarn KIT containing all the required 24/7 Cotton Yarn (available in 8 different colors) can be found HERE.
- Part 1 of the step-by-step tutorial explaining how to crochet the granny squares and arrange and seam them together can be found HERE.
- Add this design to your Ravelry queue HERE!
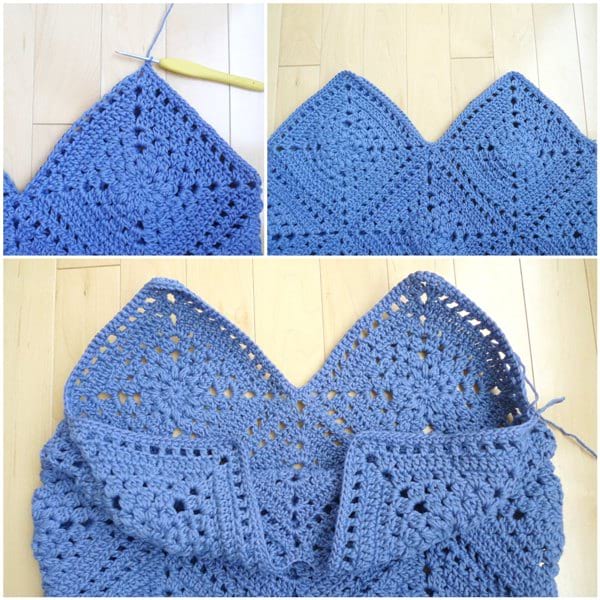
The 13 granny squares have been seamed together and folded in a special way to create the body of the Wildrose Market Bag. It is now time to work on the top edging and sturdy strap. To begin, start in the right corner of the top edge as indicated by the red circle. Work single crochets along all the stitches of the top edge: that is, single crochet around the top edges of both granny squares of one side, and then the top edges of both granny squares of the other side. To do so, make a slip knot. Insert your crochet hook into right corner. Add the slip knot and pull through. Yarn over and chain 1. Work a sc in same st and continue single crocheting around. At the end of the round, sl st to first sc.

Single crochets have been worked around the entire top edge.
For Round 2, we will work the waistcoat stitch/center single crochet in each stitch. Rather than inserting our crochet hook into the front and back loops, the hook is inserted directly into the middle of the V from the previous round. This creates a dense stitch with less stretching.
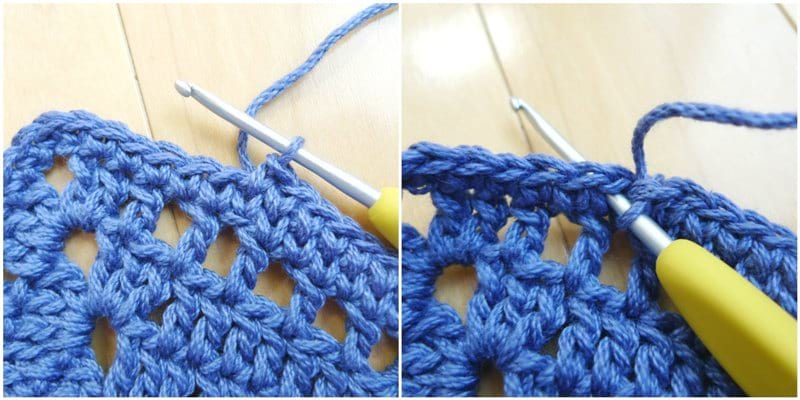
Please view this VIDEO BELOW to see how to crochet the waistcoat stitch! I also demonstrate how to whip stitch the granny squares together and how to crochet the underside of the straps in the same video:
As you approach the tip of the first granny square, get ready to crochet the first strap. Chain 85 and join to the tip of the second granny square with a single crochet (be careful not to twist the chain). Continue working the waistcoat stitch around.
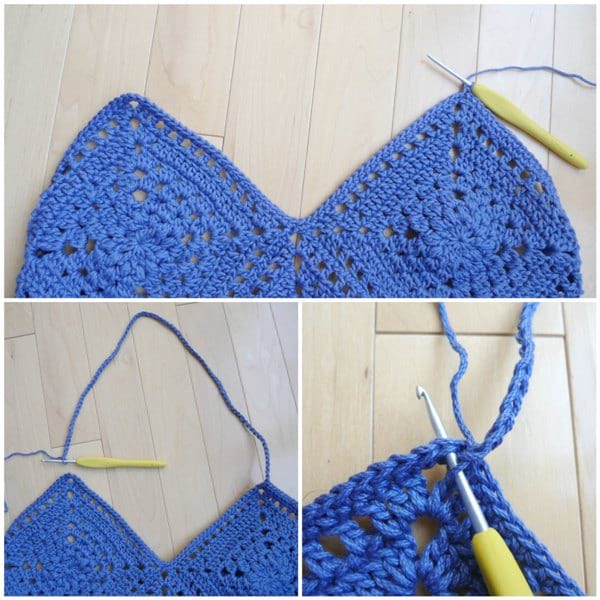
Once you approach the top tip of the first granny square of the other side, chain 85 to create the second strap. Join to the top tip of the second granny square with another single crochet, once again being careful not to twist the chain. Work the waistcoat stitch until the end of the round.
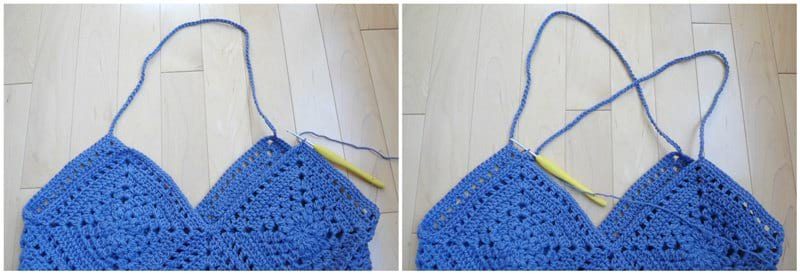
For Round 3, continue working the waistcoat stitch in the stitches around the granny squares. Single crochet into the chain stitches of the strap as you begin to increase the thickness of the straps.
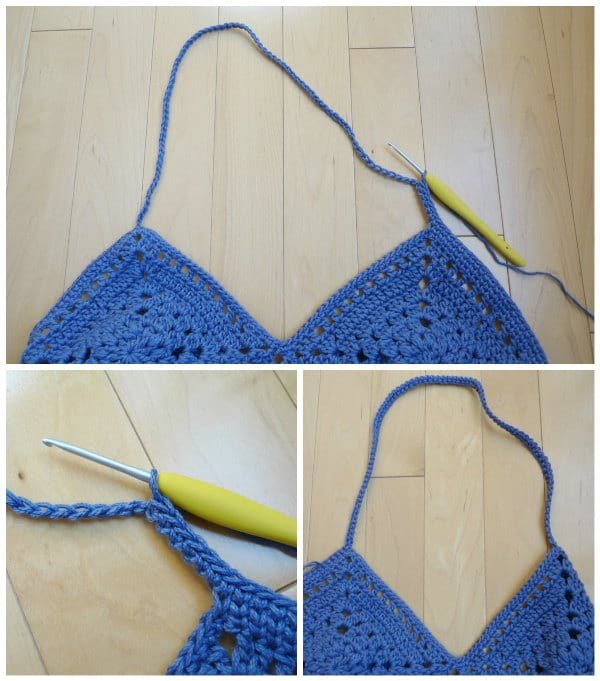
For Round 4, work the waistcoat stitch for the entire round, including along both straps. Once you are finished Round 4, fasten off and weave in your ends.
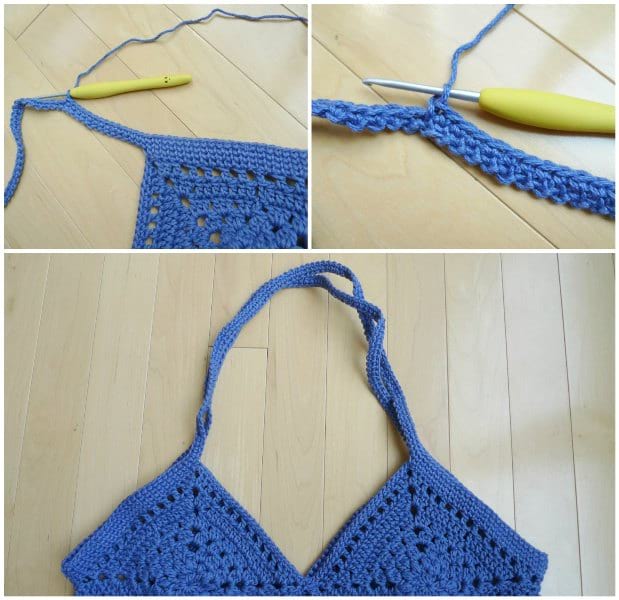
We will now work on crocheting the inner strap and the dip of the V to increase the thickness and make the straps even more sturdy. We will repeat the process described below on both sides. To begin, rejoin your yarn at the dip of the V as indicated by the red circle shown below. To do this, make a slip knot and insert your crochet hook into the dip of the V. Add the slip knot and pull through. Yarn over, chain 1, work a single crochet in the same st. Work the waistcoat stitch around.
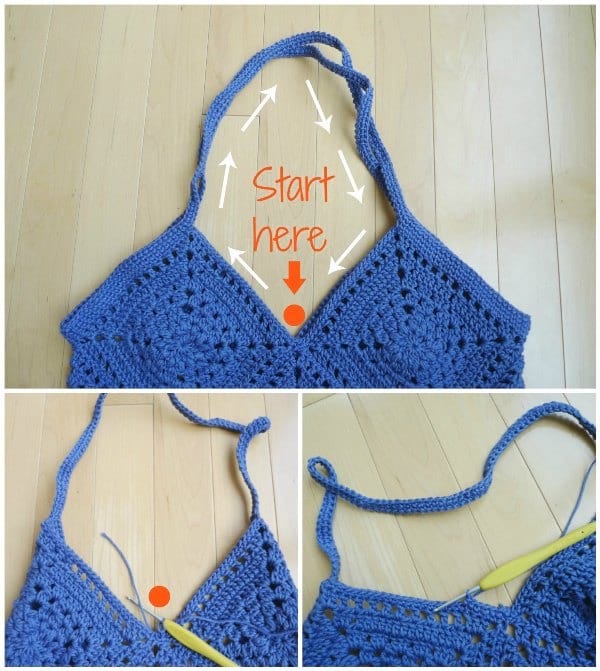
As you approach the sides of the top edging, single crochet across.
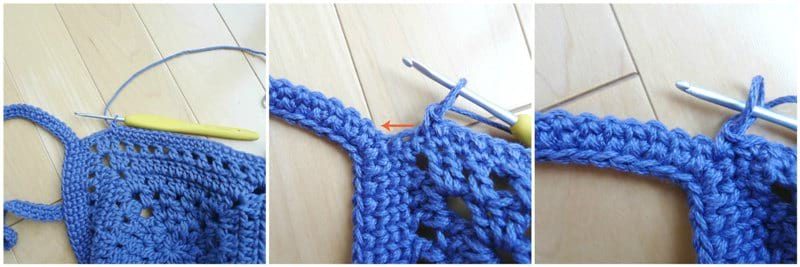
As you approach the strap, continue working along the underside by inserting you hook into the upside down V underneath the horizontal bars as shown below.
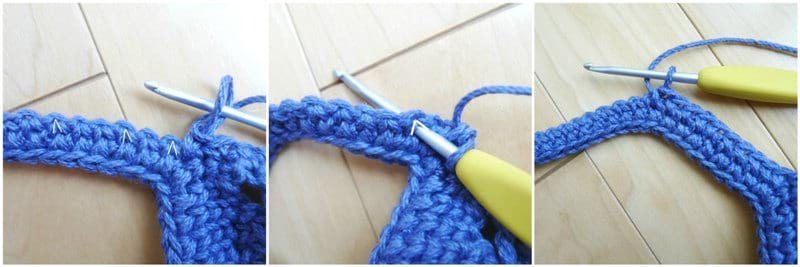
When you are approaching the end of the round, skip the last single crochet to prevent bunching and slip stitch to the first single crochet to close off the round.
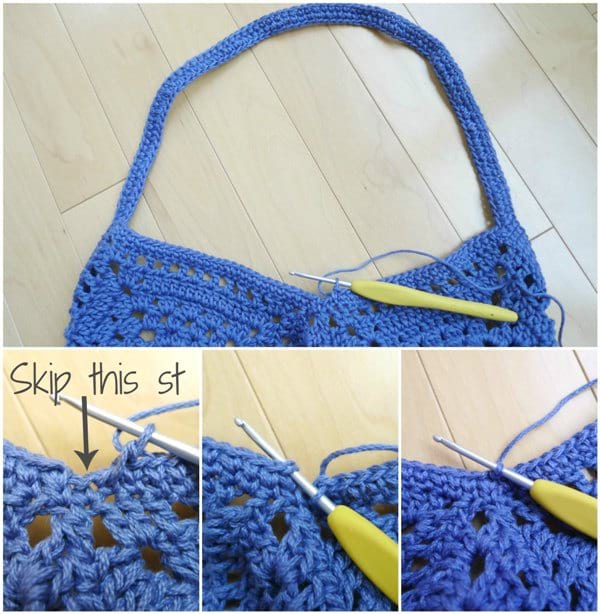
Work one more round building up the thickness of the inner V and the underside of the strap using waistcoat stitches. When one side is done, fasten off and weave in your ends. Repeat the above steps for the second side.
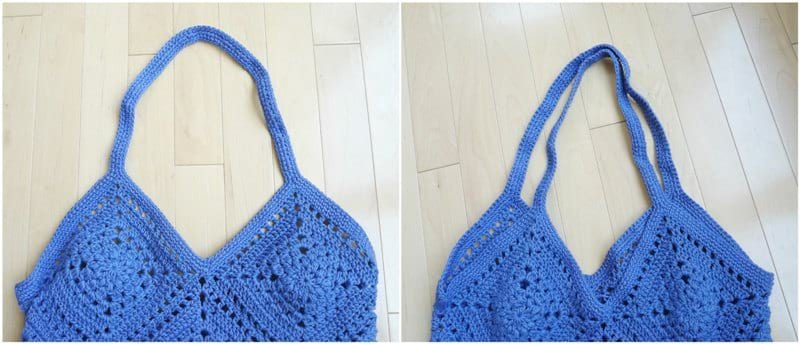
Your Wildrose Market Bag is now complete! You can block your finished bag with steam to ensure everything is smooth and flat, and add an ultraleather garment tag as a beautiful finishing touch!
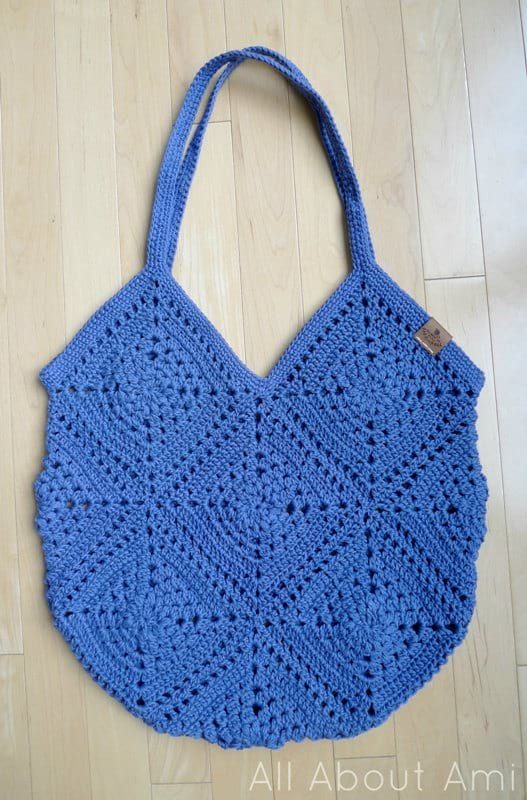
Be sure to reference the free written pattern for the Wildrose Market Bag HERE! Thank you for following along, and enjoy your gorgeous new bag!
