Note: This is Part 1 of the step-by-step photo tutorial of the Wildrose Market Bag. We will crochet the granny squares, arrange and seam them together.
- The free crochet pattern with exact written numbers and round counts can be found HERE.
- The beautifully-formatted, inexpensive PDF containing the written-out pattern and all the step-by-step pictures (total of 14 pages) can be found on Etsy HERE!
- The convenient Lion Brand Yarn KIT containing all the required 24/7 Cotton Yarn (available in 8 different colors) can be found HERE.
- Part 2 of the step-by-step tutorial explaining how to crochet the strap can be found HERE.
- Add this design to your Ravelry queue HERE!
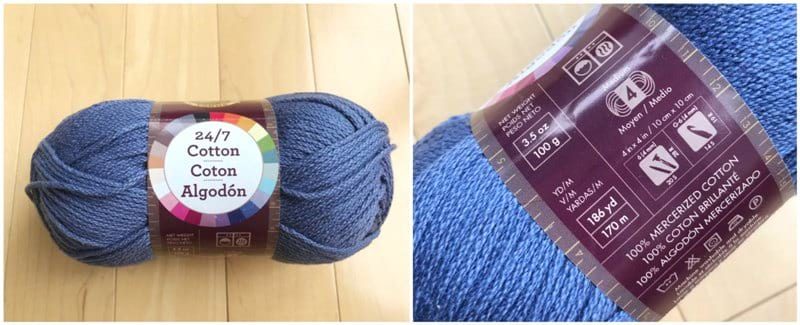
I am thrilled that so many of you have crocheted the Wildrose Backpack, and we are blown away by all the love that this special design has received. We are excited to show you this sequel to the Wildrose Backpack that we have designed as it centers around the same Wildrose Granny Square. We opted to use this beautiful blue shade of 24/7 Cotton called “Denim”. 24/7 Cotton is a mercerized worsted weight (level 4) cotton that is extremely strong and durable. It comes in a wide range of colors, and many of you have fallen in love with this unique cotton yarn since it does not split and works up beautifully with fabulous stitch definition and a lovely sheen.
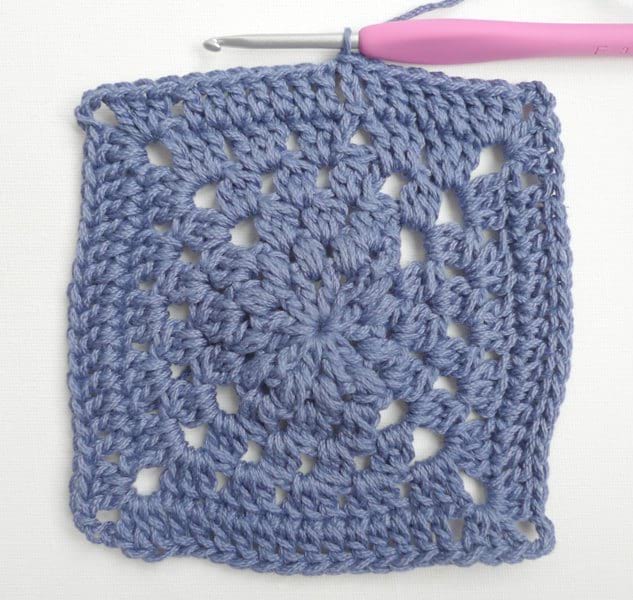
To work the granny squares, you follow the same instructions as the Wildrose Granny Square with one additional Round (Round 7). There is a step-by-step tutorial available for the Wildrose Granny Square that can be found HERE.
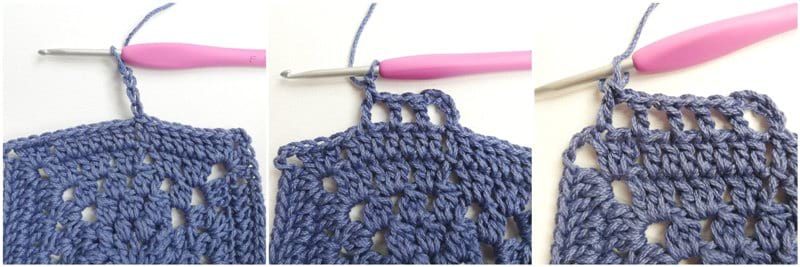
To start Round 7, chain 4 (counts as double crochet and chain 1). Next, skip 1 and double crochet 1 until the chain space. Notice that the last dc is worked in the stitch right before the chain space (this is in contrast to Round 6 where that last dc right before the chain space was skipped).
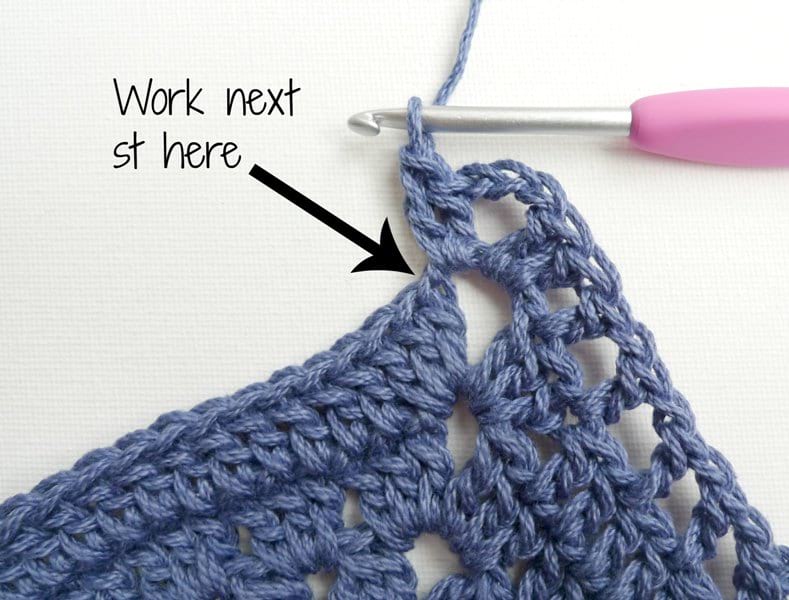
Work *2 dc, Ch 3, 2 dc* in the chain space. Then, work the next dc in the stitch immediately after the chain space as shown by the arrow below.
After working a double crochet in the stitch immediately after the chain space, continue working the same pattern of double crochets interspersed with Chain 1’s along the side.
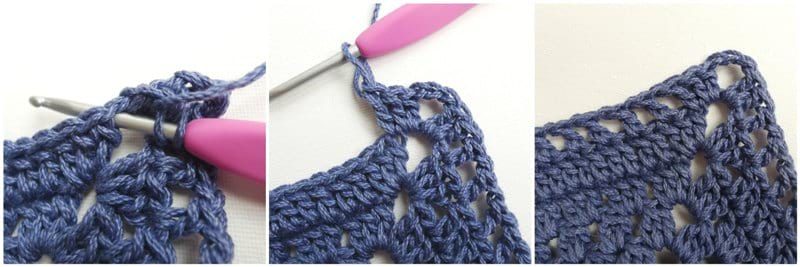
Our granny square composed of 7 rounds is now complete! This last round adds a beautiful edging with more spaces, and it gives a delicate and lace-like look to the bag when the granny squares are seamed together.
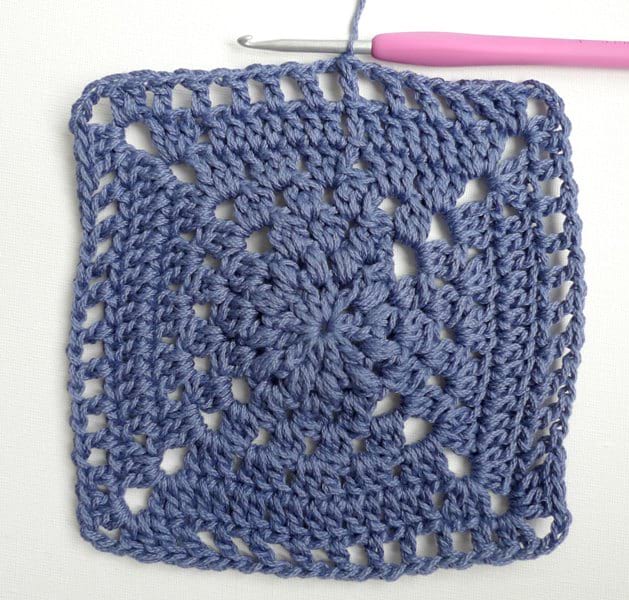
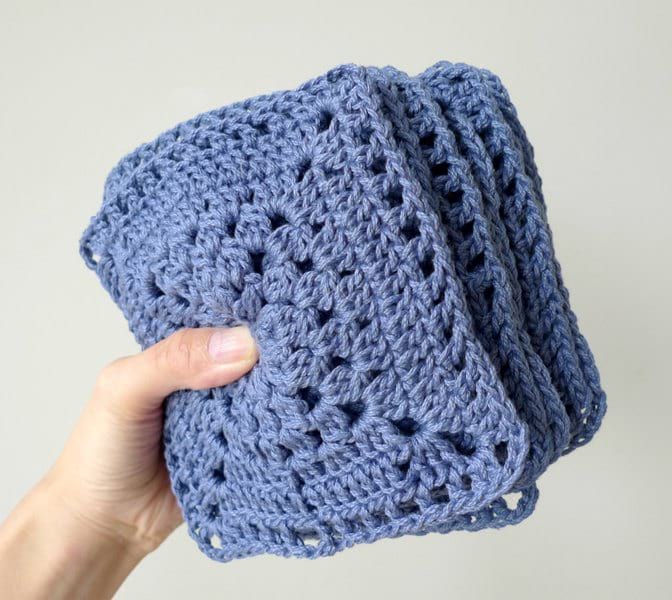
Crochet 13 of these granny squares in total – after you have done a couple, you will have the pattern memorized!
***Please watch the “Wildrose Granny Square” video tutorial below that shows you how to crochet the granny square and its variations (the Wildrose Backpack goes to Round 6, the Wildrose Market Bag goes to Round 7, and the Wildrose Shoulder Bag uses a different Round 5). Note the following timestamps:
1:33 Round 1
3:08 Round 2
5:24 Round 3
8:46 Round 4
11:20 Round 5 (Wildrose Shoulder Bag)
13:16 Round 5 (Wildrose Backpack & Wildrose Market Bag)
15:18 Round 6 (Wildrose Backpack & Wildrose Market Bag)
18:20 Round 7 (Wildrose Market Bag)
Block all 13 granny squares to give clean and straight edges. This makes it much easier to seam the granny squares later on. In the bottom right picture, you can see the big difference blocking can make as the square on the left has been blocked while the square on the right has not.
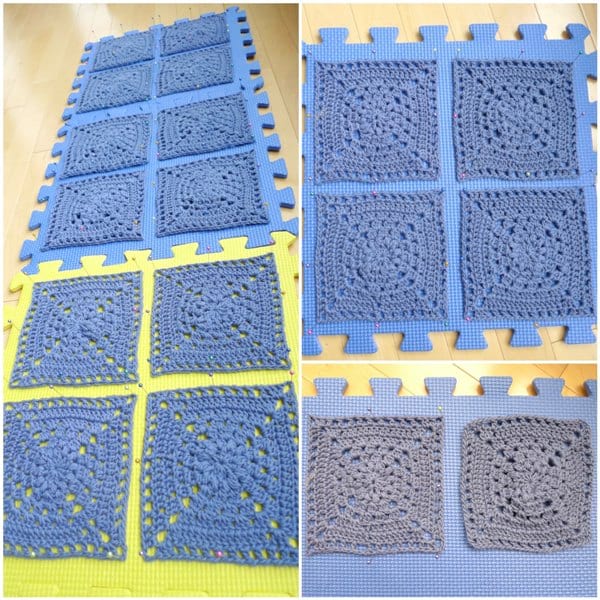
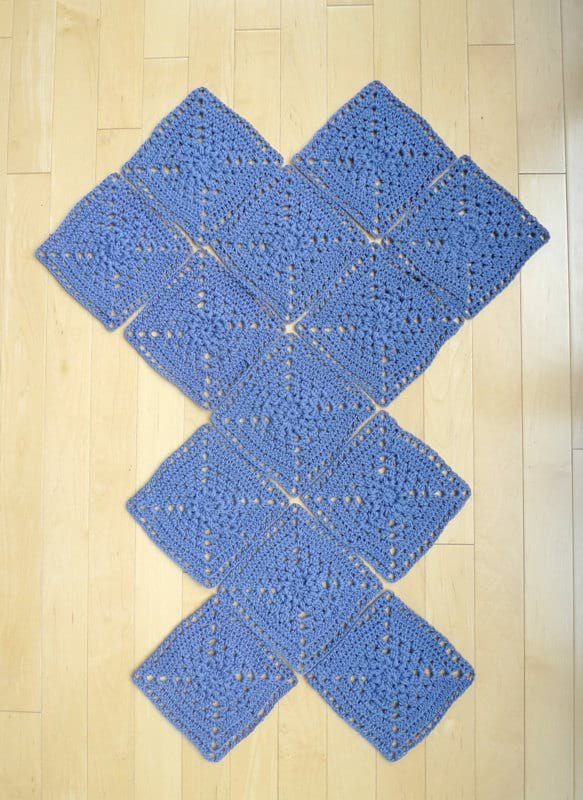
Arrange your 13 granny squares as shown below.
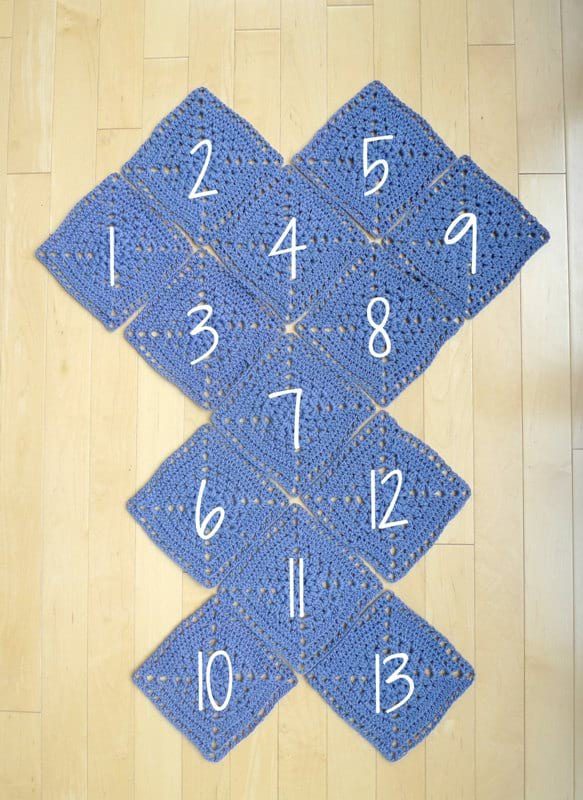
Here is another visual, this time with numbers!
It is now time to seam the granny squares together in this arrangement. I found it easiest to seam the squares on a diagonal as shown below with the dotted lines. Leave extra long tails so that you can use these same tails to seam the squares on the opposite diagonal.
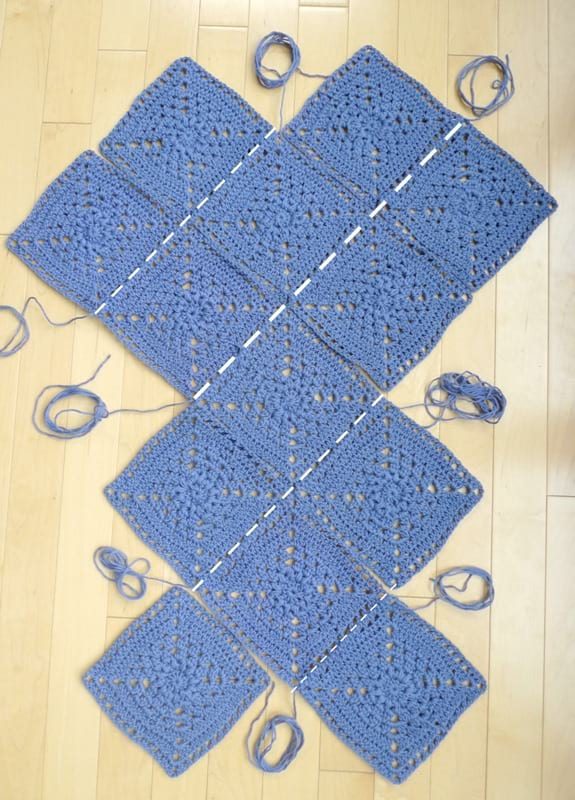
To seam the squares together, use the whip stitch going through both the front and back loops of both sides. Flip the granny squares upside down when seaming them together. Make sure that each chain 1 space of one granny square lines up with the chain 1 space of the other granny square. Similarly, ensure that each double crochet of one granny square lines up with the double crochet of the other granny square.

Please view the VIDEO BELOW to see this in action! I demonstrate how to whip stitch the granny squares together as well as how to crochet the straps:
Using the long tails from seaming up the squares of one diagonal, seam up the squares on the opposite diagonal!
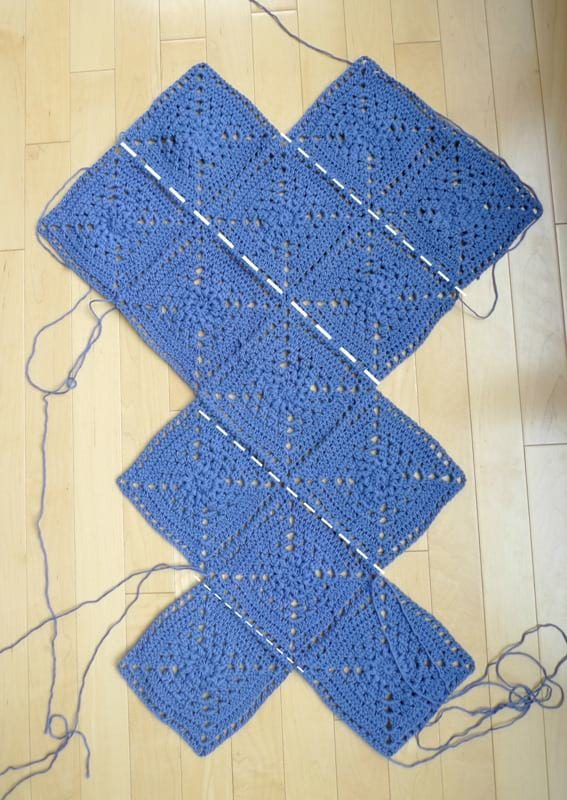
Now comes the exciting part! After the 13 squares have been seamed together, fold the piece upwards as shown below so that the top tips of the granny squares are lined up.
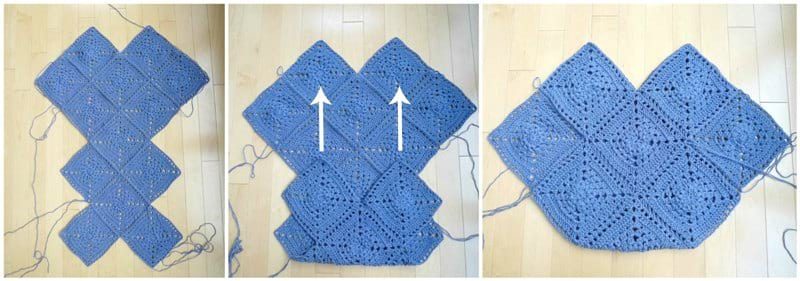
Next, fold the side granny squares in half inwards upon themselves so that the side tips are pointing towards the granny square in the middle.

Whip stitch the edges as indicated below by the dotted lines: the edges of the side granny squares and the diagonals of the bottom granny squares.
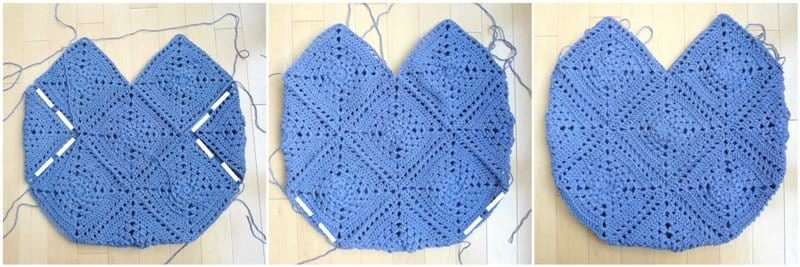
You have completed the body of the Wildrose Market Bag! Weave in the ends and get ready to crochet the strap! The step-by-step tutorial for the strap can be found HERE!
