- The free knit pattern with exact written numbers and row/round counts can be found HERE.
- The beautifully-formatted, inexpensive PDF containing the written-out pattern and all the step-by-step pictures (total of 10 pages) can be found on Etsy HERE.
- The convenient Lion Brand Yarn KIT containing all the required Color Made Easy yarn (available in 5 different colors) can be found HERE.
- Join our Dotty Cardigan Knit-Along on Facebook HERE!
- Add this design to your Ravelry queue HERE!
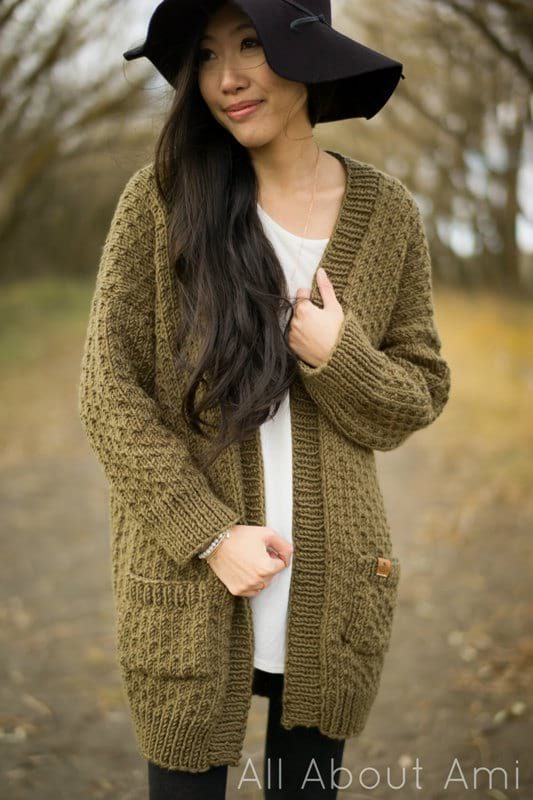
I absolutely adore working with Color Made Easy as this bulky level 5 yarn is so much fun to knit up! A year ago, I released my millennial pink Downtown Cardigan which uses the relaxing garter stitch, and it has been one of my most popular designs to date. I wanted to create another bulky cardigan, this time featuring one of my favorite knit stitches: the dot stitch. The dot stitch is such a delicate stitch providing gorgeous texture with the scattered purls. It may appear complicated, but the dot stitch is very simple to learn and addictive to knit up (and in my opinion, less tedious than the seed stitch which requires you to keep moving the yarn in front and back). Thus, I wanted to combine two popular designs (the Downtown Cardigan and Dotty Beanie) into one: the Dotty Cardigan!
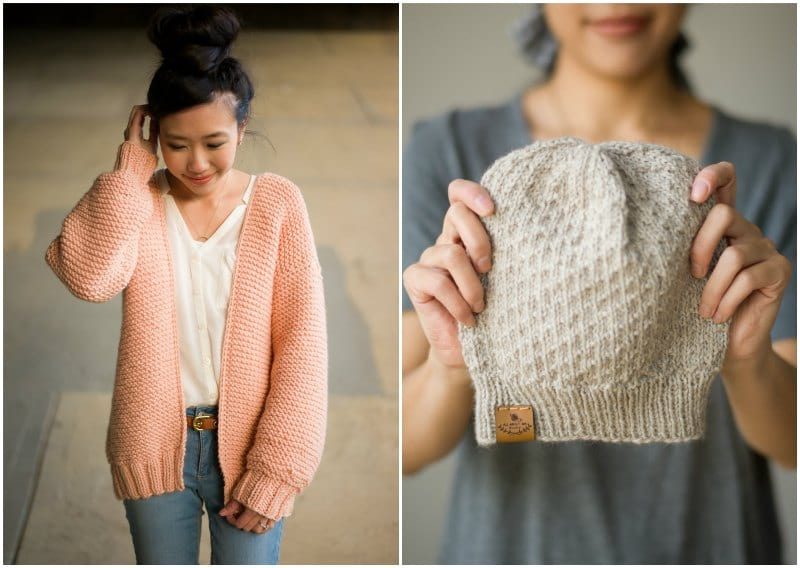
For the Dotty Cardigan, I used this stunning earthy olive shade called “Avocado“. I know this shade is a favourite of many, and it looks gorgeous when worn. Color Made Easy is 100% acrylic (which you can machine wash and dry) and each ball is a generous size of 200 grams. I used 8 mm needles for this design, so as you can imagine, this cardigan worked up extremely quickly and flew off my needles! [[Note that Color Made Easy has now been discontinued. You can substitute any level 5 bulky yarn such as “Hue & Me” – see other yarn substitution suggestions HERE!]

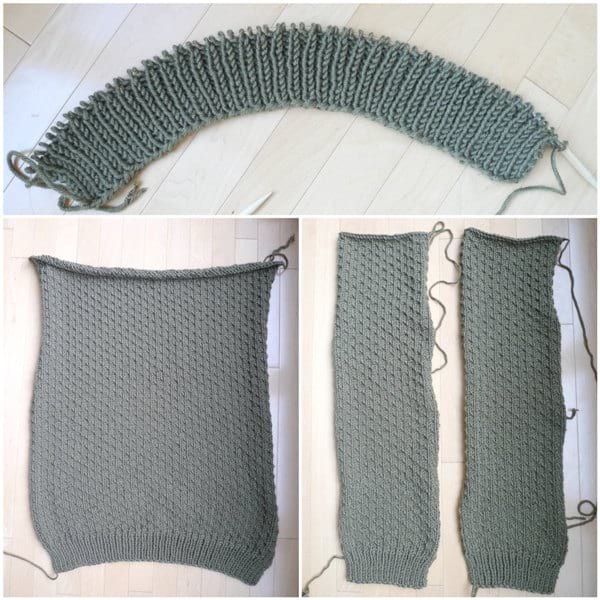
I started off the bottom of my back and front panels with a simple *Purl 1, Knit 1* ribbing. I then worked the body of the back and front panels in the dot stitch. Prior to this design, I was accustomed to working the dot stitch only in a round for my beanies. It is very simple to knit the dot stitch flat in turned rows, and I love how you can verify your work by making sure that the purl stitches line up. Note that when working the dot stitch flat, your cast-on number should be a multiple of 4 +3.
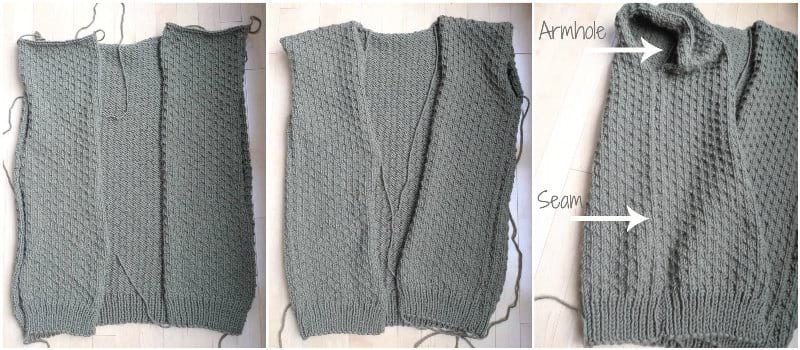
I used the vertical invisible seaming technique to seam the sides of the front panels to the back panel, making sure to leave a space for the armhole. This seaming technique is brilliant since you cannot see where the back panel becomes the front panel! To seam the tops of the back and front panels, I used the whip stitch (you could use the horizontal invisible seaming technique, but I find that it tends to add a bit of bulk).
When I was thinking of creating this design, one part stood out to me: how would I work increases for the dot stitch? The sleeves would need increasing, and I did not want the pattern to get too messy/complicated, or for the purls to no longer be aligned. I thought of a simple solution that worked out very well: I framed the dot stitch by stockinette stitches, and the increases are only worked in this stockinette portion. To make this less confusing and to help keep track of where the dot stitch portion begins and ends, I utilized stitch markers to frame the dot stitch portion of the sleeve. After completing the ribbing, I began to add my stitch markers. Note that in the first row after the ribbing (Row 14), the dot stitch is framed by two knit stitches on either end so that it looks like: Knit 2, Stitch Marker, Dot Stitch Section, Stitch Marker, Knit 2. As you continue knitting the sleeve, continue passing the stitch marker from one needle to the next, to help you keep track of where the dot stitch section begins and ends.
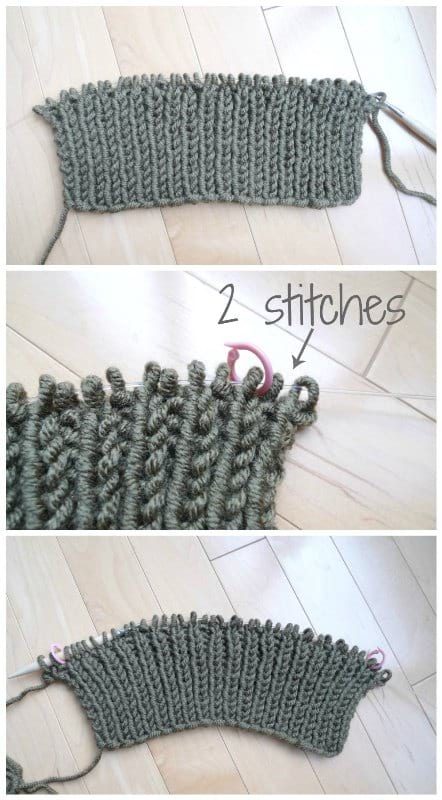
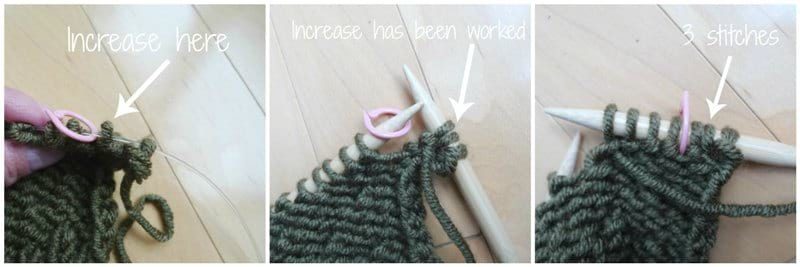
An INCREASE ROW in the sleeve is worked as follows: {P1, PFB, P across until last two stitches. PFB, P1.} PFB stands for “Purl Front and Back“, which is an increase that you can learn how to do HERE. With this increase row, the stitch count increases by two stitches. The increases are always worked in the second stitch and second to last stitch. There are four increases rows in total for the entire sleeve. Below is the first increase row (Row 25): as you can see, the increase is worked in the second stitch (in the picture below, the one right before the stitch marker). Since you have worked an increase, there are now 3 stitches on one side of the stitch marker. As you continue working increases throughout the sleeve, the number of stitches will increase on either end of the stitch markers, and each end should have the same number (e.g. 3 stitches on one side and 3 stitches on the other side). Note that the number of stitches in the dot stitch section between the stitch markers REMAINS THE SAME and should not increase.
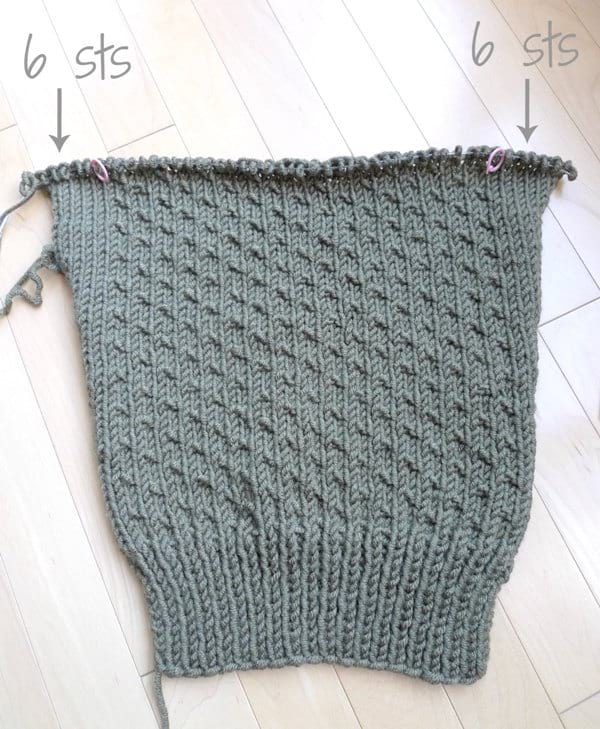
By the end of the sleeve after the four increase rows have been worked, there should be 6 stitches on either end of the stitch markers. In this picture below, you can see how the dot stitch has remained the same between the stitch markers, and this section is framed by the stockinette portion where the increases have been worked (on either side of the stitch markers).
Next, fold the sleeve in half lengthwise and use the vertical invisible seaming technique for a clean finish.
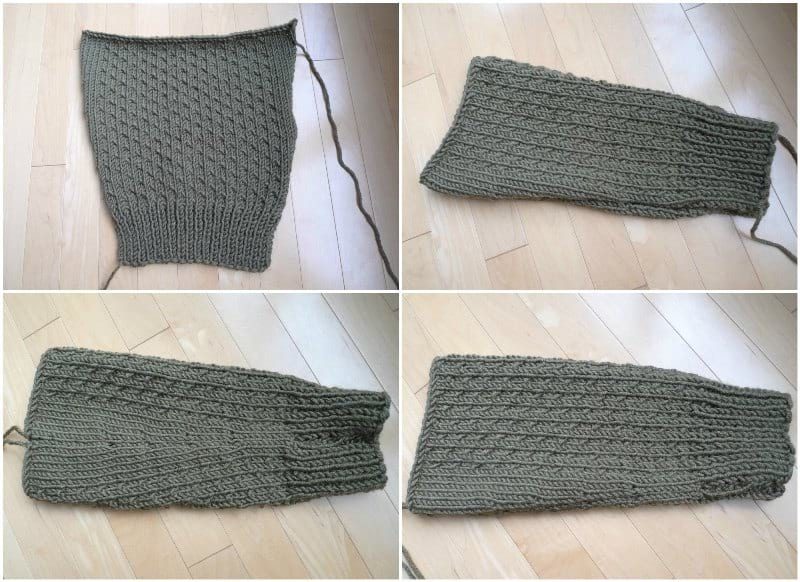
Whip stitch the top of the sleeve to the arm hole. When using the whip stitch, I like to whip stitch the wrong sides together to give a cleaner seam.

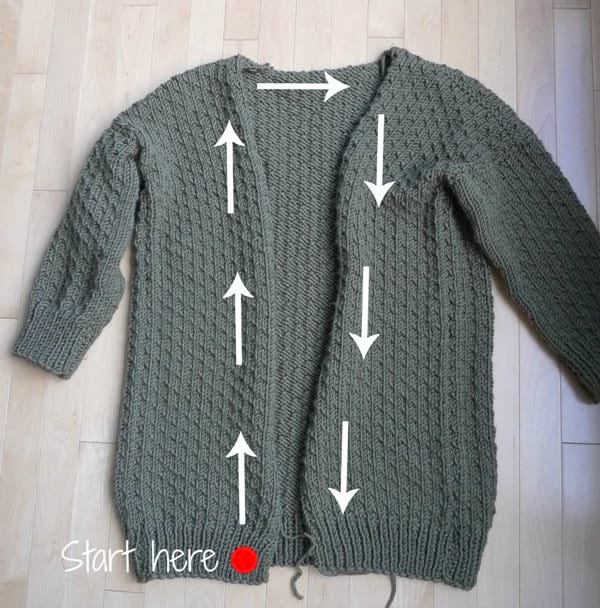
Next it is time for the collar. Starting in the bottom left corner, pick up 3 out of every 4 stitches along the front panel, across the back panel (pick up every stitch for the back panel portion), and down the front panel. Watch this video HERE for tips on how to pick up stitches along a vertical edge.
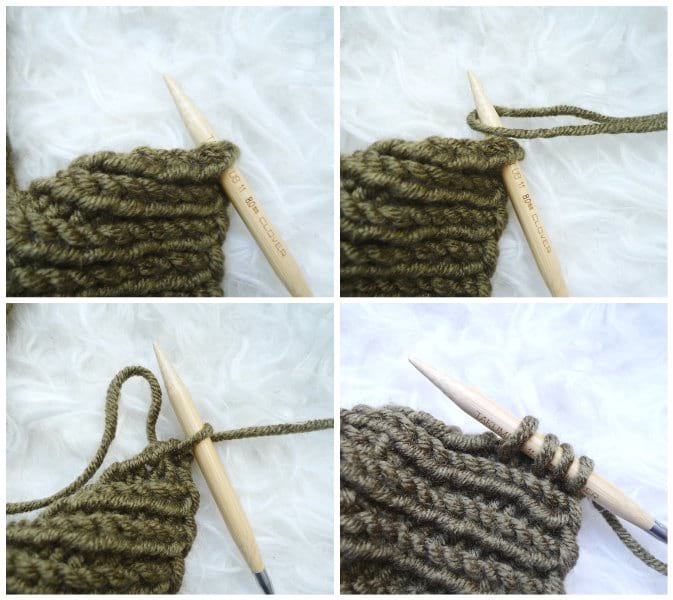
To pick up stitches using the working yarn, insert your needle into the first stitch along the edge. Yarn over, then pull up a loop. Keep inserting your needle into the next stitch, yarning over, and pulling up a loop.
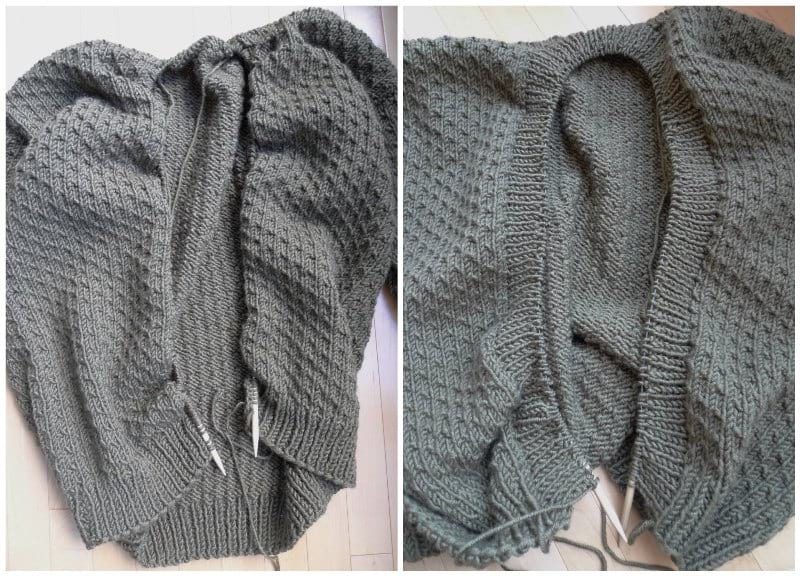
I worked a *P1, K1* ribbing to match the bottom of the front and back panels. When I was happy with the width of the ribbing, I casted off the stitches.
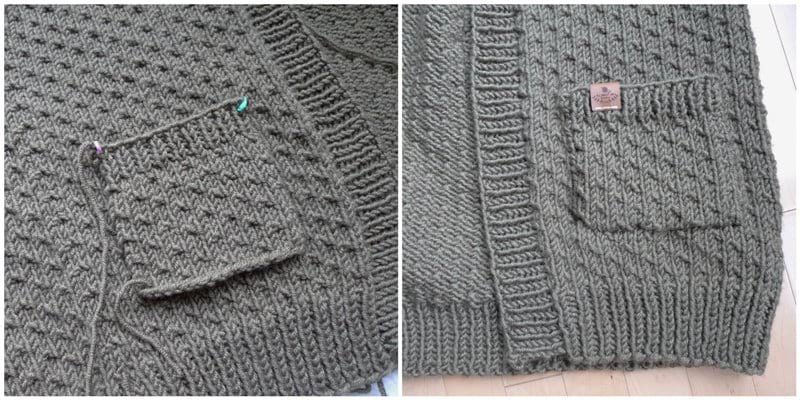
Lastly, I knitted a pocket by starting off with the dot stitch and ending with the ribbing. I seamed the pocket to the front panel, trying my best to line up the dot stitch of the pocket with the dot stitch of the front panel! Check out this video HERE to see tips on how to sew a pocket onto a knitted garment.
I was absolutely thrilled to try on my finished Dotty Cardigan, and I am amazed by how it turned out! This cozy cardigan has such a beautiful length and gorgeous texture with the dot stitch. Check out the free pattern HERE with all the written numbers and to see more pictures of the finished cardigan! I hope you’ve enjoyed seeing the making of this beautifully textured cardigan – once again, the convenient kit can also be found HERE! Happy knitting!
