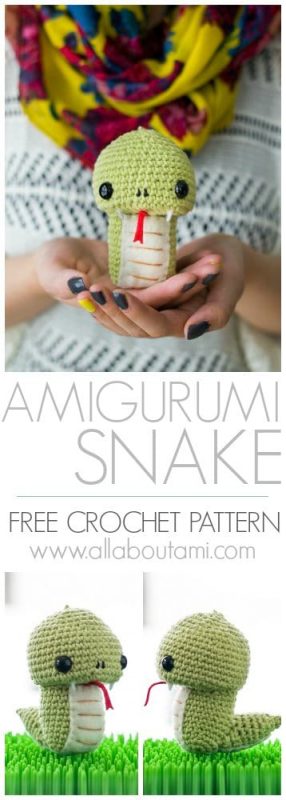
***You can purchase an INEXPENSIVE AD-FREE PDF of this pattern on Etsy HERE. The printable PDF with step-by-step pictures has been condensed into a total of 5 pages including the cover page! PLEASE follow along with my blog post HERE to read about the background story of this Snake and to see more step-by-step photos!
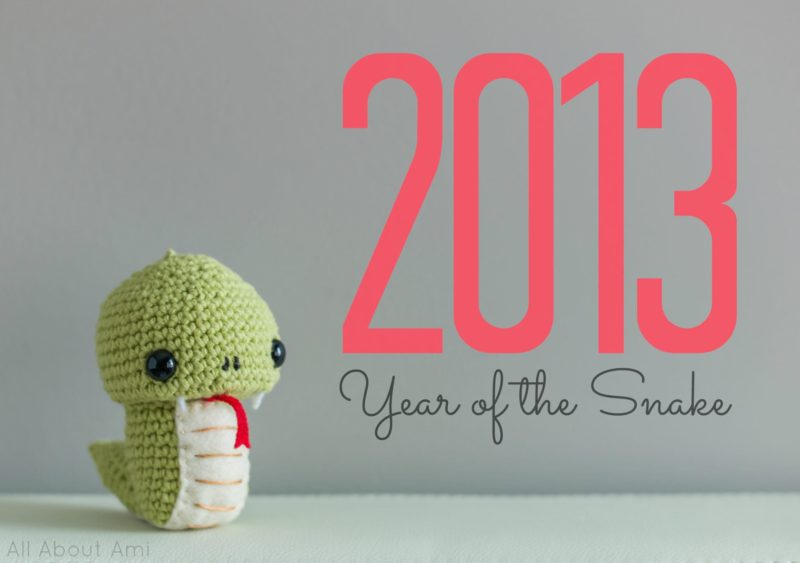
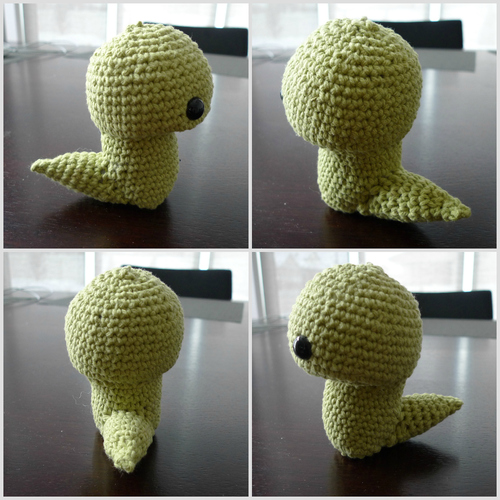
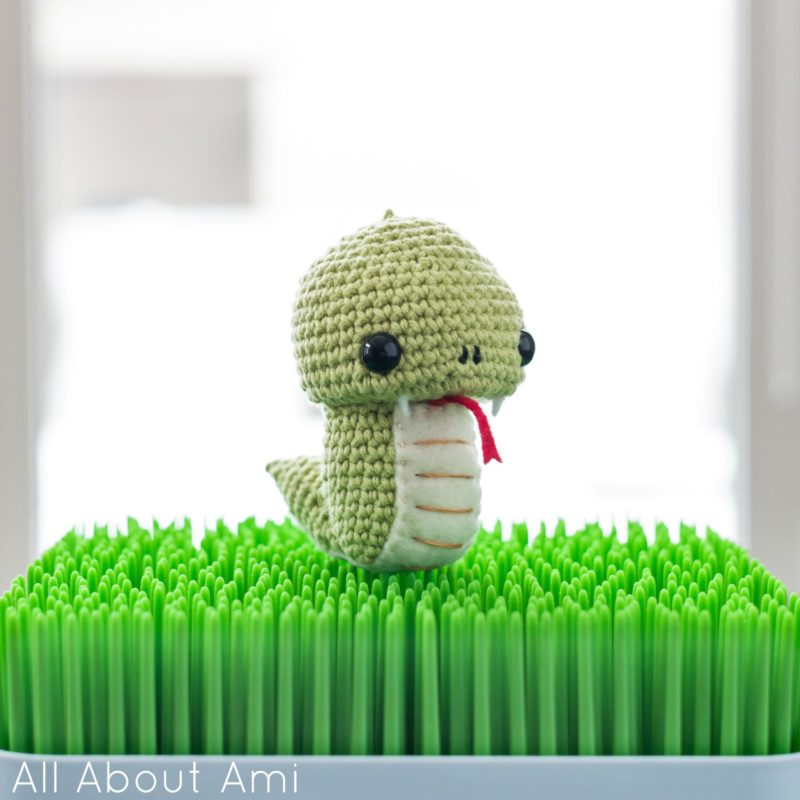
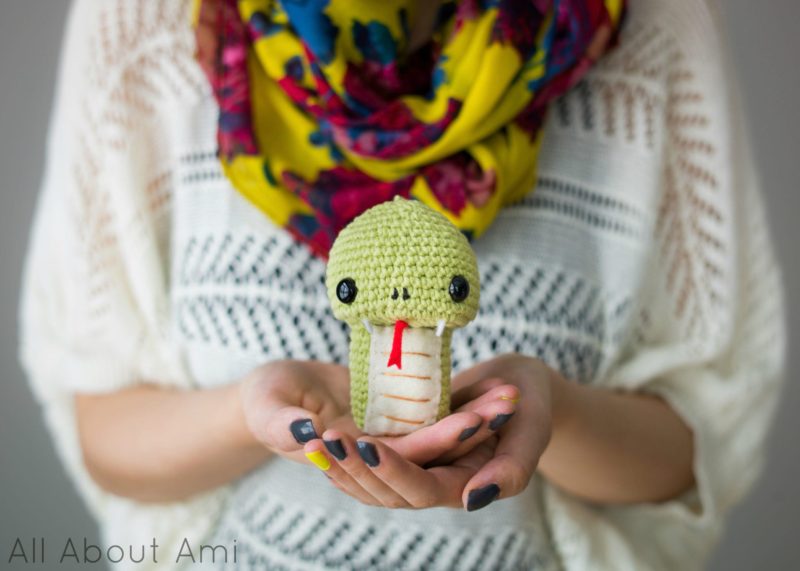
It’s the Year of the Snake this year! Crochet this cute and friendly snake complete with fangs, a slithery tongue and scaled body to celebrate! Snakes typically have a bad rap as sinister villains, but this little guy is determined to break the stereotype!
Materials:
- worsted weight green yarn (I used Lion Brand Cotton-Ease Yarn in ‘Lime’)
- 2.00 mm Clover Amour crochet hook
- Yarn needle (bent tip helpful for attaching amigurumi parts- see HERE)
- fiberfill
- beige felt (for scaled body), red felt (for tongue), white felt (for fangs)
- 12 mm safety eyes
- black embroidery floss (for nose), tan embroidery floss (for scaled body)
- glue gun
Note: I worked in continuous rounds (vs. joined rounds).
HEAD
[We are working from the bottom of the head to the top of the head in order to get a flat base.]
Using green yarn,
Chain 5
R1: Starting from second chain from hook, Sc 3. 3 sc in next sc (which is the first ch). Turn and Sc 3. 3 sc in next sc (this is the fifth chain). [We are making an oval by crocheting around the chain]. (12 sts)
R2: Sc 4, 2 sc in next sc, Sc 5, 2 sc in next sc, Sc 1. (14 sts)
R3: *Sc 1, 2 sc in next sc*, rep 7 times (21 sts)
R4: *Sc 2, 2 sc in next sc*, rep 7 times (28 sts)
R5: *Sc 3, 2 sc in next sc*, rep 7 times (35 sts)
R6: *Sc 4, 2 sc in next sc*, rep 7 times (42 sts)
R7-13: Sc 42
Position safety eyes and embroider nose on short side of oval. Nose is embroidered by making two “L” shapes.

R14: *Sc 5, dec 1*, rep 6 times (36 sts)
R15: Sc 36
R16: *Sc 4, dec 1*, rep 6 times (30 sts)
R17: *Sc 3, dec 1*, rep 6 times (24 sts)
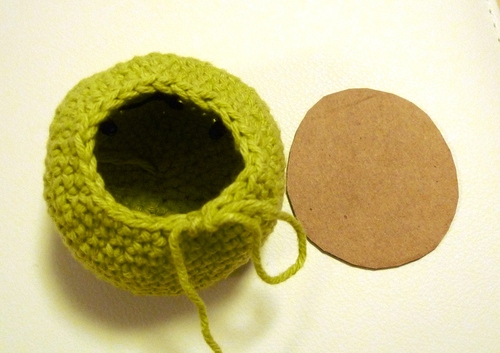
Cut oval shape out of cardboard and place on bottom of head. Begin stuffing head.
R18: *Sc 2, dec 1*, rep 6 times (18 sts)
R19: *Sc 1, dec 1*, rep 6 times (12 sts)
Stuff head firmly.
R20: *Dec 1*, rep 6 times (6 sts)
Fasten off and weave in end.

BODY
Using green yarn,
Chain 9
R1: Starting from second chain from hook, Sc 7. 3 sc in next sc (which is the first ch). Turn and Sc 7. 3 sc in next sc (this is the 9th chain). [We are making an oval by crocheting around the chain]. (20 sts)
R2: *Sc 4, 2 sc in next sc*, rep 4 times (24 sts)
R3-R11: Sc 24
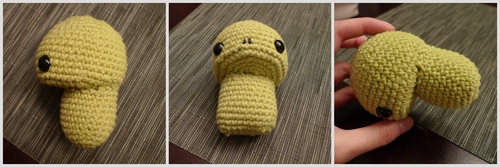
Fasten off and leave long end for sewing. Stuff body firmly. Attach body to head, aligning back of body to back of head so that body is leaning back slightly.
TAIL
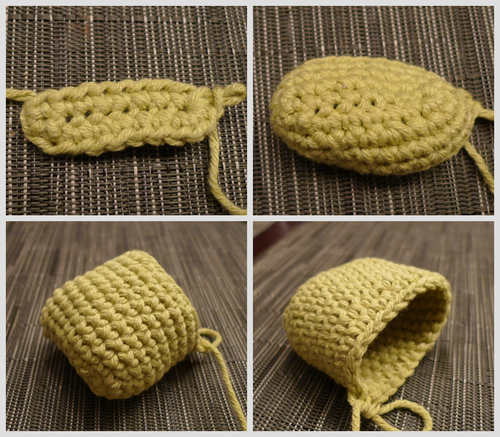
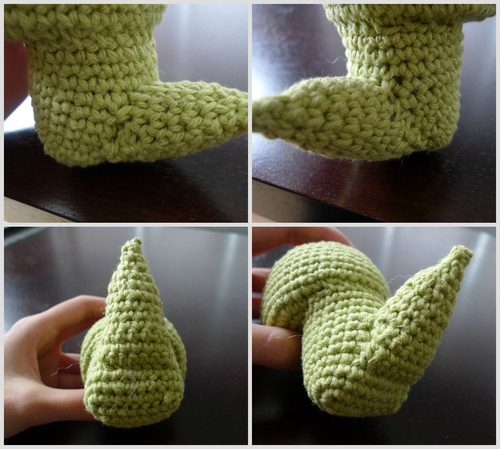
Overall, we will be crocheting the wide part of the tail (in the shape of an oval) by picking up stitches from the back of the body and then crocheting towards the tip. See this video HERE to learn how to pick up stitches. The tail should appear like a continuation of the body and be placed approximately where the faded oval is:
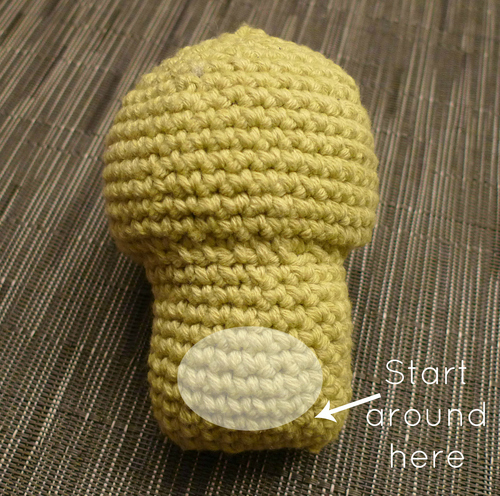
We will be crocheting the bottom “U” shape of the tail first:
Using green yarn,
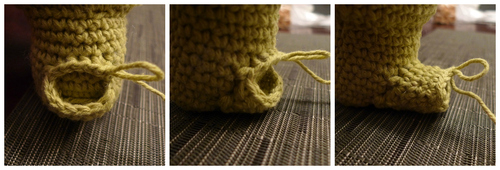
R1: Hold Snake’s head and body so that the back is facing towards you. Starting from bottom right side, pick up a stitch. Chain 1. Pick up 7 more stitches along bottom row. Ensure that Snake will stand by himself at this point. (8 sts)
***I picked up the first stitch between Rounds 3 and 4 of the body. Choose an appropriate first stitch so that the 8 sts of Row 1 are centered along the back of the body.
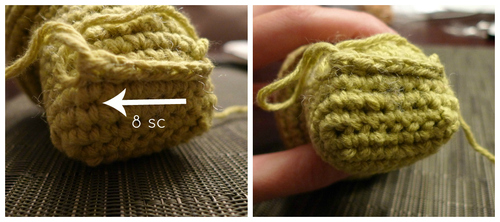
R2: Sl stitch to one stitch above and slightly left. Turn and sc 8. (8 sts)
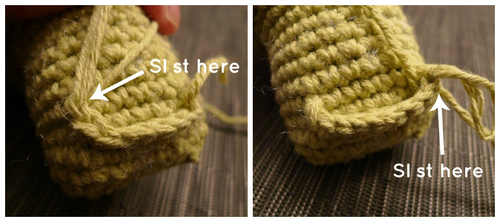
R3: Sl stitch to one stitch above and slightly right. Turn and sc 8. (8 sts).
R4: Sl stitch to one stitch above and slightly right. Turn and sc 8. (8 sts).
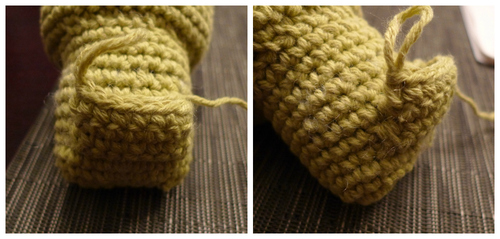
R5: Sl stitch to one stitch above and slightly left. Turn and sc 8. Sc 1 above (left side of oval). Sc 4 by picking up stitches along top of oval. Sc 1 down (right side of oval). (14 sts)
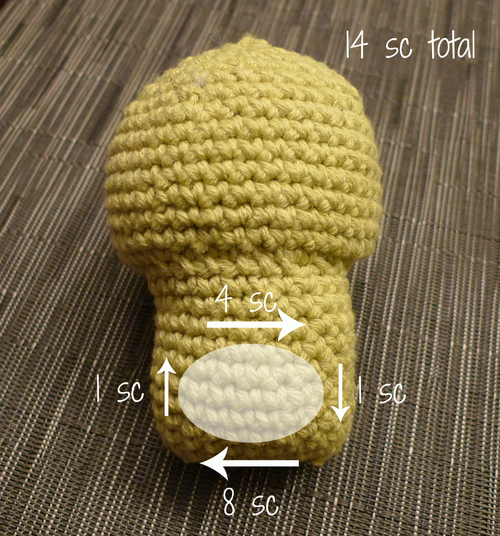
R6-7: Sc 14 (14 sts)
Stuff tail lightly.
R8: *Sc 5, dec 1*, rep 2 times (12 sts)
R9: *Sc 2, dec 1*, rep 3 times (9 sts)
R10: *Sc 1, dec 1*, rep 3 times (6 sts)
R11: Sc 6 (6 sts)
R12: *Dec 1*, rep 3 times (3 sts)
Fasten off and weave in end.
Adding details:
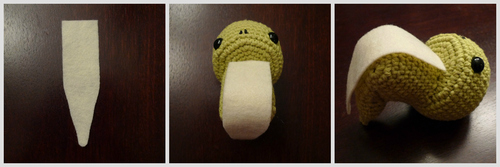
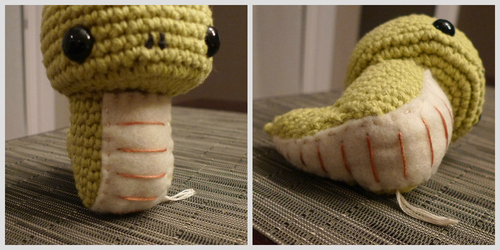
– Cut out below shape from beige felt. Drape it across Snake`s body and tail to make sure it is the correct length. Sew felt piece onto body. Add lines of tan embroidery floss down the felt piece for the scaled body.
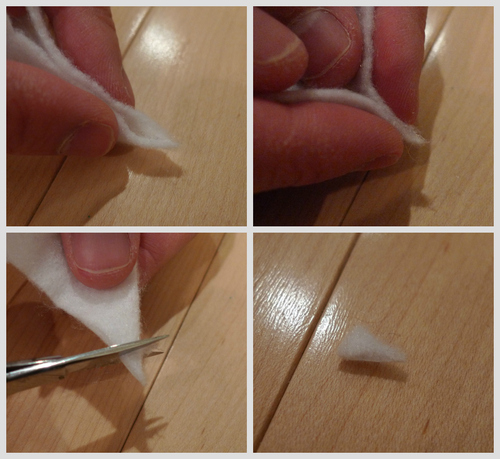
– To make the fangs, pinch a corner of white felt together. Add a drop of glue from a glue gun to hold the sides together. Snip the corner off. Make 2 fangs.
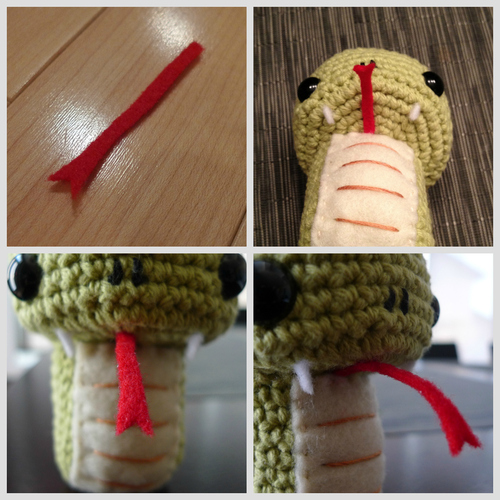
– Cut out a long narrow piece of red felt and snip a “v” at the tip for the tongue. Glue two white fangs and red tongue in place.
Have a very Happy Chinese New Year, and have fun making this friendly little snake! He would make a perfect gift for expectant mothers whose babies will be born in the Year of the Snake, or for friends who were born in the Year of the Snake as well! Once again, please check out my full blog post HERE to read about how this little Snake came to be and to see more pics of him! Post your finished Snake pics on my Facebook page, Twitter, Instagram or e-mail them to me (all_about_ami@hotmail.com) so we can all enjoy them!
This pattern is an original pattern by Stephanie Lau of All About Ami (February 2013). Please do not claim this pattern as your own. If you wish to share this pattern, you may link to this pattern but please do not reprint it on your site. You may keep a copy for your own personal use but you please DO NOT sell the pattern or distribute it.
You may sell products made from this pattern but please clearly credit the design to me, Stephanie Lau of All About Ami, and provide a link to my blog www.AllAboutAmi.com. Permission is NOT granted for mass production or factory manufacturing of any kind. Thank you for being respectful and for your understanding!
