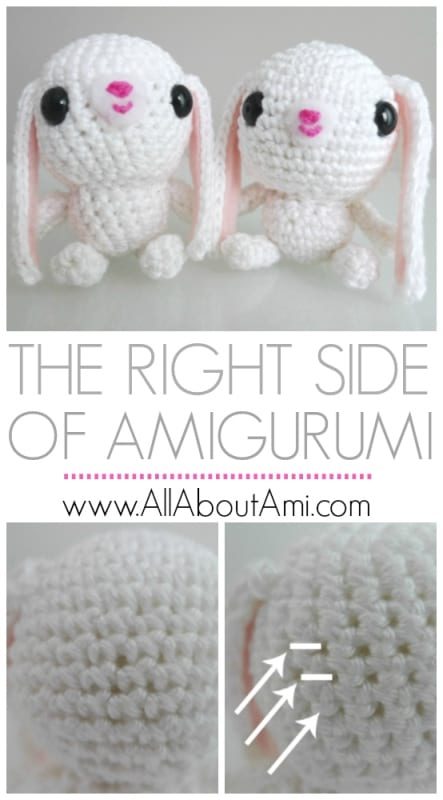
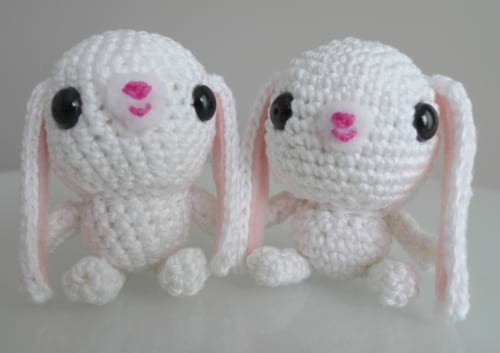
Can you see the difference in the look of the stitches between these two bunnies? The one on the left shows the back of the stitches while the one on the right shows the front of the stitches. Continue reading if you’re interested in amigurumi technique and want to learn how to tell the difference between both sides as they each have unique characteristics!
I first learned how to crochet from a book when I was a child, and I never really knew there was a “right” (front) or “wrong” (back) side when crocheting. I picked up some amigurumi books a few months ago and started crocheting away. To my surprise, a few of my readers politely informed me that my amigurumi were “inside-out”. You can imagine how shocked I was when I heard this! How could all my stuffies be inside-out? Did it actually make a difference? I quickly researched what other people had to say on-line…
Roxycraft has a great youtube video illustrating which is the “right side” of amigurumi here. Basically, when you are crocheting in a round, the right side is the side facing you.
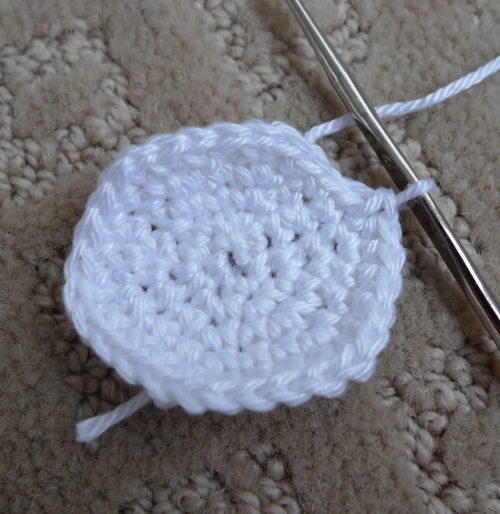
Since I am right-handed, however, as I continue crocheting, the ball starts to curve towards me. The ‘right’ side is now on the inside of the ball, and the back side is on the outside.
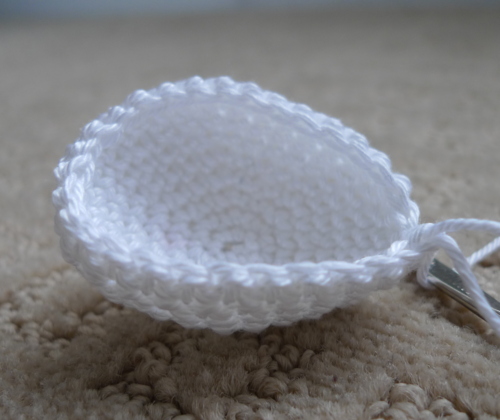
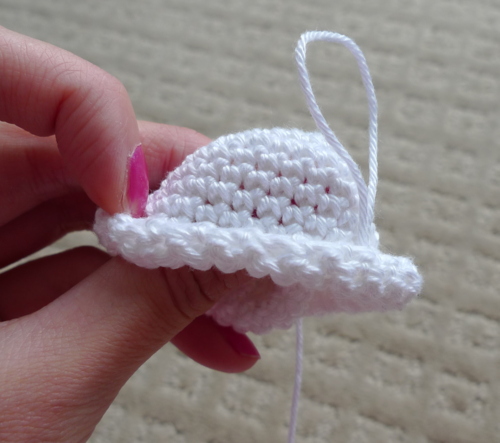
Since the patterns I followed would say to do the stitches in each row and then ‘stuff firmly’, I intuitively thought that this was how amigurumi was crocheted (with the back side facing outwards). However, there is a general consensus that amigurumi looks better when the ‘right’ or front side is facing out. Thus, you can either curve the ball away from you while you are working (so the right side is now on the outside), or flip it inside out at the end.
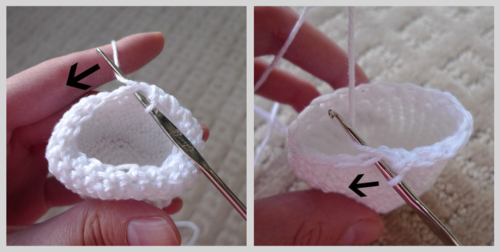
To clarify, typically when you are working with the back side facing outwards, your crochet needle is moving in a counter-clockwise direction around the piece, and you stick your needle from the inside of the ball to the outside (see left picture below). However, once you flip your piece inside-out so that the front side is facing outwards, your crochet needle now moves in a clockwise direction around the piece, and you stick your needle from the outside of the ball to the inside (see right picture below). This is how you finish up your last few rows once you flip it inside out.
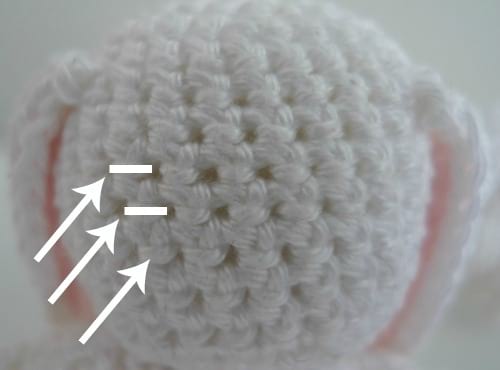
Here is a close-up of the bunny which has the ‘back’ side facing outwards! The back side is generally more bumpy and fuzzy. The stitches also curve diagonally more steeply. Notice that there are also horizontal bars visible on the back side as indicated by the arrows!
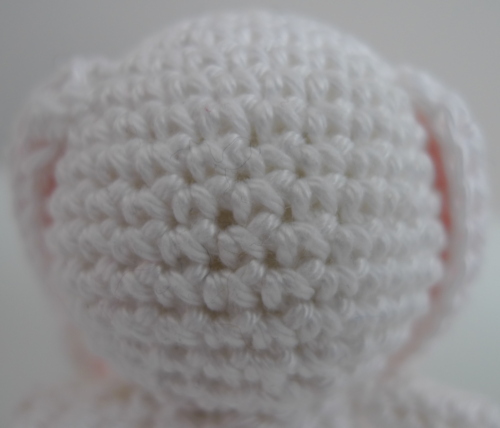
Here is a close-up of the bunny which has the front or ‘right’ side facing outwards! This side is generally more smooth, and you can see the little v’s of the stitches- note that there are no horizontal bars visible. Furthermore, when this side faces outwards, the amigurumi balls have a better shape and the invisible decreases are much less noticeable.
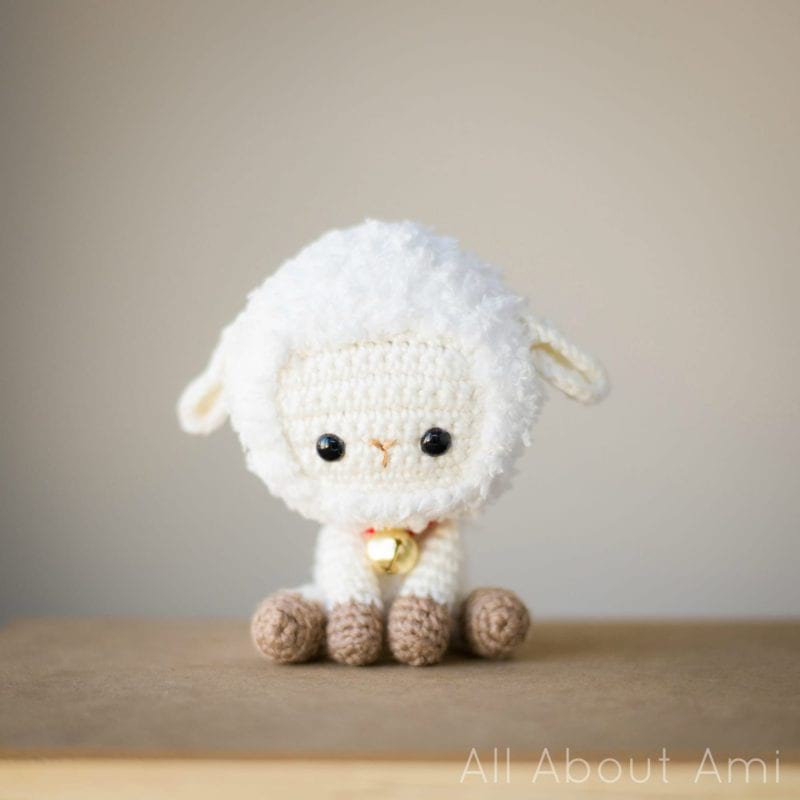
I thank my readers for informing me about the ‘right’ vs. ‘wrong’ side. Since being informed and doing my research, I have switched to having the front side facing outwards. It is definitely a matter of personal preference though, as some amiguurmi designers I know choose to have the back side facing outwards It is also important to note that since the back side tends to be more fuzzy, if you are aiming to create a fuzzy amigurumi, you can purposely choose to have the back side facing outwards to emphasize the fuzziness as I did with my Chinese New Year Lamb as pictured below!
I hope you feel more informed about the ‘right’ vs. ‘wrong’ side of amigurumi and that you have learned to tell the difference! I think amigurumi stuffies are cute both ways, don’t you? Let me know what you think or whether you’ve had any experiences crocheting with the ‘right’ or ‘wrong’ side or have any stories to share! Feel free to pin the below image to your Pinterest boards to help you remember which side is which and to let other crochet enthusiasts know about the difference!
