***You can purchase an INEXPENSIVE AD-FREE PDF of this pattern on Etsy HERE and on LoveCrochet HERE! This beautifully formatted PDF includes ALL the step-by-step pictures and pattern and is a total of 13 pages including the cover page! Lion Brand Yarn has made a convenient kit HERE that includes the pattern and all the 24/7 Cotton yarn needed (choose any shade you want) to crochet this stylish shoulder bag!
***The pattern has been divided into 2 PARTS:
- Please reference Part 1 HERE that goes through the granny square, assembly and seaming.
- This is Part 2 that goes through the top edging and strap!
Special decreases used at the bottom of the V for the top edging:
- Half double crochet decrease: YO, insert hook into both indicated gaps. YO, pull through first 2 loops. YO, pull through remaining 3 loops.
- Invisible single crochet decrease (worked across 3 stitches in this pattern): Insert hook into front loops of next 3 stitches. YO, pull through 3 loops. YO, pull through both loops.
- Invisible slip stitch decrease (worked across 3 stitches in this pattern): Insert hook into front loops of next 3 stitches. YO, pull through all loops.
Top Edging and Strap:
{This section is worked around the entire top edge of the bag.}
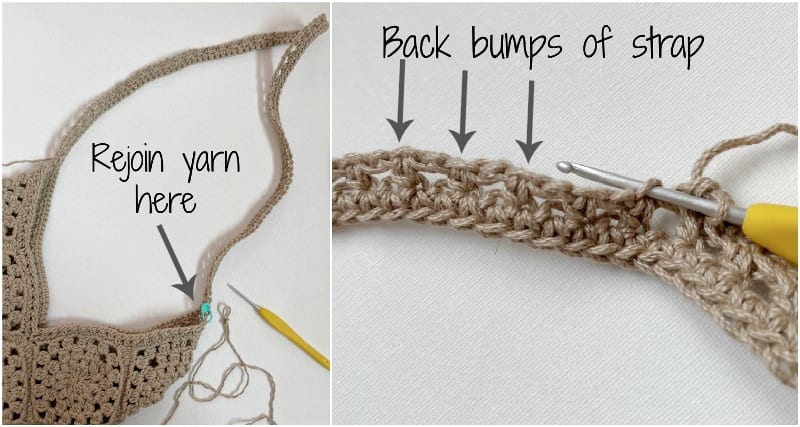
With the bag facing you so that the dip of the V is in the middle, rejoin the yarn in the top right corner of the bag (the chain 2 gap of the corner of the granny square). To rejoin the yarn, make a slip knot, insert the crochet hook into the indicated space, add the slip knot and pull through.
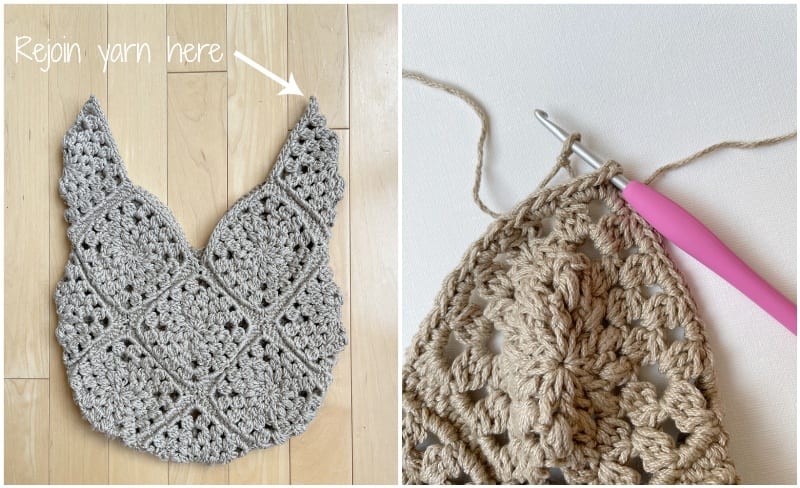
Round 1: Chain 3 (counts as 1 hdc and chain 1), skip 1, hdc 1. *Chain 1, sk 1, hdc 1*, rep around until you have reached the bottom V (end off with a *ch 1, sk 1* before working the hdc dec). Work a hdc dec across the chain 2 gaps of the granny square corners in the dip of the V. Continue working *chain 1, sk 1, hdc 1* around until you have reached the second bottom V on the other side of the bag. Once again, work a hdc dec across the chain 2 gaps of the granny square corners. Continue *chain 1, sk 1, hdc 1* until you have reached the end of the round. At the end, you will chain 1, skip 1 and work a slip stitch in the 2nd chain of the initial chain 3 to close up the round. Do not fasten off.
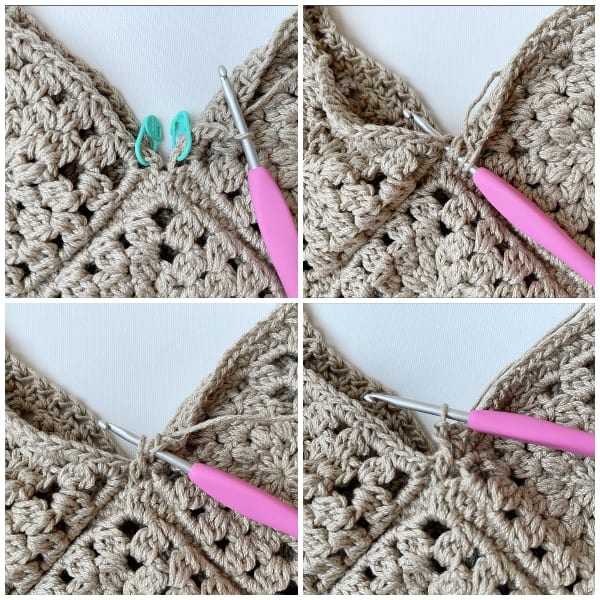
This collage below shows where you will work the hdc decrease across the chain 2 gaps (the gaps are indicated by the two green stitch markers).
Strap:
Chain 110 (Adjust this length depending on how long you want your strap to be, especially if you plan on wearing this bag cross-body. Keep this initial chain length an even number).
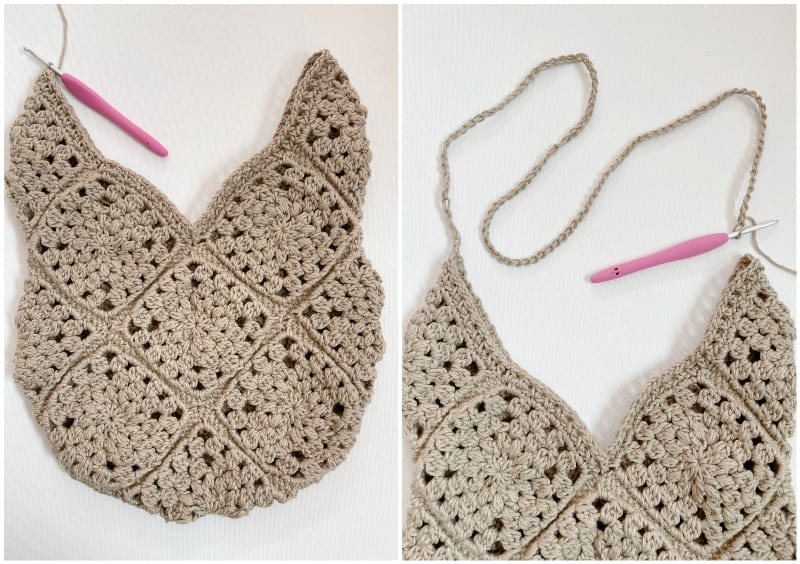
With the WRONG side of the bag facing you, slip stitch to other top corner of bag (indicated by green stitch marker). Slip stitch 1 in stitch beside on the left to help anchor the strap in place (as indicated by the peach stitch marker). It is very important that these two slip stitches are worked on the wrong side of the bag, otherwise the strap will be twisted.
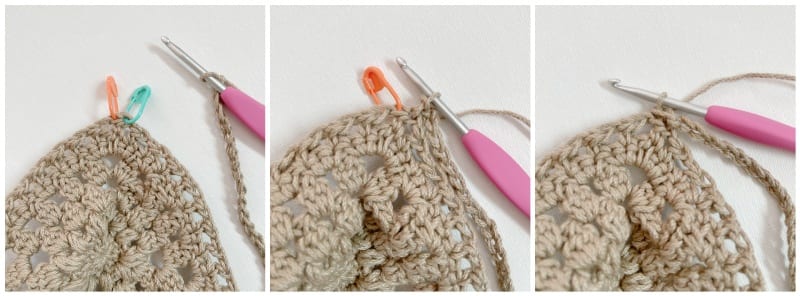
Row 1: Chain 1, turn. Begin crocheting back down the chain length (the strap) using the front and back loops of the chain stitches (leave the back bumps for later on in the pattern). Work 1 hdc in second chain of strap.
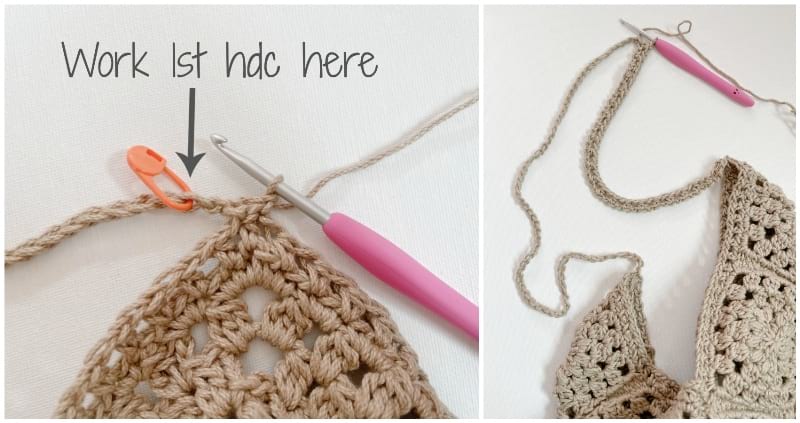
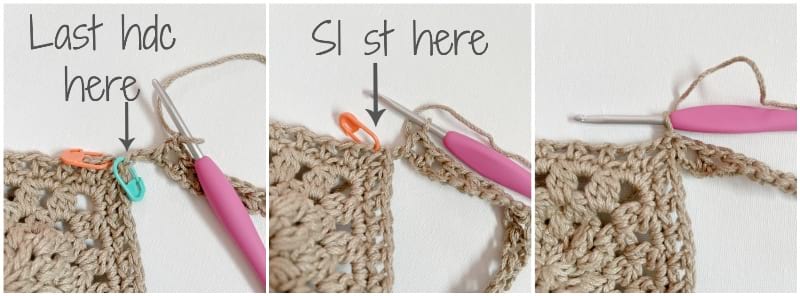
*Ch 1, sk 1, hdc 1*, across the chains. Slip stitch in adjacent stitch to tip of granny square (as indicated by peach stitch marker – the green stitch marker shows where the last hdc is worked). Do not cut the yarn.
Building Up the Top Edging & Strap
{This section is worked on only one side of the bag and one side of the strap. The yarn is then cut, rejoined and repeated on the other side.}
Switch to 2.75 mm hook,
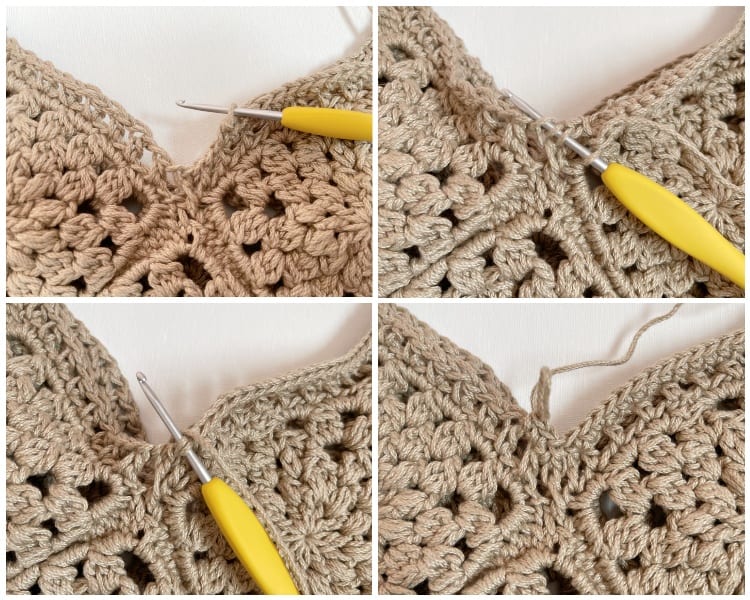
Round 1: Chain 1, continue working single crochets down the top edging and strap of the bag (you should be working in a clockwise direction). When approaching the dip of the V: locate the 5 middle stitches (including half double crochets and chain gaps) and work the following pattern across these 5 middle stitches: *Skip 1, Inv sc dec over 3 middle stitches, skip 1*. Continue working single crochets around and along the strap. Slip stitch to chain 1 to finish off the round.
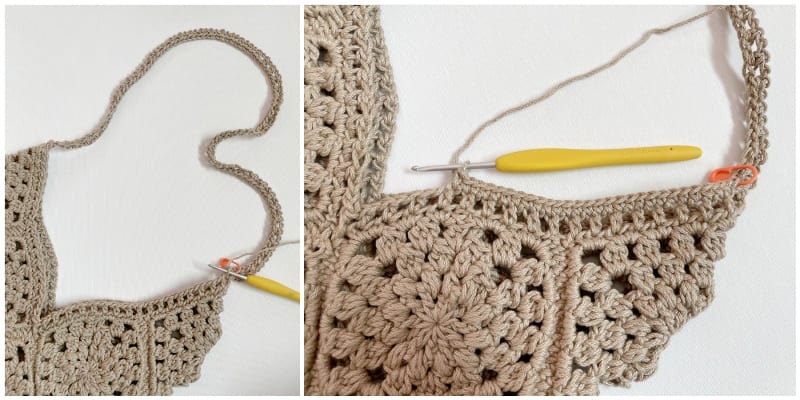
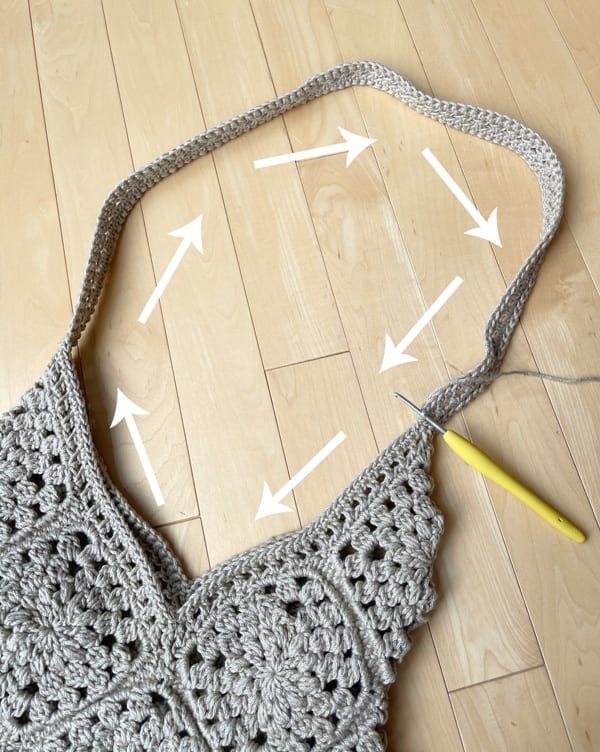
This photo below shows you the direction you will always be working when building up the top edging and strap. You are working in a clockwise direction:
This collage below shows where you will work the invisible sc decrease across the 5 middle stitches:
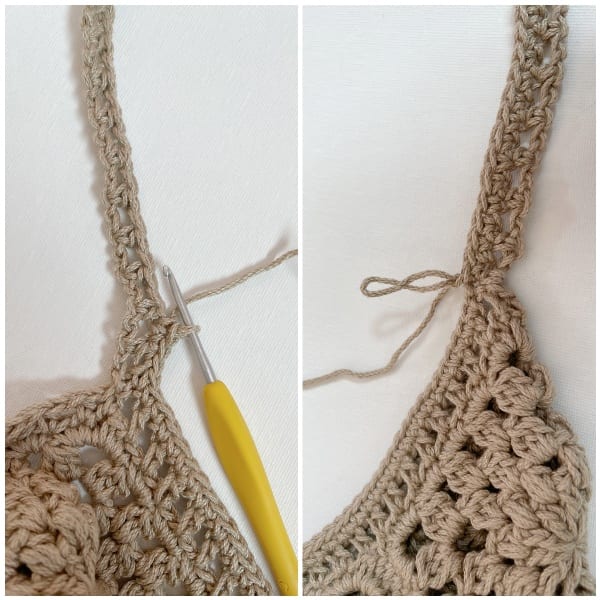
This collage shows working single crochets along the strap:
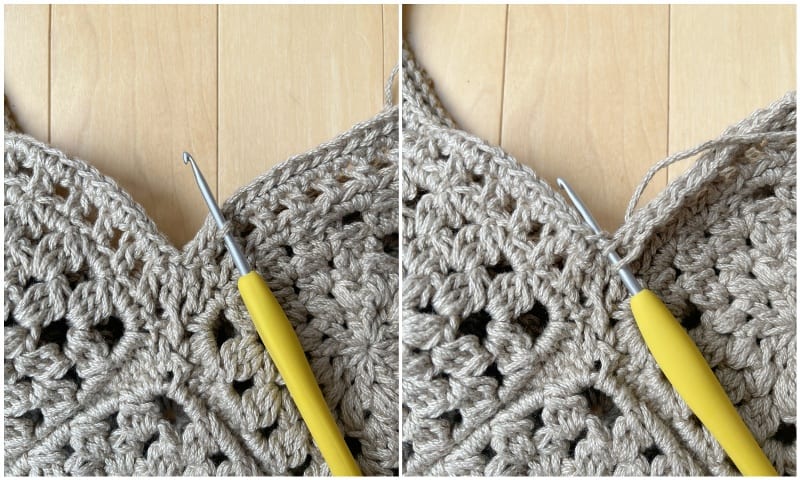
Round 2: Work slip stitches around top edging and strap for added strength. When approaching the 3 middle stitches of the dip of the V, work an invisible slip stitch decrease. Continue working slip stitches around and along the strap. Slip stitch to first st, fasten off and weave in end.
This collage below shows the invisible slip stitch decrease in the dip of the V:
Next, we will repeat what we just did to build up the top edging and strap on the OTHER side of the bag.
Flip the bag over and rejoin the yarn at the top right corner of the bag. Repeat Rounds 1 and 2 above for the “Building up the Top Edging & Strap” instructions. When crocheting along the bottom of the strap for Round 1, work the single crochets through the back bumps.
Note: If you want to try adding button closure to your bag, you could sew a button to one side in the dip of the V. On the other side, you could make a loop with chain stitches in the dip of the V during Round 2 after working the invisible slip stitch decrease and then finish up the round (e.g. inv sl st dec, chain 5, continue sl st around).
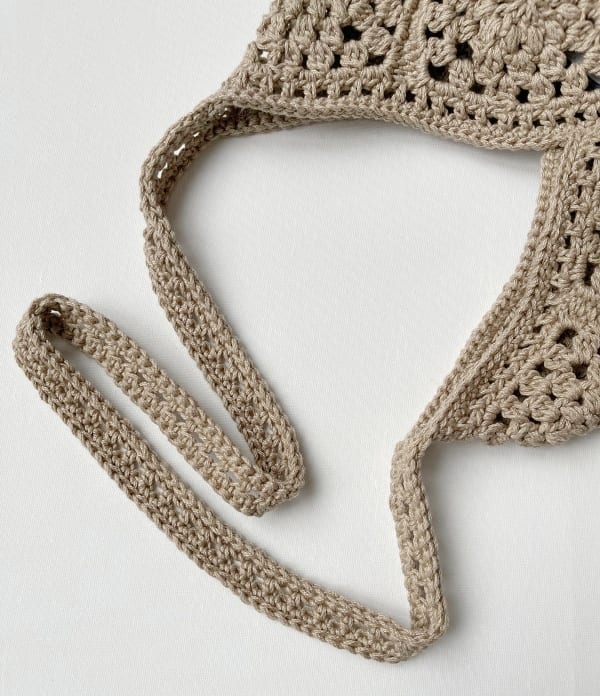
Your final strap is comprised of a middle section of half double crochet stitches interspersed with chain 1’s; this middle section has single crochet stitches on either side, and then slip stitches on each end.
Optional Interior Pocket:
{This pocket measures 5”/12.7 cm wide, 6”/15 cm long – adjust as necessary to fit your own cell phone.}
Using 3.75 mm hook and working in turned rows,
Chain 22.
Row 1: Starting in second chain from hook, Sc across. (21 sts)
R2: Chain 1, turn. Starting in second st from hook, sc across. (21 sts)
R3-35: Repeat Row 2.
Fasten off and leave long end for sewing. Use running stitch and attach cell phone pocket to inside of bag, attaching down one side, along the bottom, and up the other side of the pocket.
******************************
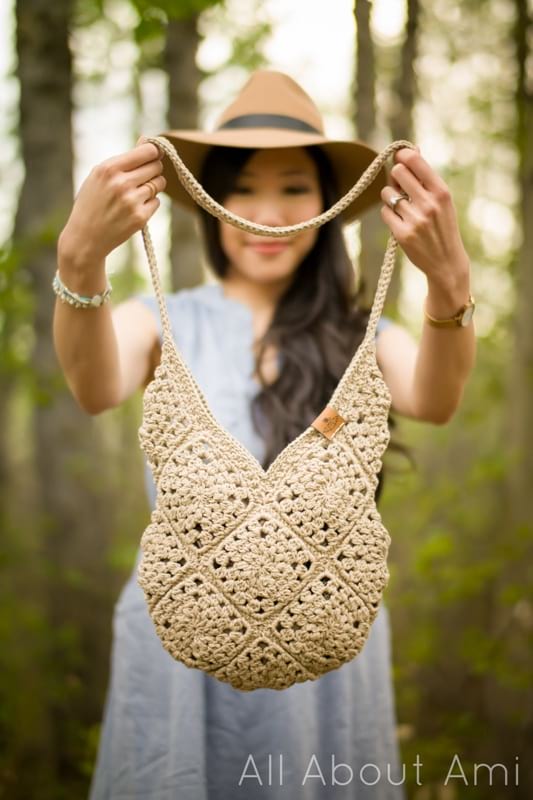
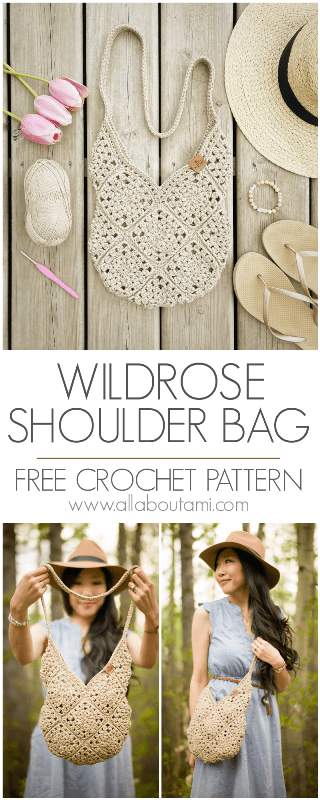
I love the romantic and elegant look of this shoulder bag! It is the perfect size to hold your essential items!
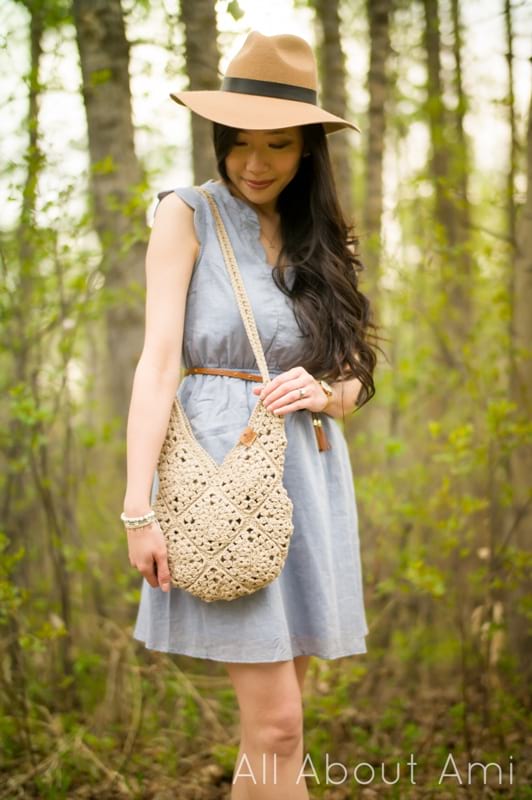
The design of the granny squares and slip stitch seaming give this lovely purse an almost “quilted” look to it! It is so easy to throw on this bag over your Spring/Summer outfits and add a handmade touch!
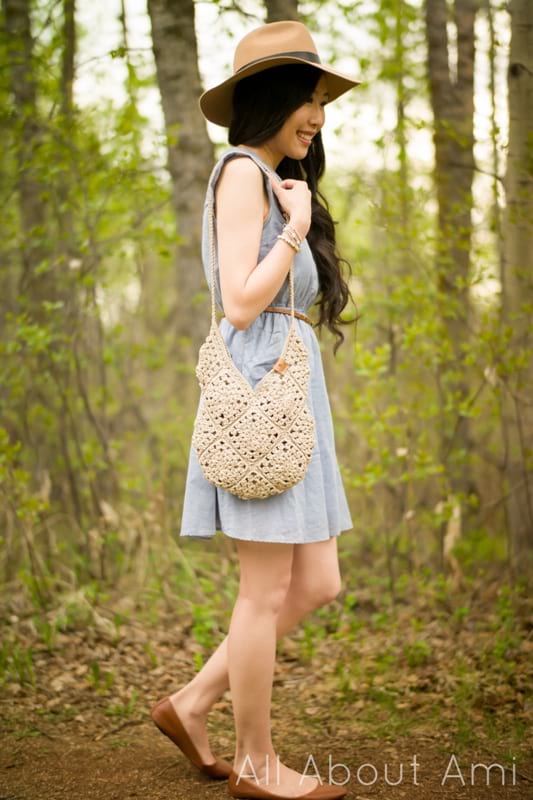
When you want to be hands-free, it is wonderful having a cross-body bag option. I love how you can adjust the strap based on your height and where you want the bag to hit. I made my strap this length for myself as I LOVE how I can also wear it cross-body!

Don’t forget to check out the small size bag organizer as it instantly adds more compartments and zipper closure to your purse. It is a great option for those of us who are not so skilled at sewing and adding bag linings! You can see this purse organizer in action HERE in this video I made. I hope you will LOVE putting your handmade bags to great use – it is so empowering how we can crochet such functional and stylish items!

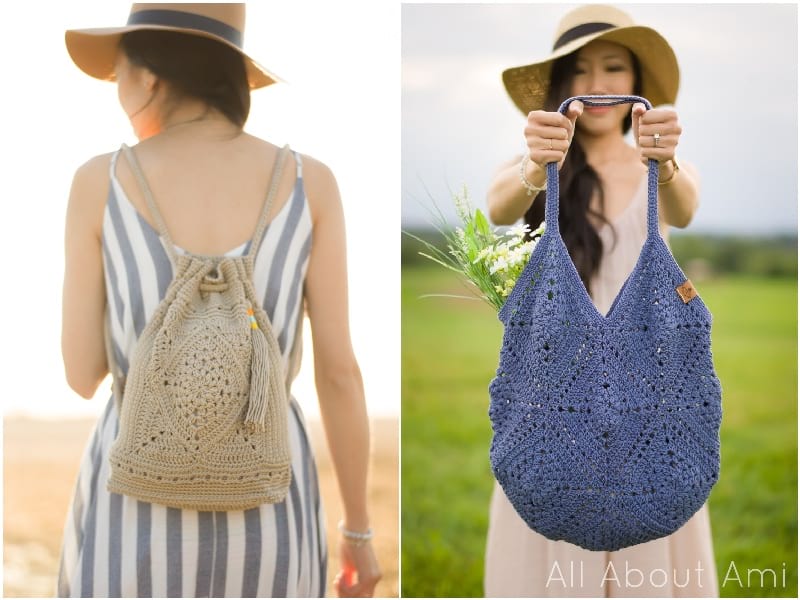
If you love the Wildrose Shoulder Bag, be sure to check out the other two bags in this series: the Wildrose Backpack and the Wildrose Market Bag! Isn’t it incredible how you can make so many different designs using the same granny square as the base? I’ve also got a “Crochet Bags Pattern Bundle” available in my Etsy shop HERE! Crochet bags are one of my favourite items to design, and I am so thankful that they have been so well-received! Thank you for your love and support, everyone, and enjoy making your bags!
{This post is sponsored by Lion Brand Yarn! I’ve loved working with their yarn throughout the years and I’m thrilled that I get to collaborate with them every month!}
This pattern is an original pattern by Stephanie Lau of All About Ami. Please do not claim this pattern as your own. If you wish to share this pattern, you may link to this pattern but please do not reprint it on your site. You may keep a copy for your own personal use but please DO NOT sell the pattern or distribute it.
You may sell products made from this pattern but please clearly credit the design to me, Stephanie Lau of All About Ami, and provide a link to my blog www.AllAboutAmi.com. Permission is NOT granted for mass production or factory manufacturing of any kind. Thank you for being respectful and for your understanding!


