***You can purchase an INEXPENSIVE AD-FREE PDF of this pattern on Etsy HERE and on LoveCrochet HERE! This beautifully formatted PDF includes the step-by-step pictures and is a total of 5 pages including the cover page!
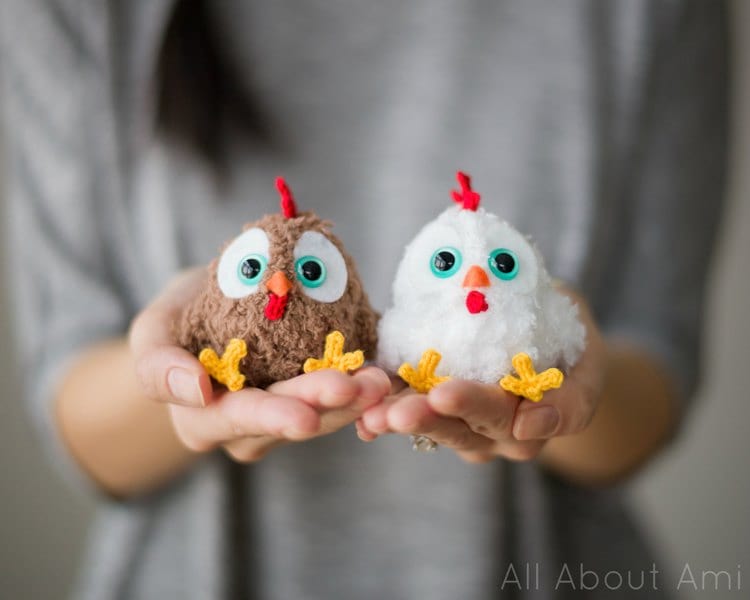
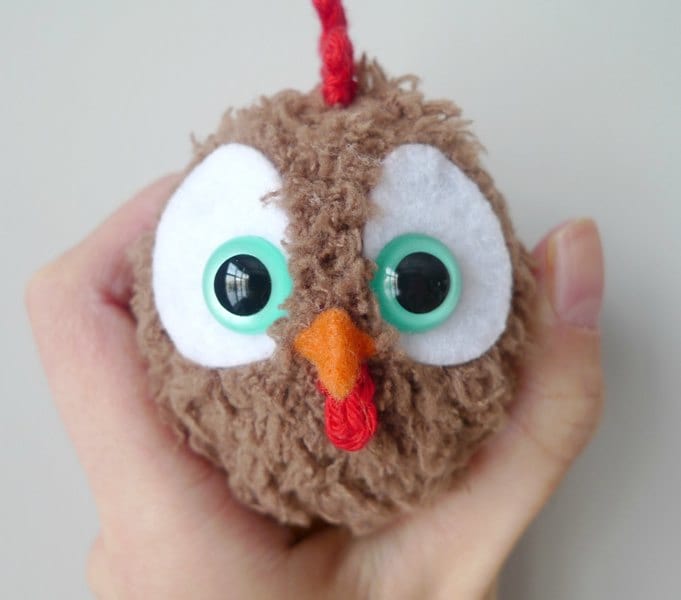
Meet Roy, Bruno, and Pip, our adorably sweet roosters that we crocheted to celebrate Chinese New Year! Their fluffiness and larger than life personalities will melt your heart!
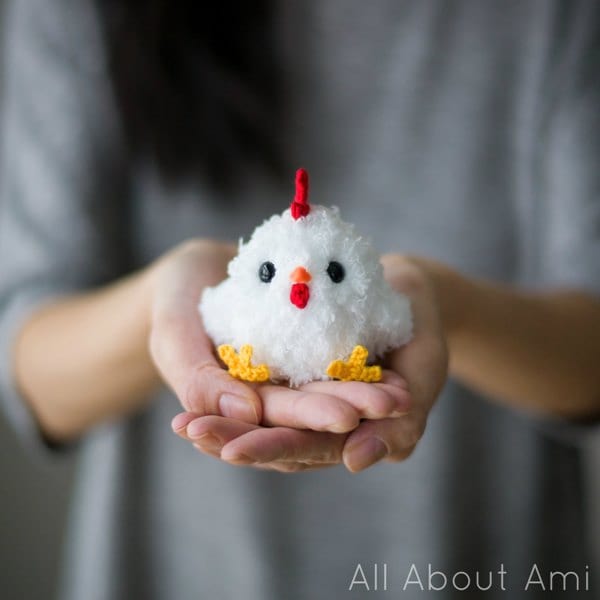
***Please follow along with my step-by-step blog post HERE to see more detailed photos and to read the story behind these roosters
Materials:
- bulky fuzzy white yarn or fuzzy brown yarn (I used Bernat’s Pipsqueak)
- lightweight red yarn (I used Lion Brand Yarn’s Bonbons in “Beach”)
- lightweight yellow yarn (I used Lion Brand Yarn’s Bonbons in “Beach”)
- 2 mm Clover Amour crochet hook, 3.5 mm Clover Amour crochet hook
- orange felt (for beak)
- white felt (for eye roundies)
- 12 mm teal safety eyes (mine are from the Fresh Stitches shop)– similar HERE on Etsy; OR 9 mm regular black safety eyes
- glue gun
- Clover lock ring stitch markers
- Fiberfill
- Yarn needle (bent tip recommended)
Note:
- I worked in continuous rounds (vs. joined rounds) unless otherwise indicated.
- Complete comb and wattle before closing up head/body so that the ends can be more easily hid inside.
- There is technically a “right” and “wrong” side of crochet when working in the round. Read about this in my blog post HERE! When working with the fluffy yarn, ensure the wrong side is facing outwards as this is the fluffier side!
- When working with fluffy yarn, it will be difficult to see the stitches. You will need to “feel” for the next stitch by inserting your crochet hook by faith. Fluffy yarn is also very forgiving as mistakes are not easily visible- don’t worry too much if you make a mistake!
- I HIGHLY recommend using a stitch marker (I use these ones HERE) to help you keep track of the beginning of each round. You can also check the number of stitches when you reach the half way point (across from the marker).
Finished Dimensions: 3.5″/8.9 cm tall, 3.5″/8.9 wide
COMB
Using red yarn and 2 mm hook,
Row 1:
This is created in one continuous strip. When slip stitching, work the stitches in the back “bumps” of the chains.
Chain 3, turn. Starting from second bump from hook, slip stitch 2.
Chain 6, turn. Starting from second bump from hook, slip stitch 4.
Chain 5, turn. Starting from second bump from hook, slip stitch 3.
Chain 4, turn. Starting from second bump from hook, slip stitch 2.
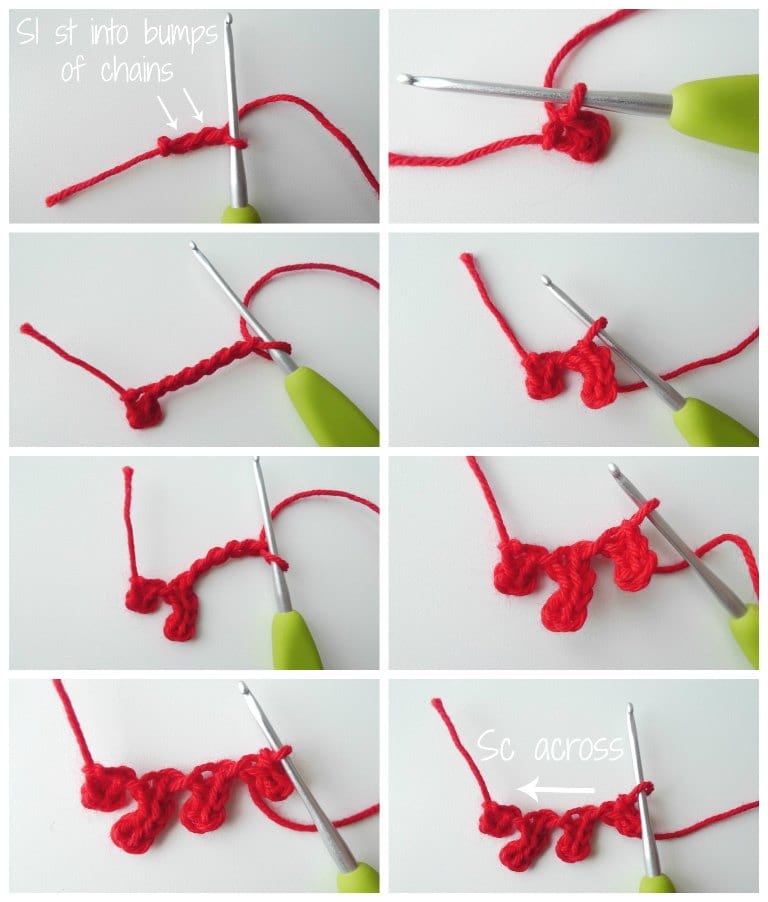
Row 2:
Continue working underneath the Row 1 just created.
Chain 1, Sc 7.
Fasten off and leave long end for sewing.
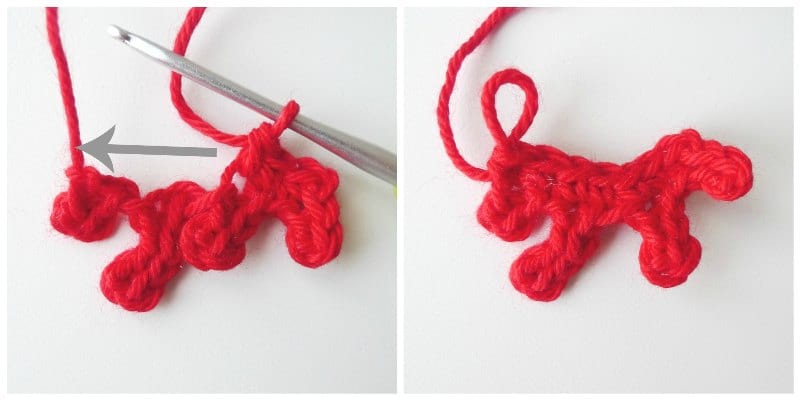
WATTLE
Using red yarn and 2 mm hook (leave long initial end to help with attaching),
Ch 3, turn. Starting from second bump from hook, slip stitch 2. Fasten off. Leave long end for attaching.
BEAK
Cut triangle out of orange felt. When ready to add onto face, bend in half and place some glue along the midline. Gently pinch part of it shut and trim excess sides according to how small you want the beak to be.
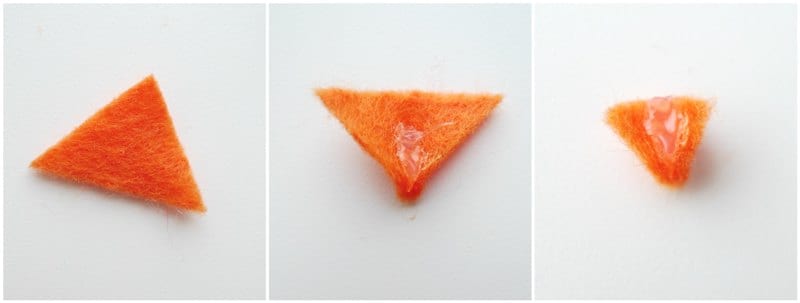
HEAD/BODY:
Using fuzzy white/brown yarn and 3.5 mm hook,
Round 1: 6 sc in Magic Ring. (6 sts)
R2: Inc around. (12 sts)
R3: *Sc 3, Inc*, rep 3 times. (15 sts)
R4: *Sc 2, Inc*, rep 5 times. (20 sts)
R5-9: Sc 20

Cut eye roundies out of white felt. Insert teal safety eyes onto the bottom corners. Insert eyes onto face so that bottom of eyes are about 2″ down from top of head, about 0.4″/1 cm apart. Or, place regular black safety eyes without eye roundies onto face about 1.25″ down from top of head, about 0.98″/2.5 cm apart.
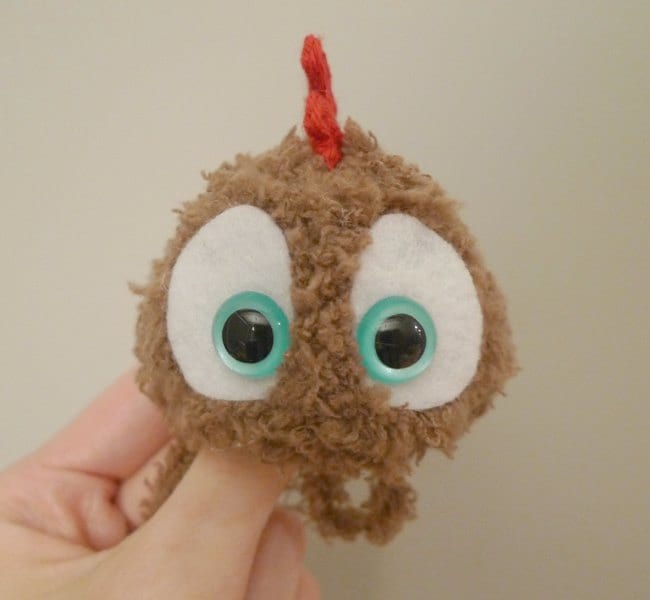
Attach red comb ontop of head, glue beak under eyes, and attach red wattle under beak. If using regular black safety eyes, glue beak higher up, slightly between eye for a more kawaii look.
Begin stuffing head/body.
R10: *Dec*, rep 10 times. (10 sts)
R11: *Dec*, rep 5 times. (5 sts).
Finish stuffing head.
R12: *Dec*, rep 2 times and fasten off. Weave in end.
WINGS (make 2)
Using fuzzy white/brown yarn and 3.5 mm hook,
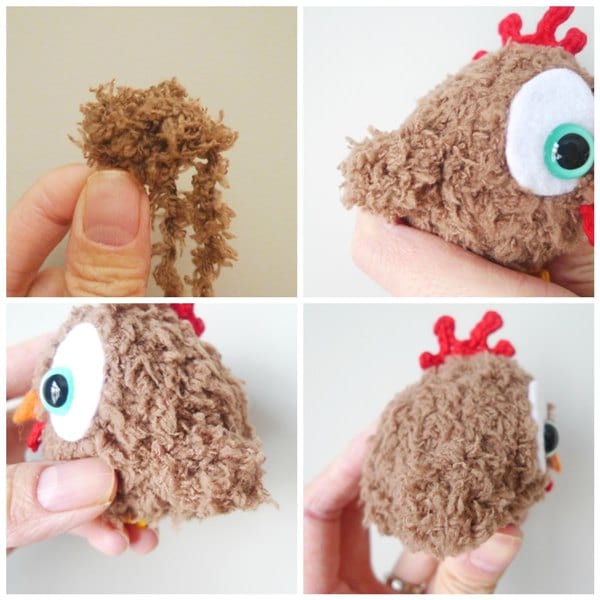
R1: 5 sc in Magic Ring. Do not close up circle so that semi-circle is created. Fasten off and sew side edge of semi-circle to side of body.
FEET/LEGS (make 2)
We will begin crocheting the feet. The feet are crocheted in one continuous strip. When slip stitching, work the stitches in the back “bumps” of the chains.
Using yellow yarn and 2 mm hook,
*Chain 4, turn. Starting from second bump from hook, slip stitch 3*, rep 3 times. 3 claws created.
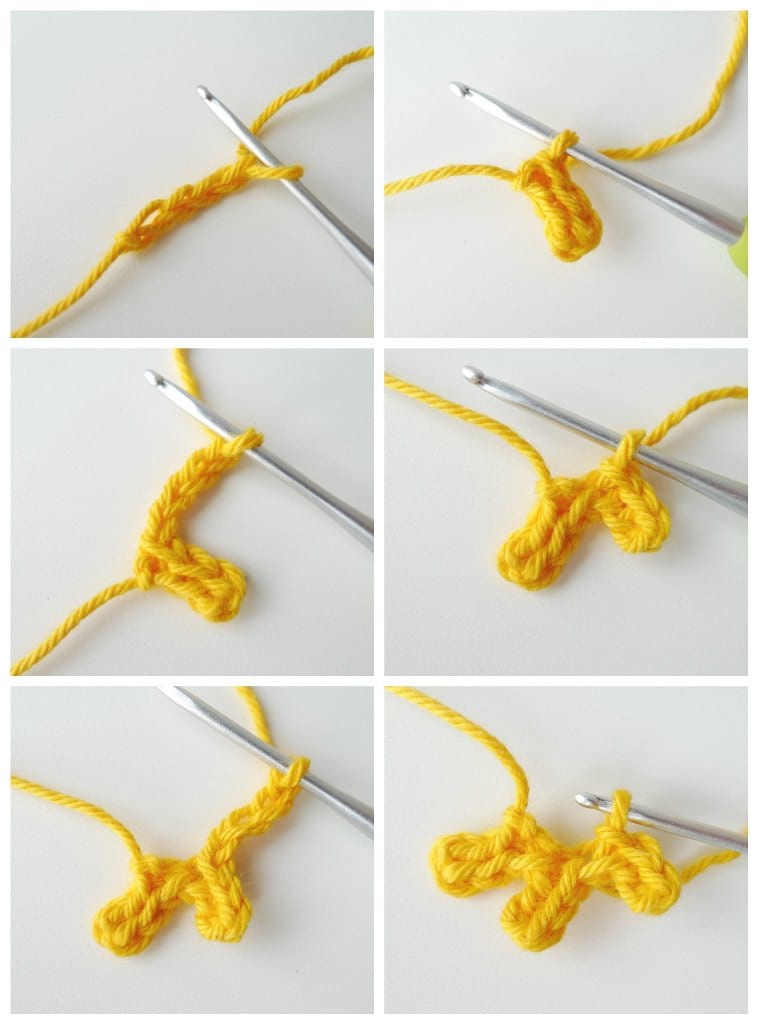
Slip stitch to first chain to close up heel of foot. Do not fasten off.
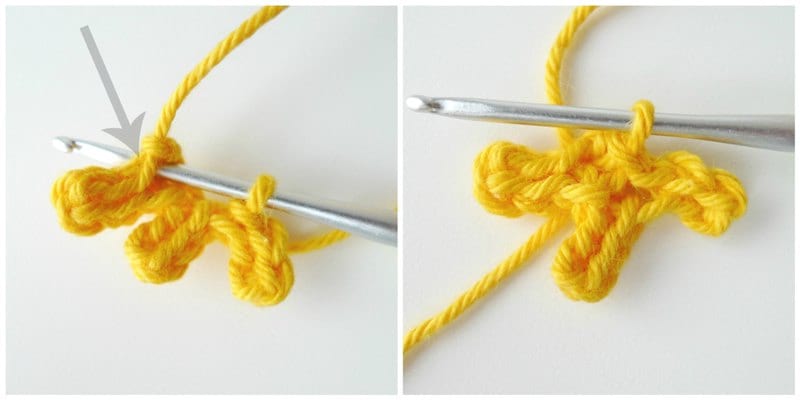
We will now begin crocheting the leg.
Chain 7.
Row 1: Starting in second chain from hook, Sc 6.
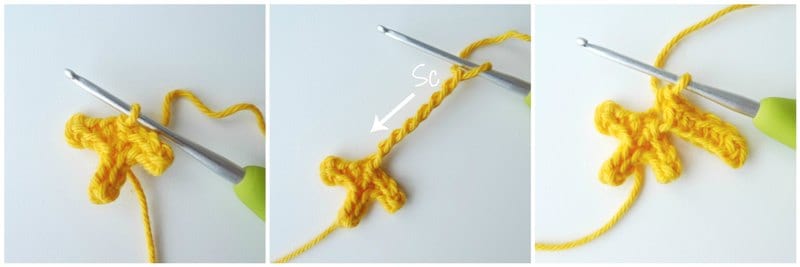
Slip stitch to stitch on foot where leg originated from. Fasten off and leave long end for sewing.
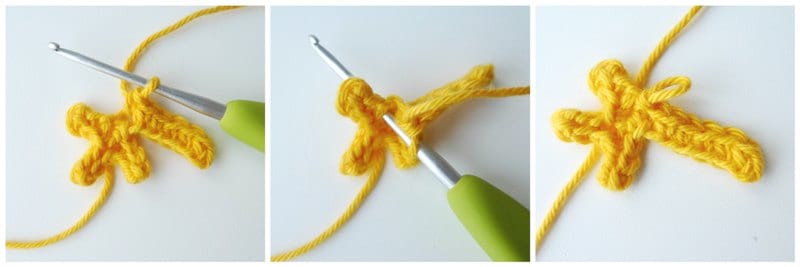
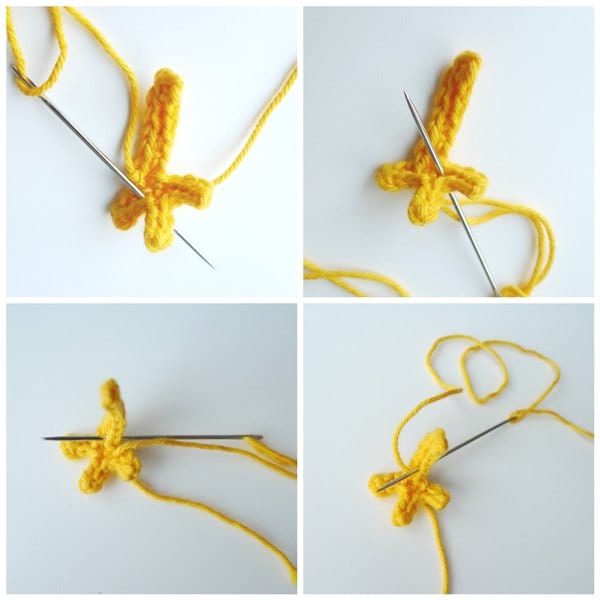
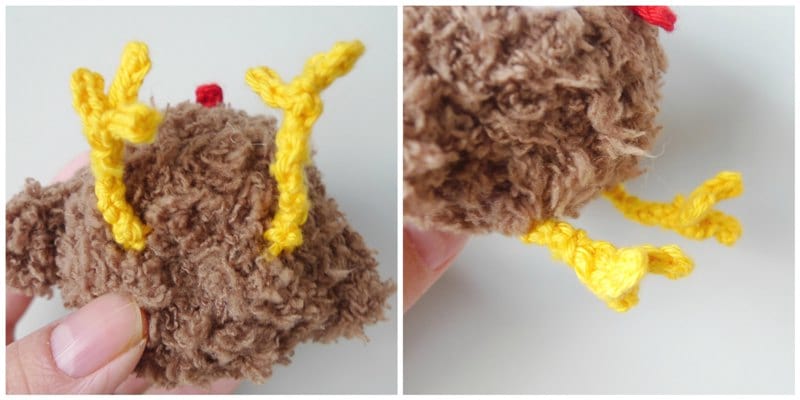
To make the leg stand up perpendicular to the feet, weave yarn needle in and out of the feet and leg as shown below:
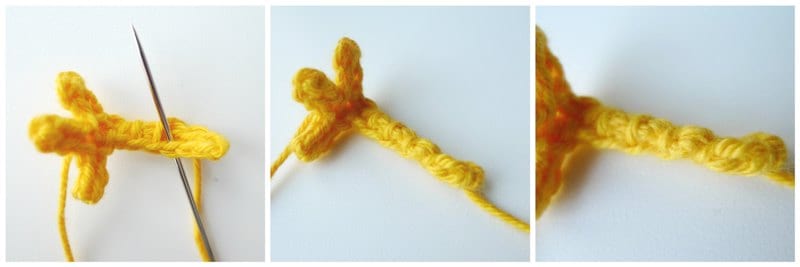
Pinch leg slightly and whip stitch it to create a more rounded and sturdy leg.
Attach legs to bottom of body.
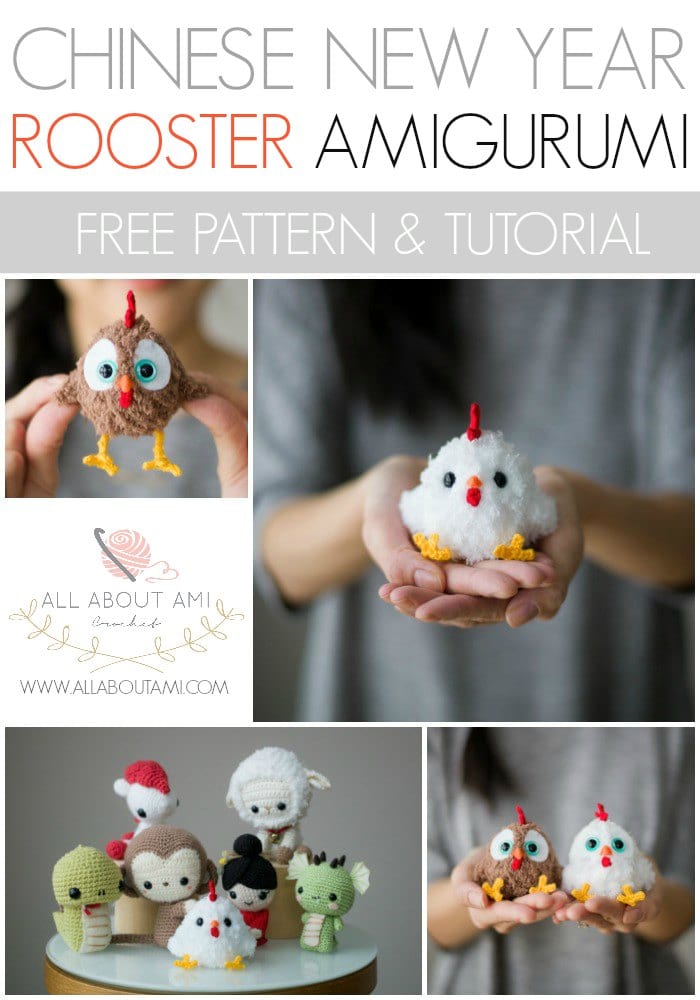
Congratulations, your Rooster is complete! Enjoy your sweet and fuzzy little amigurumi and have a great Year of the Rooster! These little friends are quick to work up, so you can make a whole flock of them! Feel free to pin this collage below to Pinterest to help remind you about this project and to let others know about it too!
This pattern is an original pattern by Stephanie Lau of All About Ami. Please do not claim this pattern as your own. If you wish to share this pattern, you may link to this pattern but please do not reprint it on your site. You may keep a copy for your own personal use but please DO NOT sell the pattern or distribute it.
You may sell products made from this pattern but please clearly credit the design to me, Stephanie Lau of All About Ami, and provide a link to my blog www.AllAboutAmi.com. Permission is NOT granted for mass production or factory manufacturing of any kind. Thank you for being respectful and for your understanding!

