***You can purchase an INEXPENSIVE AD-FREE PDF of this pattern on Etsy HERE and on LoveKnitting HERE! This beautifully formatted PDF includes the step-by-step pictures and pattern and is a total of 5 pages including the cover page! You can also find this pattern in my Easy & Modern Knits Pattern Bundle found HERE (includes over a dozen of my knit patterns at a discounted price)! Lion Brand Yarn has made a convenient kit HERE (currently 30% OFF) that includes the pattern and all the soft Feels Like Butta yarn needed to make this gorgeous sweater (4 color options available)!
I loved designing my Sea Breeze Sweater with its nautical vibe and simple construction! I used a unique super bulky tape yarn called “Fast-Track” for the Sea Breeze Sweater, and it was very quick to work up. I wanted to make another version of this sweater using thinner yarn for more drape, and to make it longer and cozier so that I could wear it over leggings! During the fall and winter months, long oversized sweaters and tunics over leggings are my uniform!
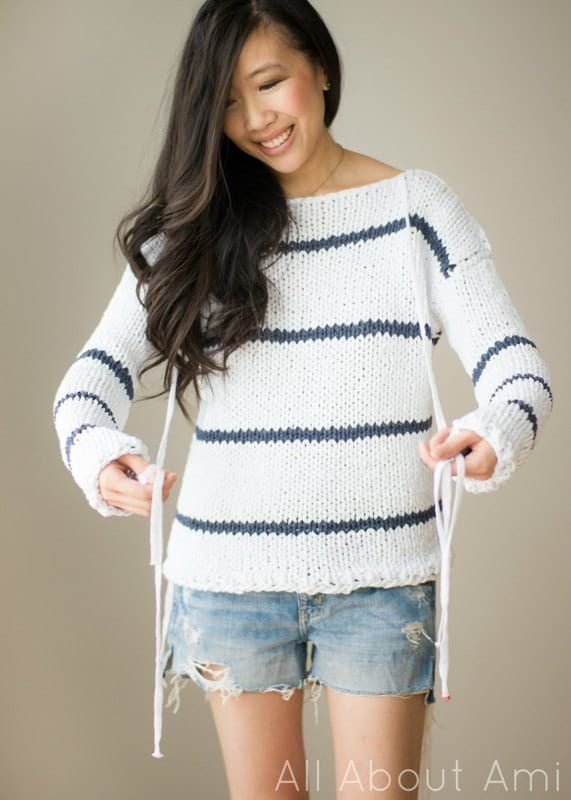
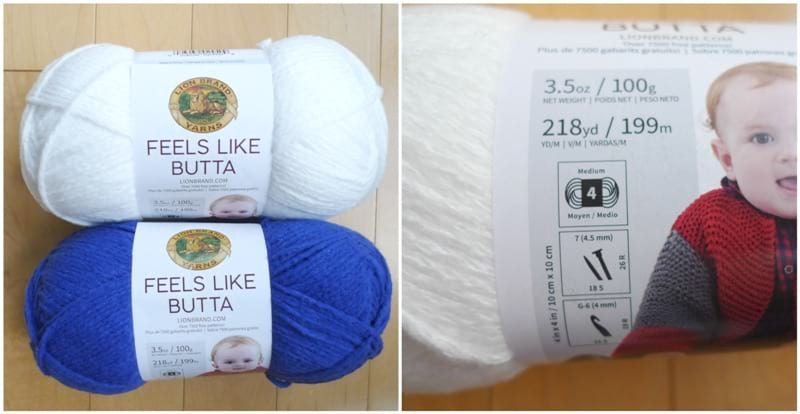
When we attended the Lion Brand Yarn Blogger Bash in January 2018, we were shown a preview of some upcoming yarns, and one of them was a beautifully soft yarn called “Feels Like Butta“. It is a worsted weight level 4 yarn that is 100% polyester with each skein being 3.5 oz/100 g and 218 yd/199 m. When I browsed through the colors available and saw this beautiful “Royal Blue” and “White“, I knew that this would be the perfect combination for my updated sweater. This yarn is one of the softest yarns I’ve ever felt and feels amazing against the skin! I knew that if I used this yarn to knit a sweater, it would be the most comfortable garment ever, and I would not want to take it off!
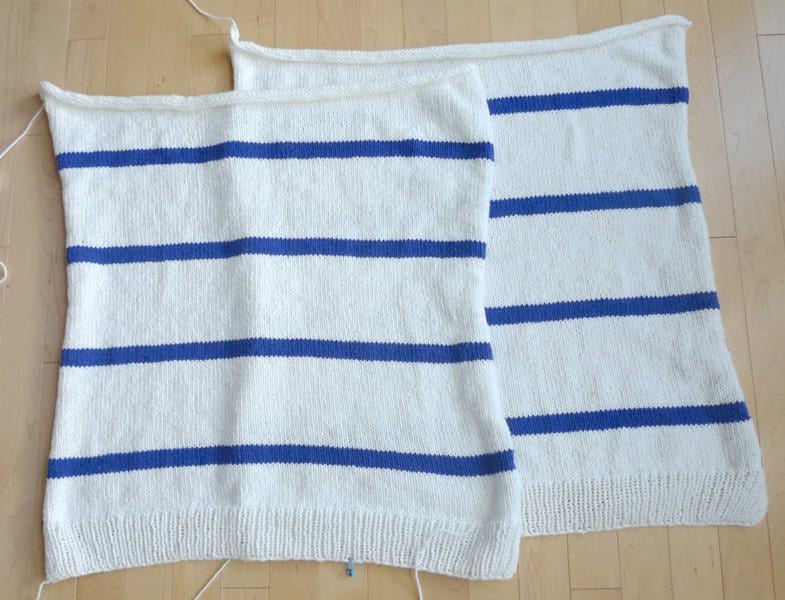
It was very fun knitting with this yarn and the front and back panels worked up quickly since it was broken down into color-blocked chunks. I started off with some bottom ribbing, then moved to stockinette, alternating between white and blue. I did not cut the yarns at all, but rather dropped them and picked them back up when I needed them. I made sure to leave enough slack along the sides for the blue yarn to be picked up again for the next stripe.
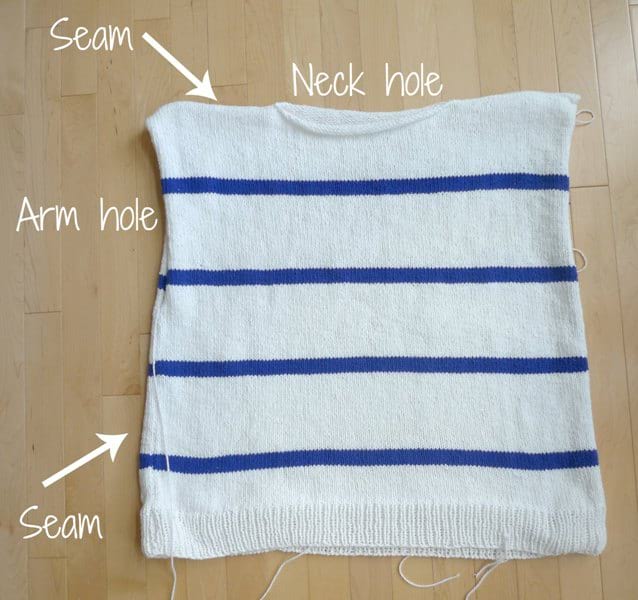
I used the mattress stitch to seam the sides together, making sure to leave arm holes. I whip stitched the shoulders and left a neck hole as well.
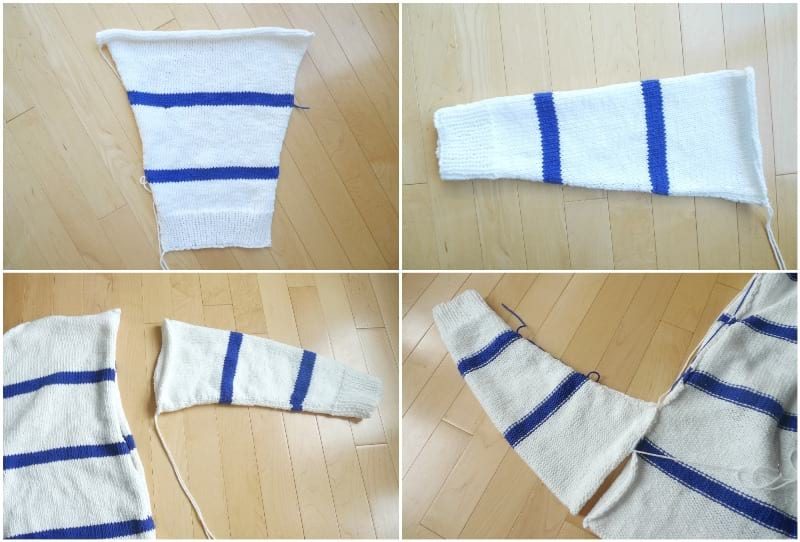
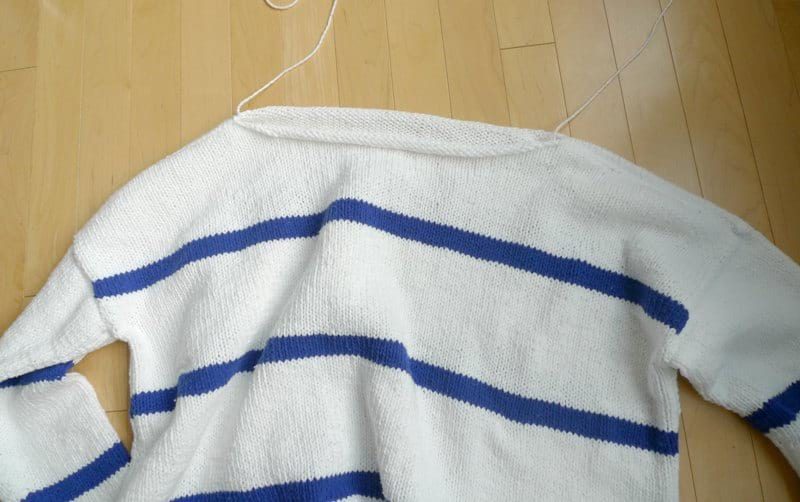
I made the front and back panels pretty wide since I wanted a loose and oversized fit. Since, the panels bend past the shoulders and become part of the sleeve, I did not need to make the sleeves too big. I made the sleeve with two blue stripes, whip stitched the edges together, and attached it to the armhole.
I love how the neckline rolls downward for a casual look. You could pick up stitches around the neckhole to create a turtleneck or add another edging if desired. You could also make the neckhole larger (seam less) for a more off-the-shoulder look along the neckline.
***************************************
Here is the FREE PATTERN for the Light Breeze Sweater!
***You can purchase an INEXPENSIVE AD-FREE PDF of this pattern on Etsy HERE and on Craftsy HERE! This beautifully formatted PDF includes the step-by-step pictures and pattern and is a total of 5 pages including the cover page! You can also find this pattern in my Easy & Modern Knits Pattern Bundle found HERE (includes over a dozen of my knit patterns at a discounted price)! Lion Brand Yarn has made a convenient kit HERE (currently 30% OFF) that includes the pattern and all the soft Feels Like Butta yarn needed to make this gorgeous sweater (4 color options available)!
Materials:
- Feels Like Butta Yarn (worsted weight level 4 yarn) in White and Royal Blue: see yardage below for different sizes
- Clover Takumi 22″ 5.5 mm and 6 mm circular needles
- Yarn needle
Approximate Yardage/Number of Skeins Required:
Small/Medium: White yarn: 5 skeins, ~480 g; Blue yarn: 1 skein, ~77 g
Large/XL: White yarn: 6 skeins, ~550 g; Blue yarn: 1 skein, ~85 g
2X/3X: 7 skeins, ~620 g; Blue yarn: 1 skein, ~93 g
Gauge: 19 stitches and 28 rows = 4 inches
Final Measurements:
- Width across back: 25″/63.5 cm (S/M), 27″/69 cm (L/XL), 29″/74 cm (2X/3X)
- Length: 25″/63.5 cm (S/M), 26″/66 cm (L/XL), 27″/69 cm (2X/3X)
- Sleeves: 15.5″/39 cm
Notes:
- KFB = Knit Front and Back Increase: Step 1: Knit the first stitch on your main needle. Step 2: Before taking the stitch off the main needle, insert the tip of your working needle into the backside of the loop and knit it through the back loop. Then pull the stitch off the needle. See tutorial and video on how to do KFB HERE on New Stitch A Day.
- When switching colours, do not cut the yarn. Simply carry the unused yarn up the side and pick it back up again when it is time to knit with it. Leave enough slack so that the sweater can still stretch.
Sizing Notes:
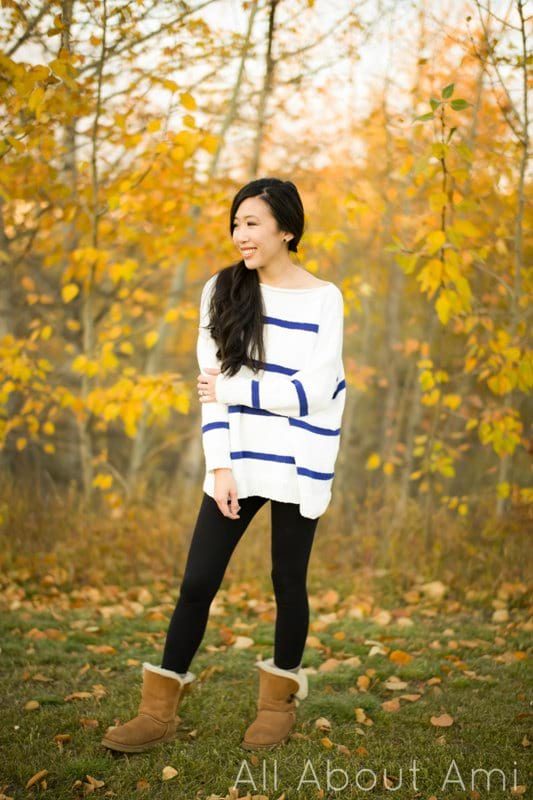
- The Light Breeze Sweater is designed to be loose, relaxed, and oversized with plenty of positive ease. Size down if you would like a tighter fit. I am wearing a size Small/Medium in the pictures.
- Part of the front and back panels become part of the sleeve as they bend past the shoulders.
- Increase the width of the top by casting on more stitches
- Increase the length of the top by knitting more rows.
- Each size increases by 2″ in width and 1″ in length for the front panels. The sleeves of each size increase by 2″ in width.
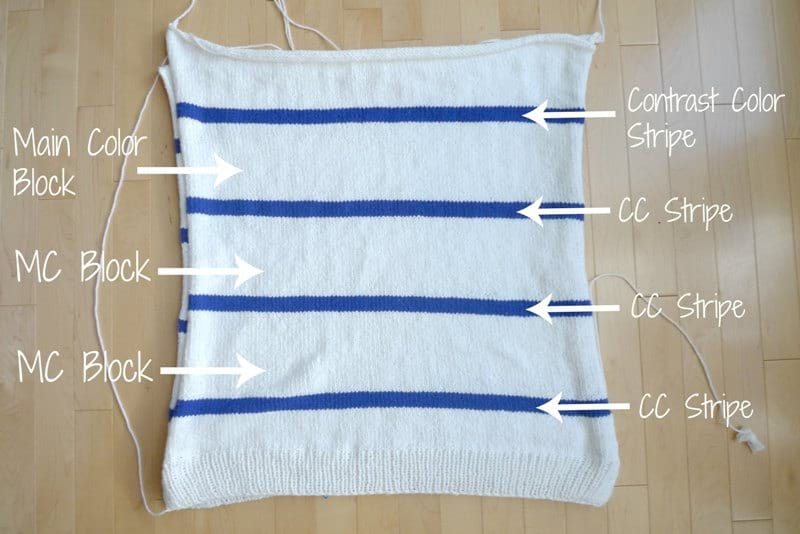
- The front and back panels consist of Four Contrast Color Stripes (blue) and 3 Main Color Blocks (white) positioned between the contrast color stripes.
- When increasing the length of the Large/XL size front and back panels, 6 additional Main Color (white) rows are added to the top. If you want the Contrast Color stripe (blue) to be closer to the top, add 2 extra MC row to each of the three Main Color Blocks positioned between the four Contrast Color stripes.
- When increasing the length of the 2X/3X size front and back panels, 14 additional Main Colour (white) rows are added to the top. If you want the Contrast Color stripe (blue) to be closer to the top, add 4-5 extra MC rows to each of the three Main Color Blocks positioned between the four Contrast Colour stripes (make sure the number adds up to 14, e.g. 4+5+5).
PATTERN:
Front and back panels (make 2)
Using 6 mm needles and Main Color,
Cast on 117 (128, 138) stitches using long tail cast-on.
Row 1: *Knit 1, Purl 1* till end. (117, 128, 138 sts)
{Note: For Size Large/XL and 2X/3X, keep repeating Row 1 for the rest of the ribbing since the stitch number is even.)
R2: *P1, K1* till end. {For Size Small/Medium since the stitch number is odd.}
R3-15: Repeat Rows 1 and 2
Switch to 5.5 mm needles,
R16: Knit all stitches.
R17: Purl all stitches.
R18-29: Repeat Rows 16-17.
Switch to CC [Contrast Color Stripe 1],
R30: Knit all stitches.
R31: Purl all stitches.
R32-35: Repeat R30-31
Switch to MC,
R36-65: Repeat Rows 16-17
Switch to CC [Contrast Color Stripe 2],
R66: Knit all stitches.
R67: Purl all stitches.
R68-71: Repeat Rows 65-66
Switch to MC,
R72-101: Repeat Rows 16-17.
Switch to CC [Contrast Color Stripe 3],
R102: Knit all stitches.
R103: Purl all stitches.
R104-107: Repeat Rows 102-103.
Switch to MC,
R108-137: Repeat Rows 16-17.
Switch to CC [Contrast Color Stripe 4],
R138: Knit all stitches.
R139: Purl all stitches.
R140-143: Repeat Row 138-139.
Switch to MC,
R144-173: Repeat Rows 16-17.
Cast off stitches for Small/Medium size. Leave long end for sewing.
R174-179: Repeat Rows 16-17.
Cast off stitches for Large/XL size. Leave long end for sewing.
R180-187: Repeat Rows 16-17.
Cast off stitches for 2X/3X size. Leave long end for sewing.
Sleeves (make 2)
Using 6 mm and Main Color,
Cast on 41 (51, 60 sts) using long tail cast-on method.
R1: *K1, P1* till end. (41, 51, 60 sts)
{Note: For Size 2X/3X, keep repeating Row 1 for rest of the ribbing since the stitch number is even.)
R2: *P1, K1* till end. (41, 51, 60 sts)
R3-15: Repeat Rows 1 and 2.
Switch to 5.5 mm needles,
R16: Knit all stitches. (41, 51, 60 sts)
R17: Purl all stitches. (41, 51, 60 sts)
R18: Repeat R16.
R19: Repeat R17.
R20: K2, KFB, K35 (45, 54), KFB, K2. (43, 53, 62 sts)
R21: Purl all stitches. (43, 53, 62 sts)
R22: Knit all stitches. (43, 53, 62 sts)
R23-25: Repeat R21-22.
R26: K2, KFB, K37 (47, 56), KFB, K2. (45, 55, 64 sts)
R27: Purl all stitches. (45, 55, 64 sts)
R28: Knit all stitches. (45, 55, 64 sts)
R29: Repeat R27.
Switch to CC,
R30: Knit all stitches.
R31: Purl all stitches.
R32: K2, KFB, K39 (49, 58), KFB, K2. (47, 57, 66 sts)
R33: Purl all stitches. (47, 57, 66 sts)
R34: Knit all stitches. (47, 57, 66 sts),
R35: Repeat R33.
Switch to MC,
R36: Knit all stitches. (47, 57, 66 sts)
R37: Purl all stitches. (47, 57, 66 sts),
R38: K2, KFB, K41 (51, 60), KFB, K2. (49, 59, 68 sts).
R39: Purl all stitches. (49, 59, 68 sts).
R40: Knit all stitches. (49, 59, 68 sts).
R41-43: Repeat R39-40.
R44: K2, KFB, K43 (53, 62), KFB, K2. (51, 61, 70 sts)
R45: Purl all stitches. (51, 61, 70 sts)
R46: Knit all stitches. (51, 61, 70 sts)
R47-49: Repeat R45-46.
R50: K2, KFB, K45 (55, 64), KFB, K2. (53, 63, 72 sts)
R51: Purl all stitches. (53, 63, 72 sts)
R52: Knit all stitches. (53, 63, 72 sts)
R53-55: Repeat R51-52.
R56: K2, KFB, K47 (57, 66), KFB, K2. (55, 65, 74 sts)
R57: Purl all stitches. (55, 65, 74 sts)
R58: Knit all stitches. (55, 65, 74 sts)
R59-61: Repeat R57-58.
R62: K2, KFB, K49 (59, 68), KFB, K2. (57, 67, 76 sts)
R63: Purl all stitches. (57, 67, 76 sts)
R64: Knit all stitches. (57, 67, 76 sts)
R65: Repeat R63.
Switch to CC,
R66: Knit all stitches. (57, 67, 76 sts)
R67: Purl all stitches. (57, 67, 76 sts)
R68: K2, KFB, K51 (61, 70), KFB, K2. (59, 69, 78 sts)
R69: Purl all stitches. (59, 69, 78 sts)
R70: Knit all stitches. (59, 69, 78 sts)
R71: Repeat R69.
Switch to MC,
R72: Knit all stitches. (59, 69, 78 sts)
R73: Purl all stitches. (59, 69, 78 sts),
R74: K2, KFB, K53 (63, 72), KFB, K2. (61, 71, 80 sts)
R75: Purl all stitches. (61, 71, 80 sts)
R76: Knit all stitches. (61, 71, 80 sts)
R77-79: Repeat Rows 74-76.
R80: K2, KFB, K55 (65, 74), KFB, K2. (63, 73, 82 sts)
R81: Purl all stitches. (63, 73, 82 sts),
R82: Knit all stitches. (63, 73, 82 sts)
R83-85: Repeat Rows 81-82
R86: K2, KFB, K57 (67, 76), KFB, K2. (65, 75, 84 sts)
R87: Purl all stitches. (65, 75, 84 sts)
R88: Knit all stitches. (65, 75, 84 sts)
R89-91: Repeat Rows 87-88
R92: K2, KFB, K59 (69, 78), KFB, K2. (67, 77, 86 sts)
R93: Purl all stitches. (67, 77, 86 sts)
R94: Knit all stitches. (67, 77, 86 sts)
R95-97: Repeat R93-94.
R98: K2, KFB, K61 (71, 80), KFB, K2. (69, 79, 88 sts)
R99: Purl all stitches. (69, 79, 88 sts)
R100: Knit all stitches. (69, 79, 88 sts)
R101-103: Repeat R99-100.
R104: K2, KFB, K63 (73, 82), KFB, K2. (71, 81, 90)
R105: Purl all stitches.
Cast off knitwise and leave long end for sewing
Dimensions: 15.5″ in length, 7.5″ across at cuff, 15″ at widest point for Small/Medium. Widest point for L/XL is 17″, widest point for 2X/3X is 19″.
Assembly:
- Fold each sleeve in half lengthwise and use mattress stitch to seam sides together.
- Use mattress stitch to seam sides of front and back panels together. Place sleeve towards top of panels to see how much space is needed for arm holes. Seam approximately 18″ along sides and leave an arm hole for where we will attach the sleeves.
- Whip stitch top of front and back panels together approximately 8.5″ on each side, leaving space for neck/head hole (you can also use the horizontal invisible seaming technique but it adds bulk). Leave a bigger neck hole if you want a more off-the-shoulder look. The neckline will have a beautiful rolled effect.
- Whip stitch top of sleeve to arm hole.
- Fasten off and weave in all ends.

****************************************
I am in love with my new Light Breeze Sweater as it is so incredibly soft against the skin and looks so stylish with its classic stripes!
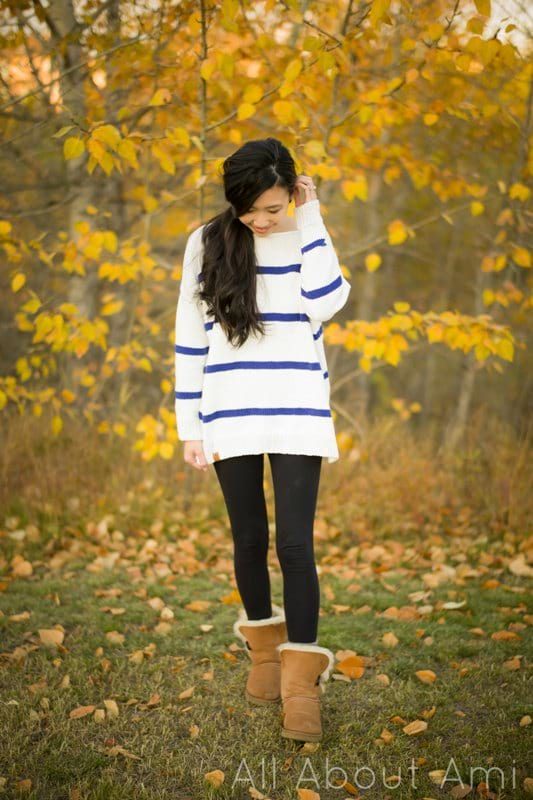
The relaxed neckline and dropped shoulders give such a chic, laid-back vibe!
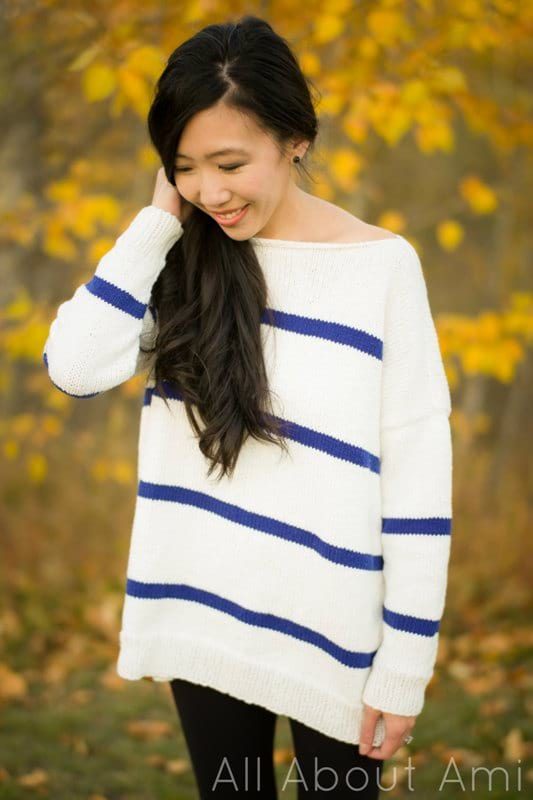
I think this royal blue looks so striking against the white- you could try different color combinations as Feels Like Butta comes in some beautiful shades! The stripes look so crisp and well-defined with this unique yarn!
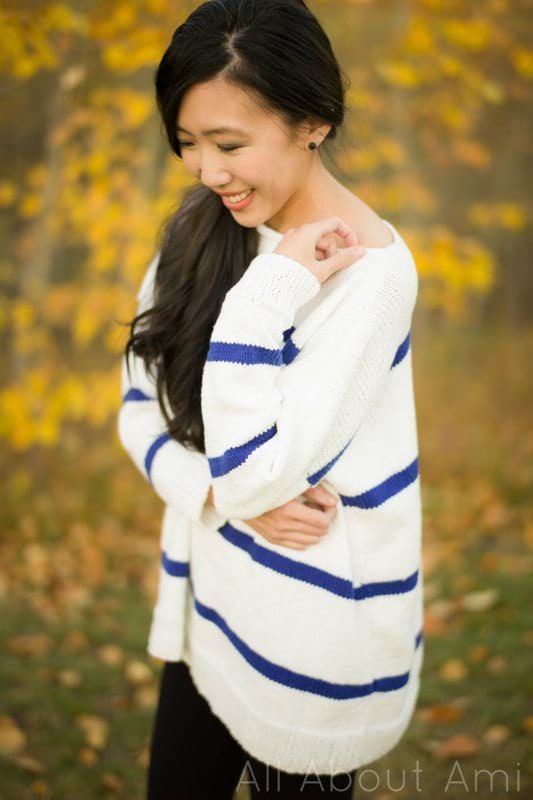
My favourite sweaters are loose and oversized, and I was definitely channeling all those relaxed and baggy pull-overs that I always see in Korean, Japanese, and Chinese style websites when I designed this piece!

It is such an amazing feeling when you wear an item that you have been diligently working on. There are very few yarns that I would want directly against my skin, and Feels Like Butta is definitely one of them! You won’t want to take it off as it is like your favorite sweatshirt- loose, relaxed, and comfortable!
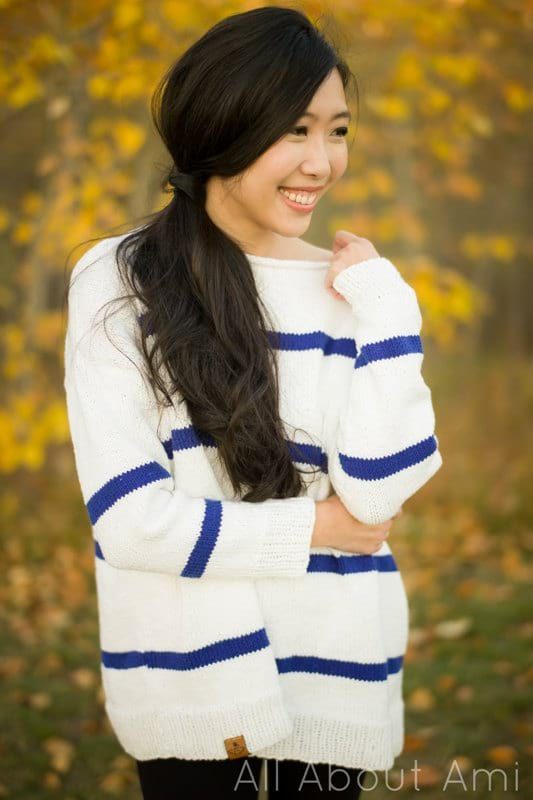
As I stated before, my go-to outfits for the fall and winter are long tops over leggings! This Light Breeze Sweater is perfect to throw on over a pair of leggings for a stylish and comfortable outfit- people will not believe that you made this top as it looks like it could be store-bought with this unique yarn!
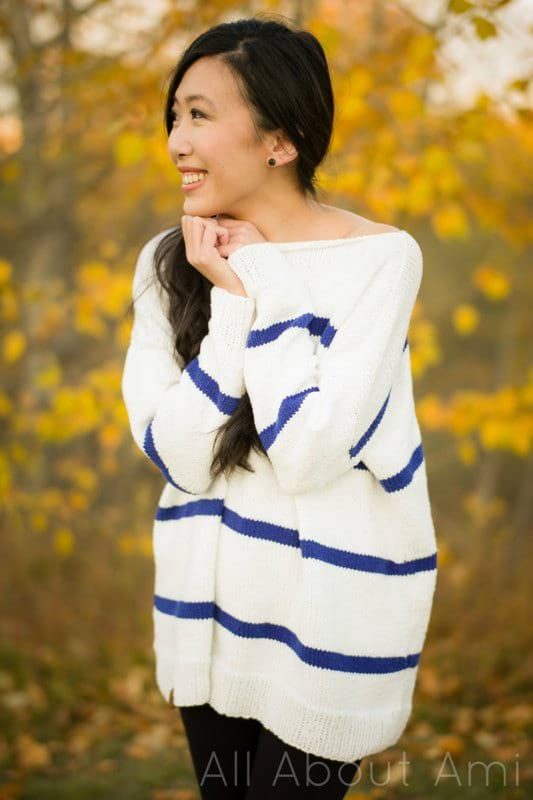
I’m glad we got to take some shots of the Light Breeze Sweater before the leaves turned colors and the trees became bare! This sweater can be worn year-round as it is perfect for the fall and winter, but I would also wear it with capris or shorts and fold up the sleeves in the Spring and Summer!

I hope I have inspired you to try knitting your own loose and relaxed striped sweater! If you have been wanting to learn how to knit, be sure to check out my “Simple Knit Series” as I teach how you to knit stockinette with detailed step-by-step photos and video tutorials- check out the “How to Knit Stockinette” tutorial HERE! Lion Brand Yarn has also put together a convenient kit HERE for my Light Breeze Sweater, and there are 4 different color options available- it contains all the Feels Like Butta yarn that you’ll need as well as the pattern! I HIGHLY recommend you snag it now as the kit is 30% off this week only, so the size Small/Medium is only $20.99– what a deal! Subscribe to my e-mail newsletter HERE to keep up-to-date with my work! Happy knitting, everyone!

This post is sponsored by Lion Brand Yarn! I’ve loved working with their yarn throughout the years and I’m thrilled that I get to collaborate with them every month!}
This pattern is an original pattern by Stephanie Lau of All About Ami. Please do not claim this pattern as your own. If you wish to share this pattern, you may link to this pattern but please do not reprint it on your site. You may keep a copy for your own personal use but please DO NOT sell the pattern or distribute it.
You may sell products made from this pattern but please clearly credit the design to me, Stephanie Lau of All About Ami, and provide a link to my blog www.AllAboutAmi.com. Permission is NOT granted for mass production or factory manufacturing of any kind. Thank you for being respectful and for your understanding!


