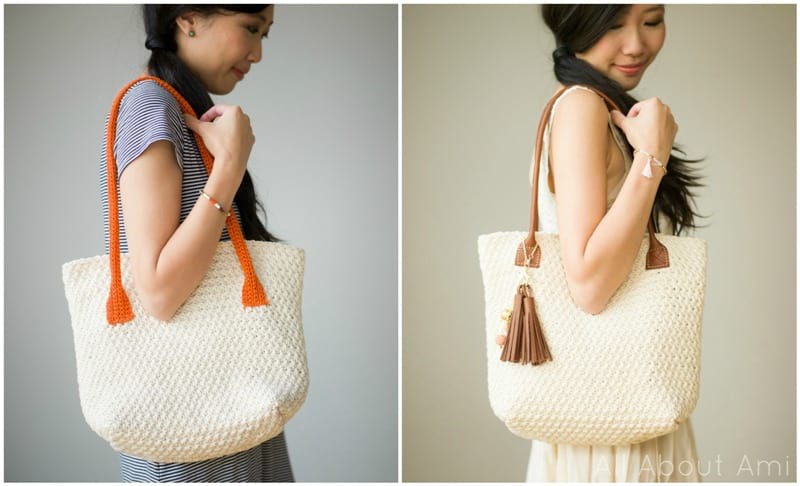
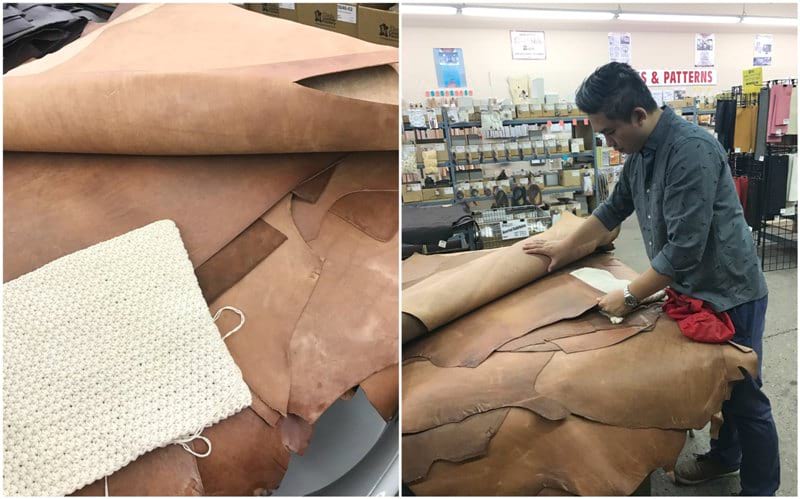
I love mixing materials for projects, and when I was designing my first crocheted purse, we knew what we wanted to add: luxurious leather handles! We had no idea where to begin as we had never worked with leather before. I scoured online shops to look for ready-made leather handles and found ones of various dimensions, but we did not know exactly what dimensions we would need. On the recommendation of my friend Diane of BrickBubble, we went to our local Tandy Leather store to take a look around. The staff was very knowledgeable and helpful and we decided to try and make our own straps! Ryan had always wanted to try his hand at leatherwork, and this was our chance! Thus, we purchased a large piece of leather at a great price of only $40 Canadian (they were having a Canada Day sale)! We liked this particular colour and thought it would look striking against our cream crocheted purse!
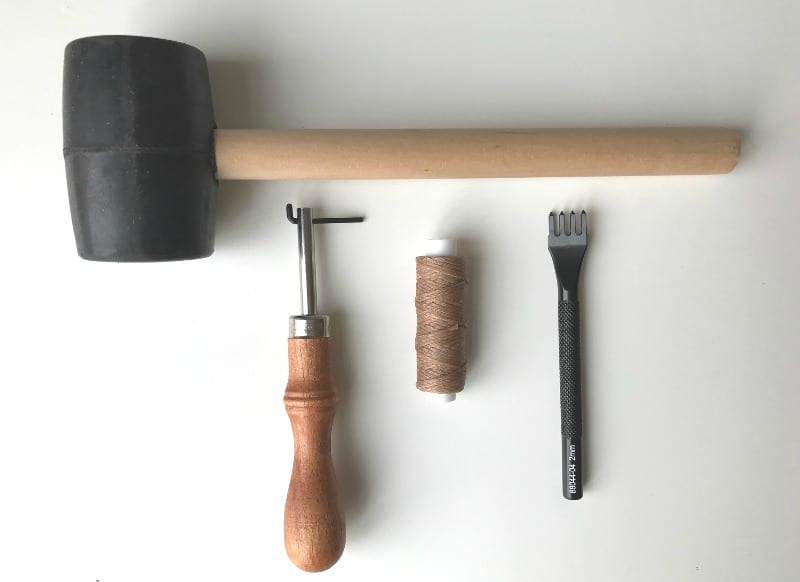
We did have to invest in some leather tools to make our own purse handles, but since we knew we wanted to work with more leather in the future, we decided to go for it. We purchased a rubber mallet from Oomomo ($3 Japanese store), an adjustable groover, diamond punch, and beige waxed braided cord (all from Tandy Leather but also available on Amazon when you click the links).
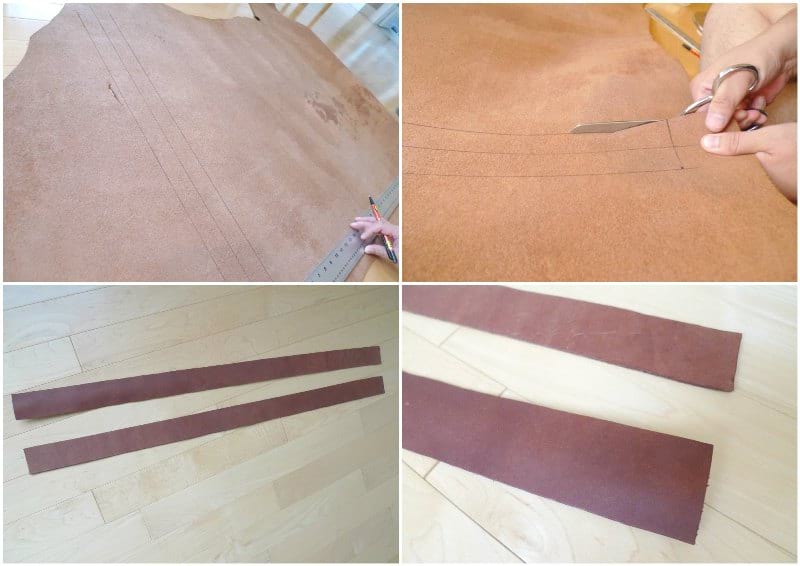
First, Ryan measured how long and wide we wanted our straps to be. We cut them 27″ long and 1.5″ wide using fabric scissors. It’s neat how we could choose our own dimensions!
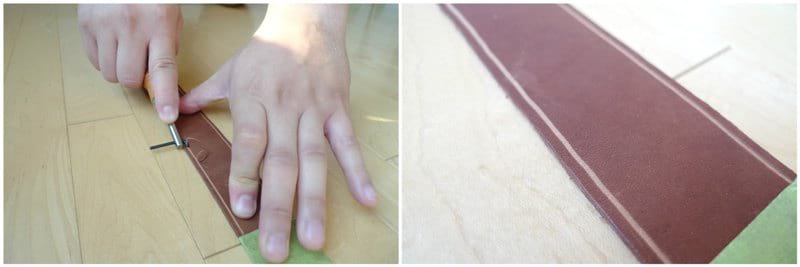
Next, Ryan used an adjustable groover to make grooves along the edges of the straps. By creating a groove, this allows the stitches to be flush with the leather instead of sticking out.
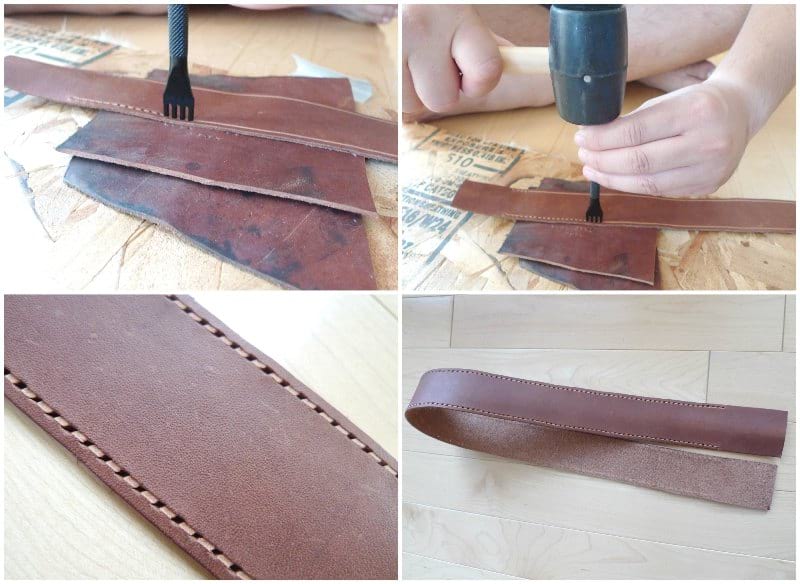
Ryan then used a diamond punch (ours was a 4 prong, 2 mm) and a rubber mallet to create holes along the grooves.
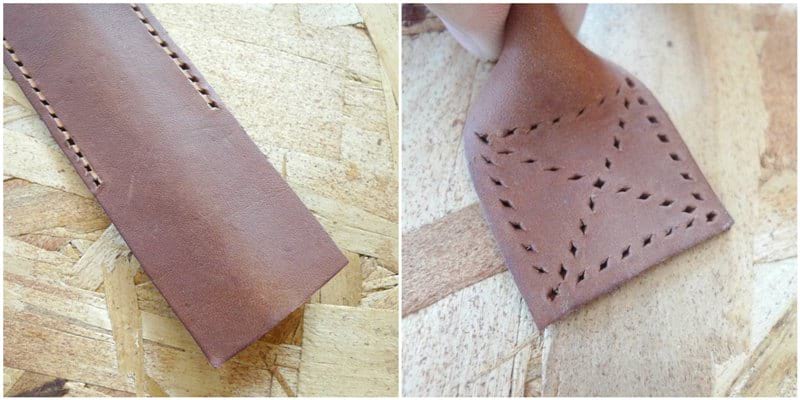
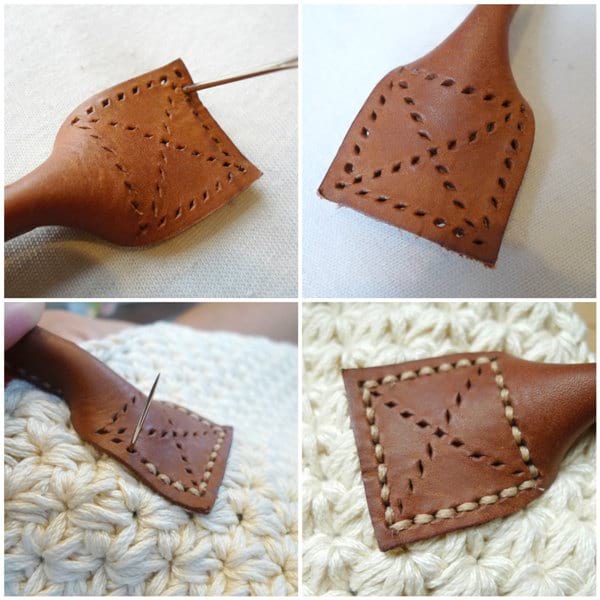
At the bottom of each strap, Ryan created this square and X design!
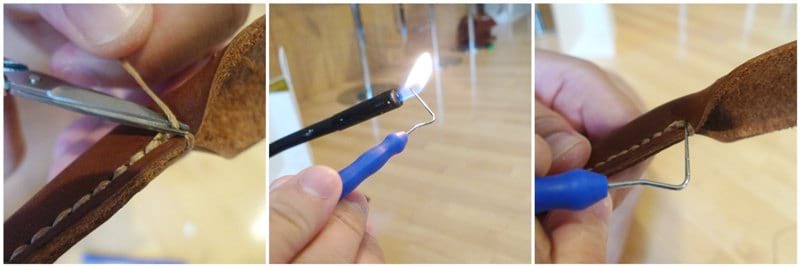
Next, Ryan used beige waxed braided cord and a needle to sew the edges together. He used the saddle stitch technique as demonstrated HERE.
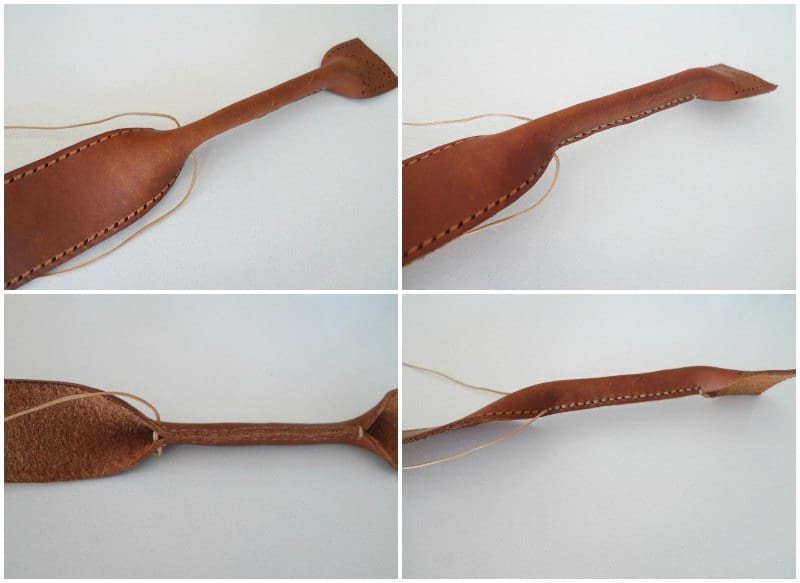
Since this is waxed cord, you can melt the ends together at the end. After snipping the end, Ryan applied heat to the waxed cord to seal it in place.
I tried to make the holes a little larger by wiggling a yarn needle in each hole. Ryan then positioned the straps and sewed the bottom squares onto the crochet purse using the back stitch about 2.5″/6.4 cm from the top (bottom of square to top of bag) and 2.5″/6.4 cm from the sides. We then cut and melted the ends to secure them.
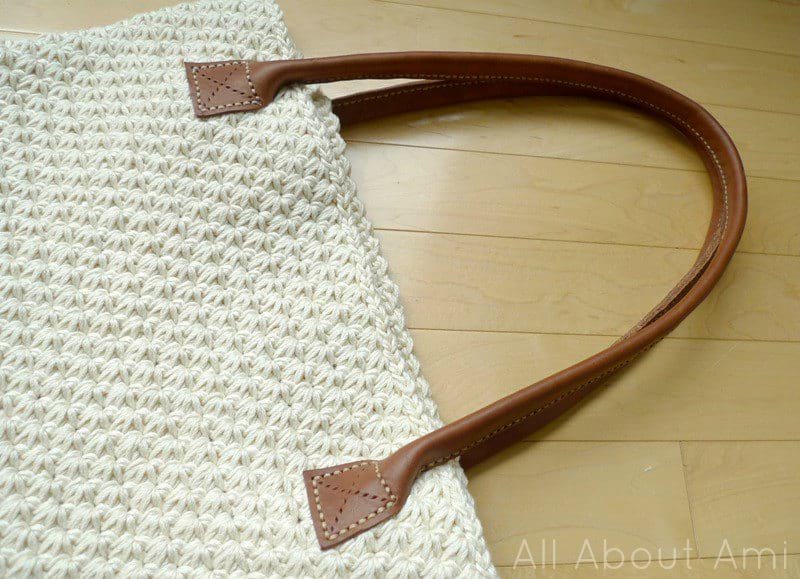
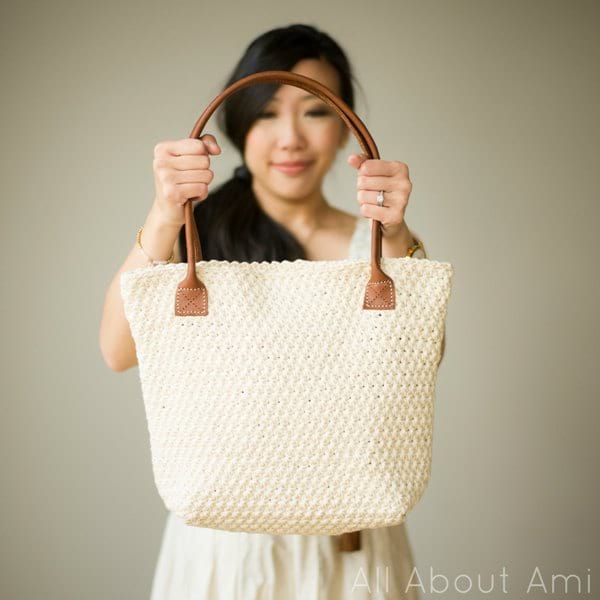
Here are our finished leather straps! Aren’t they absolutely amazing? I couldn’t believe that Ryan cut and sewed these from scratch with no prior leather experience!
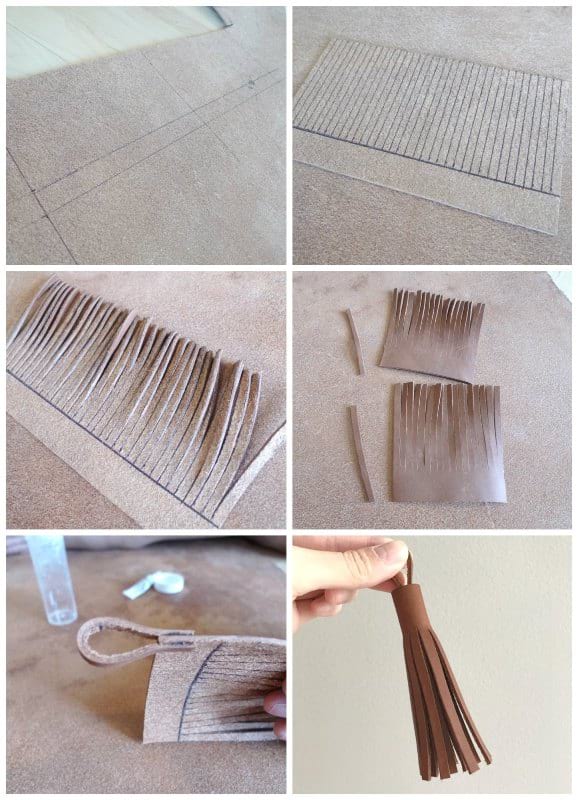
Since we had so much leather left, we decided to make some decorative elements for our purse: tassels! We followed this very helpful tutorial HERE to learn how to create a tassel! We measured our leather rectangle to be 10 cm long and 9 cm wide with each strand being 0.5 cm wide. Since our leather was thicker than the one in the tutorial, we ended up cutting our rectangle in half and creating two tassels. Our thin strap for the loop was 8 cm x 0.5 cm.
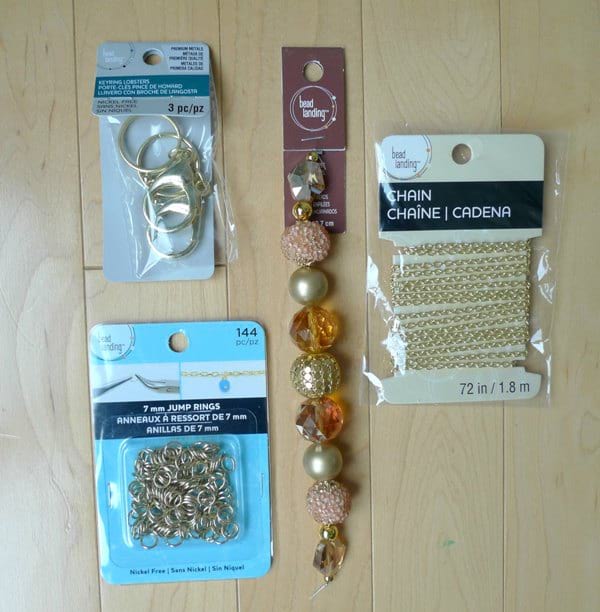
We decided to create some bag charms as well! We found these materials from Michaels including keyring lobsters, jump rings, ornate beads, and chains! We already had the jewelry tools needed such as round nose pliers and cutters and headpins as well.
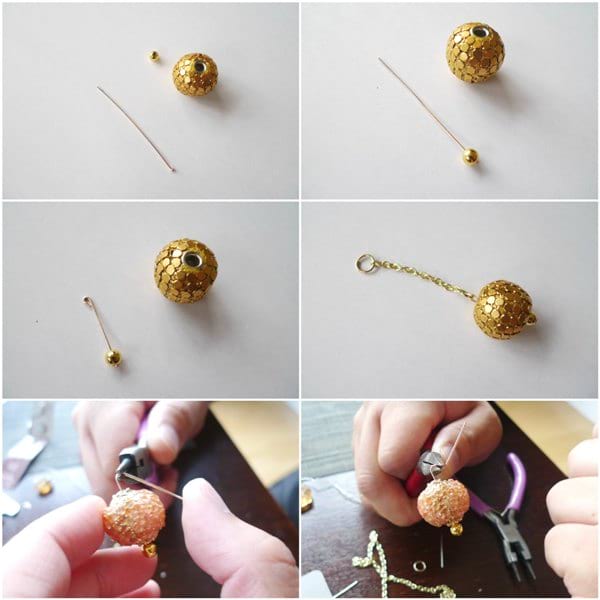
We strung the beads we wanted on a headpin, curved the top, and connected it to a chain with a jump ring.
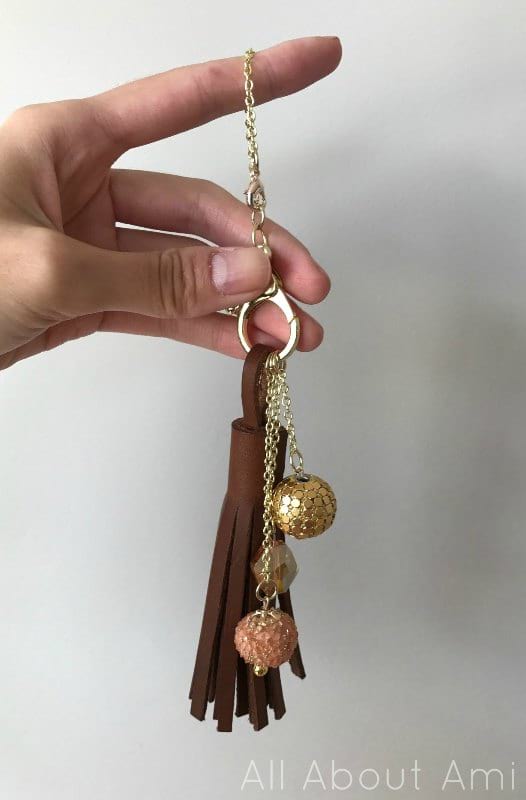
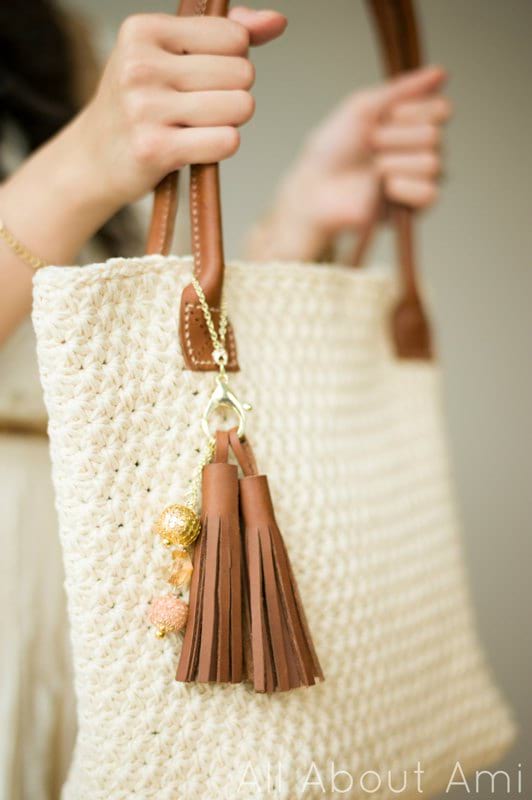
We strung all the jump rings and leather tassel onto the big lobster keyring! To attach these decorative elements to our purse, we used a chain with a lobster clasp so that it could be easily removed and attached!
We took some video clips of the making of the leather handles, tassels and purse charms along the way! I put them together into this video called “Leather Embellishments for the Star Stitch Purse” which you can view below!
******************
How to Make Leather Handles:
***You can purchase an INEXPENSIVE AD-FREE PDF of the Star Stitch Purse pattern on Etsy HERE and on Craftsy HERE! This beautifully formatted PDF includes the step-by-step pictures, the full star stitch tutorial, the full pattern, and the crochet & leather handle tutorials! It is a total of 13 pages including the cover page!
Materials:
-
- Leather (you can purchase pre-cut leather straps HERE [not as wide as mine] or find the size that you want)
- Adjustable Groover
- Diamond Punch (we used a 4 prong, 2 mm)
- Waxed Braided Cord
- Rubber Mallet
- Needle
Dimensions: 27″/69 cm long, 0.75″/1.9 cm wide (once sewed together and flattened)
Cut leather straps so that they are 27″/69 cm long and 1.5″/3.8 cm wide.
Using adjustable groover, form grooves along each edge of both handles so that the stitches will be flush with the leather.
Using diamond punch (2 mm) and rubber mallet, poke holes along both edges of each strap. Poke holes to form square at bottoms of both straps. Poke holes to form an X within each square.
Pinch sides of leather strap together and use waxed cord to sew them together using the saddle stitch as demonstrated HERE. Sew squares onto crocheted bag, approximately 2.5″/6.4 cm from top (bottom of square to top of bag) and 2.5″/6.4 cm from sides. Cut ends and melt to secure them.
If you’d like to see how to attach leather handles to a crochet purse using RIVETS, check out Make and Do Crew‘s tutorial HERE!
*******************
These leather handles add such a luxurious look to my crocheted Star Stitch Purse! They are very comfortable on my shoulders when I carry my handmade bag!
The tassels and bead charms add such a pretty decorative look as well!
If you would like to learn how to make crocheted handles with minimal stretch, check out my tutorial HERE! The free pattern for my Star Stitch Purse can also be found HERE! I hope you enjoyed reading about our adventures in leather crafting and that you’re inspired to try some new crafts that you’ve always been interested in as well!
