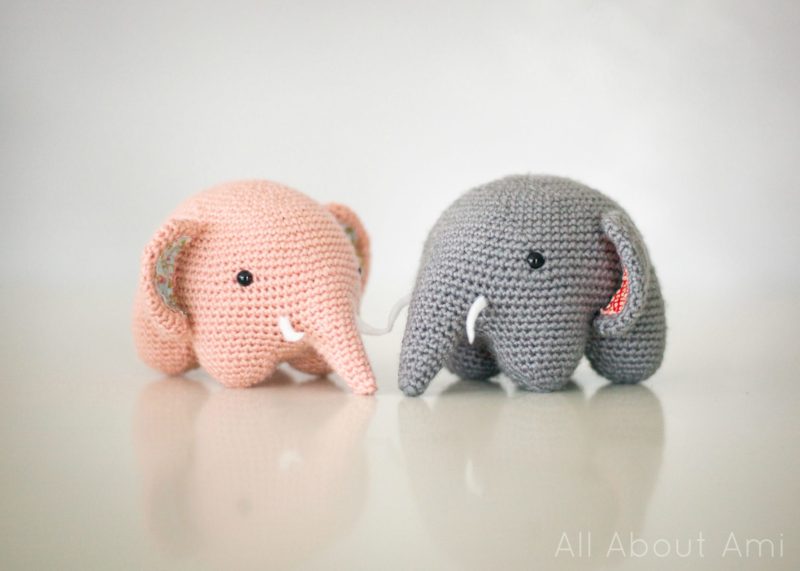
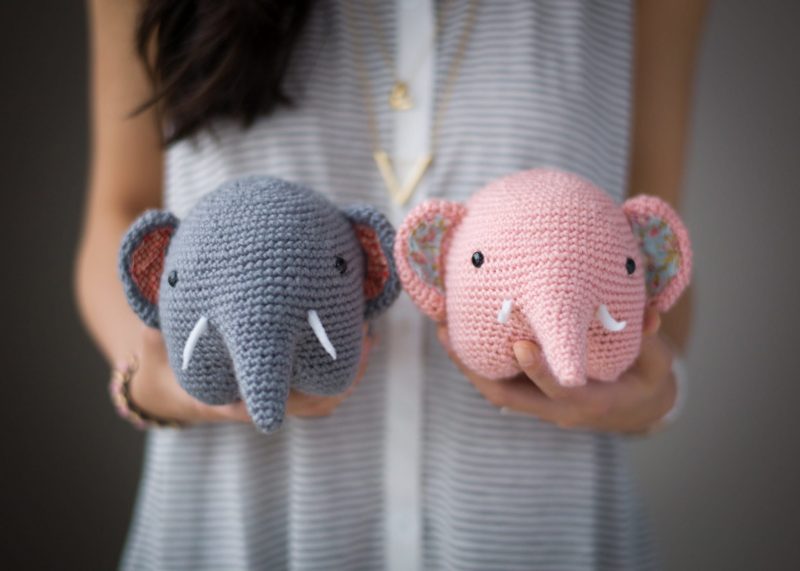
Crochet these absolutely adorable, whimsical elephants with a brilliant amigurumi technique that requires minimal attaching. Make them in a multitude of colours and add some fabric lining to the ears as a pretty touch! This elephant is an original design by Japanese artist Chisachi Kushima. For the Spanish translation, see Rani’s post HERE on “Amigurumies”, and for the French translation, see Fannie’s post HERE on “Petite Maille”. Below is the English pattern that I have translated!
Materials:
- grey or pink yarn (I used Lion Brand’s Vanna’s Choice in “Pink and Silver Grey”)
- Clover Amour 2.5 mm or 2.75 mm crochet hook (I used a 2.75 mm hook)
- bent tip tapestry needle
- fiberfill
- 6 mm or 9 mm safety eyes (I used 9 mm)
- Clovers stitch markers
- fabric for lining of ears
- white felt for tusks
Note: I worked in continuous rounds (vs. joined rounds). ***PLEASE follow along with my blog post HERE to see many more step-by-step photos. It is also VERY IMPORTANT that the “right” side of amigurumi is facing outwards for this project, otherwise the stitches of the body and the legs will look different. Please read about the “Right Side of Amigurumi” HERE to learn more!
Body:
Ch 9 ( this is the foundation chain),
R1: Starting from second chain from hook, Sc 7 in back loops of foundation chain. 3 sc in last stitch. Turn the chain, Sc 6 in front loops of foundation chain, then 1 inc in next front loop [we are making an oval by crocheting around the chain]. (18 sts)
***To see a step-by-step tutorial on how to crochet around a foundation chain, please see HERE!
R2: 1 inc, 6 sc, 3 inc, 6 sc, 2 inc (24)
R3: 8 sc, 1 inc, 1 sc, 1 inc, 1 sc, 1 inc, 11 sc (27)
R4: 1 inc, 9 sc, 1 inc, 2 sc, 1 inc, 2 sc, 1 inc, 6 sc, 1 inc, 1 sc, 1 inc, 1 sc (33)
R5: 2 sc, 1 inc, 6 sc, 1 inc, 3 sc, 1 inc, 3 sc, 1 inc, 11 sc, 1 inc, 2 sc, 1 inc (39)
R6: 1 inc, 11 sc, 1 inc, 4 sc, 1 inc, 4 sc, 1 inc, 8 sc, 1 inc, 3 sc, 1 inc, 3 sc (45)
R7: 15 sc, 1 inc, 5 sc, 1 inc, 5 sc, 1 inc, 17 sc (48)
R8: 2 sc, 1 inc, 14 sc, 1 inc, 6 sc, 1 inc, 6 sc, 1 inc, 8 sc, 1 inc, 4 sc, 1 inc, 2 sc (54)
R9: 4 sc, 1 inc, 7 sc, 1 inc, 7 sc, 1 inc, 7 sc, 1 inc, 17 sc, 1 inc, 5 sc, 1 inc, 1 sc (60)
R10: 6 sc, 1 inc, 8 sc, 1 inc, 8 sc, 1 inc, 8 sc, 1 inc, 18 sc, 1 inc, 6 sc, 1 inc (66)
R11: 1 sc in each sc (66)
R12: 1 inc, 17 sc, 1 inc, 9 sc, 1 inc, 9 sc, 1 inc, 11 sc, 1 inc, 7 sc, 1 inc, 7 sc (72)
R13: 1 sc in each sc (72)
R14: 2 sc, 1 inc, 18 sc, 1 inc, 10 sc, 1 inc, 10 sc, 1 inc, 12 sc, 1 inc, 8 sc, 1 inc, 6 sc (78)
R15: 1 sc in each sc (78)
R16: 4 sc, 1 inc, 19 sc, 1 inc, 11 sc, 1 inc, 11 sc, 1 inc, 13 sc, 1 inc, 9 sc, 1 inc, 5 sc (84)
R17: 1 sc in each sc (84)
R18: 6 sc, 1 inc, 20 sc, 1 inc, 12 sc, 1 inc, 12 sc, 1 inc, 14 sc, 1 inc, 10 sc, 1 inc, 4 sc (90)
R19-22: 1 sc in each sc (90)
R23: 39 sc, chain 6 (skip 12 sc to create the hole for the trunk), 39 sc (84)
R24: 37 sc, 1 dec, 6 sc, 1 dec, 37 sc (82)
R25: 1 sc in each sc (82)
Cut the yarn. Leave a marker in the last sc of Row 25. Work by rows for the next part. We will now be crocheting the tab that falls below the trunk.
R26: Skip 37 sc. Rejoin yarn and make 8 sc (8)
R27: Ch 1, turn, 1 sc in each sc (8)
R28: Ch 1, turn, 1 dec, 4 sc, 1 dec (6)
R29: Ch 1, turn, 1 dec, 2 sc, 1 dec (4)
R30: Ch 1, turn, 2 dec (2)
Fasten off.
We have now created a tab that falls below the trunk.
Place safety eyes between Rounds 16-17.
Legs:
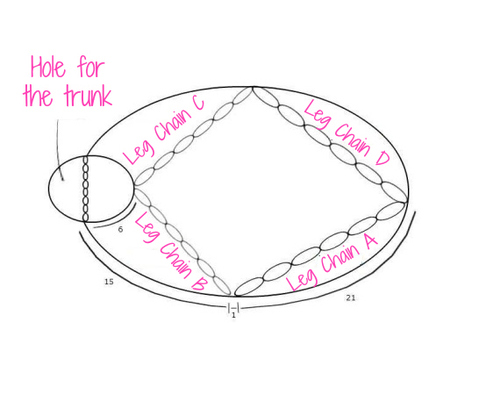
In order to create the legs, we will divide the body into leg chains. Each leg chain consists of 6 chains and we will be making 4 leg chains (A-D) in total.
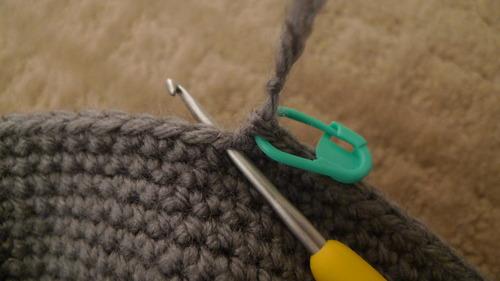
Leg Chain A: Join to one end of the last sc of R25 (see pic below), chain 6, count 21 sc, join with sl st to this end.
Leg Chain B: Continuing on from Leg Chain A, Ch 6. Sl stitch to last stitch of Row 30 of the tab.
Leg Chain C: Continuing on from Leg Chain B (the first end is in the last stitch of Row 30), chain 6, then count 15 sc from the beginning of the base of the tab of R25 and join with sl st..
Leg Chain D: Continuing on from Leg Chain C, Chain 6 then join with sl stitch to last stitch of R25 (where your stitch marker is). Do not cut yarn.
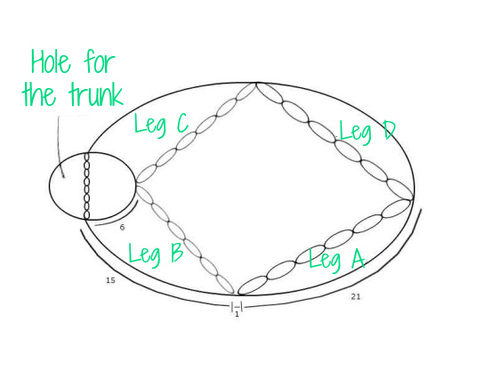
We will now be working on each individual leg, crocheting around the body and the leg chains that we have just created.
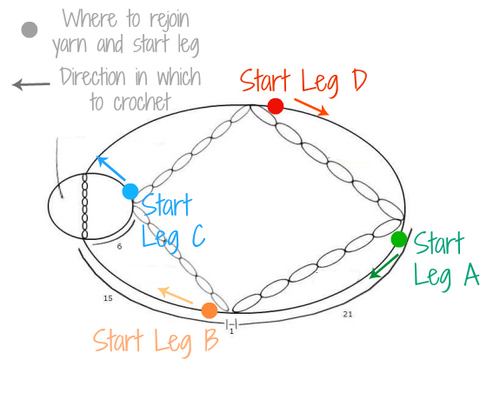
Leg A:
Starting from last stitch of Row 25 (so where the marker was, i.e. no need to cut the yarn from before, simply continue working):
R1: 21 sc (of the body), 6 sc (of the leg chain A) (27)
R2: 1 sc in each sc (27)
R3: 5 sc, 1 dec, 12 sc, 1 dec, 6 sc (25)
R4: 17 sc, 1 dec, 6 sc (24)
R5: *2 sc, 1 dec* repeat around (18)
R6: *1 sc, 1 dec*, repeat around (12)
R7: 6 dec
Fasten off and weave in end.
Leg B:
Count 23 stitches from where marker was in Row 25 (or as indicated in diagram above) and rejoin yarn.
R1: 15 sc (of the body), 6 sc (along the edge of the tab), 6 sc (of the leg chain B) (27)
R2: 1 sc in each sc (27)
R3: 1 dec, 12 sc, 1 dec, 11 sc (25)
R4: 1 dec, 23 sc (24)
R5: *2 sc, 1 dec*, rep around (18)
R6: *1 sc, 1 dec*, rep around (12)
R7: 6 dec
Fasten off and weave in end.
Leg C:
Begin in the last stitch of Row 30 (the tab) or as indicated in diagram above and rejoin yarn.
R1: 6 sc (along the edge of the tab), 15 sc (of the body), 6 sc (of the chain C) (27)
R2: 1 sc in each sc (27)
R3: 5 sc, 1 dec, 12 sc, 1 dec, 6 sc (25)
R4: 17 sc, 1 dec, 6 sc (24)
R5: *2 sc, 1 dec*, rep around (18)
R6: *1 sc, 1 dec*, rep around (12)
R7: 6 dec
Fasten off and weave in end.
Leg D:
Rejoin yarn in the body in the stitch next to Leg C (as indicated in diagram above).
R1: 21 sc (of the body), 6 sc (of the leg chain C) (27)
R2: 1 sc in each sc (27)
R3: 1 dec, 12 sc, 1 dec, 11 sc (25)
R4: 1 dec, 23 sc (24)
R5: *2 sc, 1 dec*, rep around (18)
R6: *1 sc, 1 dec*, rep around (12)
R7: 6 dec
Fasten off and weave in end.
Trunk:
Rejoin yarn in the hole left for the trunk. Rejoin in stitch in the middle of the tab (tab edge consists of 6 sts).
R1: 3 sc (half of the tab), 12 sc (of the body), 3 sc (other half of the tab) (18)
R2: 1 sc in each sc (18)
R3: *1 dec, 4 sc*, rep 3 times (15)
R4-5: 1 sc in each sc (15)
R6: *1 dec, 3 sc*, rep 3 times (12)
R7-8: 1 sc in each sc (12)
R9: *1 dec, 2 sc*, rep 3 times (9)
R10: 1 sc in each sc (9)
R11: *1 dec, 1 sc*, rep 3 times (6)
Fasten off and weave in end.
Belly:
R1: 6 sc in the MR (6)
R2: 6 inc (12)
R3: *1 inc, 1 sc*, rep around (18)
R4: *1 inc, 2 sc*, rep around (24)
Stuff body and trunk firmly. To close the belly, attach the crocheted belly piece to the edges of the four leg chains. The belly piece should fit in perfectly since it consists of 24 stitches while the leg chains each consist of 6 chains (i.e. four leg chains x 6 chains = 24 stitches).
Ears (make 2):
Ch 7 ( this is the foundation chain),
R1: Starting from second chain from hook, Sc 5 in back loops of foundation chain. 3 sc in last stitch. Turn the chain, Sc 4 in front loops of foundation chain, then 1 inc in next front loop [we are making an oval by crocheting around the chain]. (14 sts)
R2: 1 inc, 4 sc, 3 inc, 4 sc, 2 inc (20)
R3: 1 sc, 1 inc, 5 sc, 1 inc, 1 sc, 1 inc, 1 sc, 1 inc, 5 sc, 1 inc, 1 sc, 1 inc (26)
R4: 1 sc, 1 inc, 8 sc, 1 inc, 1 sc, 1 inc, 1 sc, 1 inc, 8 sc, 1 inc, 1 sc, 1 inc (32)
R5-6: 2 hdc, 9 sc, 7 hdc, 9 sc, 5 hdc (32)
R7: *1 dec, 8 sc, 1 dec, 4 sc*, rep twice (28)
Fasten off and leave long end for sewing. Fold crocheted piece in half so that it curves inwards. Sew fabric onto inner part of ears. Sew open piece shut. Attach ears to body.
Tail:
R1: 4 sc in the MR (4)
R2: 1 sc in each sc (4)
R3: *1 inc, 1 sc*, rep twice (6)
R4: 1 sc in each sc (6)
R5: *1 inc, 2 sc*, rep twice (8)
R6-7: 1 sc in each sc (8)
Fasten off and leave long end for sewing. Attach to body.
Tusks (optional):
Cut tusks out of white felt. Attach with glue gun with tusks pointing upwards or downwards.
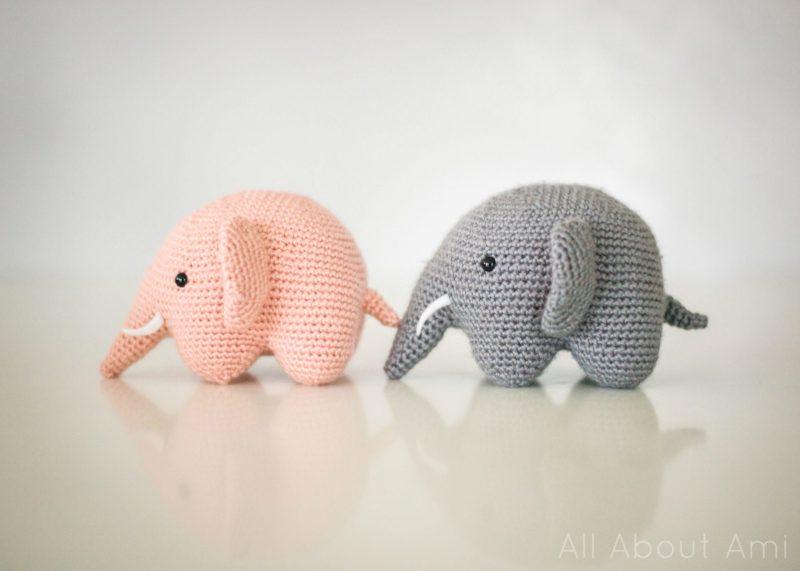
Now you’re done! Enjoy your sweet elephants and don’t forget to follow me on Facebook, Twitter and Instagram for more crafty and crochet updates!
This pattern is an English translation by Stephanie of All About Ami (April 2014). Please do not reprint this translation on your site.
Amazon affiliate links:


