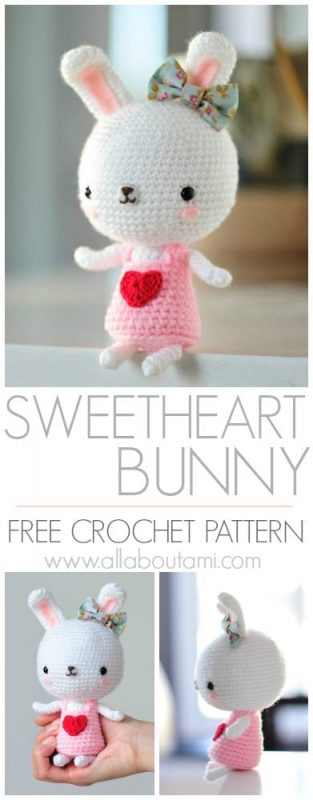
***You can purchase an INEXPENSIVE AD-FREE PDF of this pattern on Etsy HERE. The printable PDF with step-by-step pictures has been condensed into a total of 4 pages including the cover page! You can follow along with my detailed step-by-step tutorial HERE!
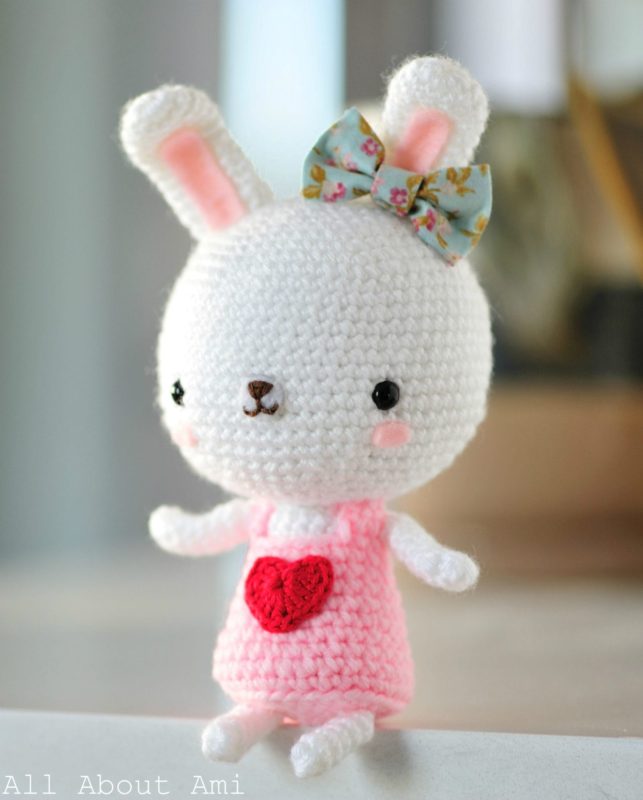
Crochet this adorable Sweetheart Bunny for your friends and family to show them your love this Valentine’s Day! This little sweetie with her dainty heart, pretty bow, and pink dress will warm your heart!
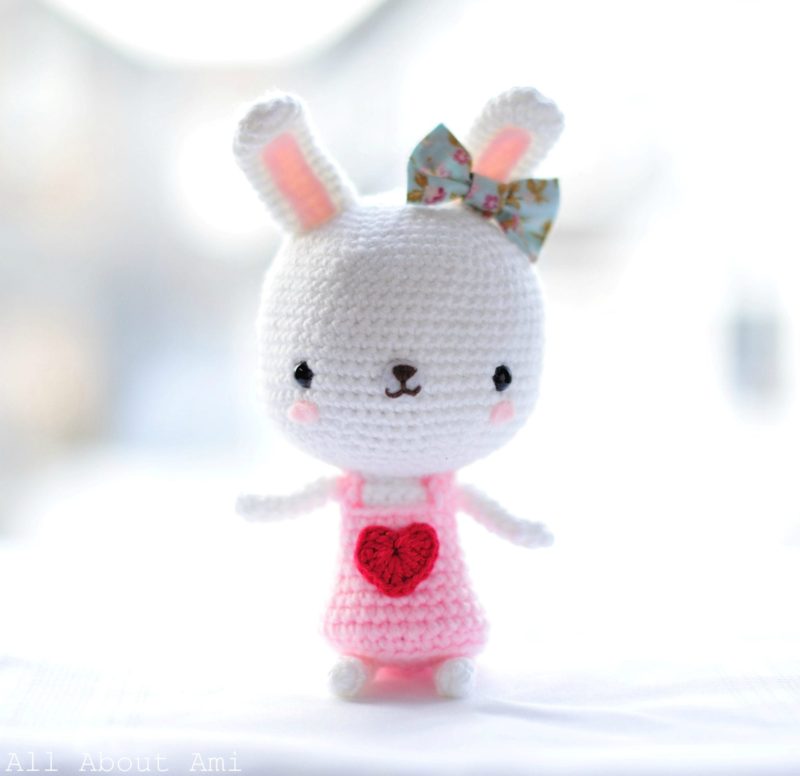
Materials:
- white yarn (I used Patons Astra, lightweight level 3), pink yarn (old yarn from when I was a little girl- no more label, but worsted weight level 4), and red yarn (I used Patons Grace, lightweight level 3)
- 2.00 mm Clover Amour crochet hook (used with white and pink yarn) and 1.25 mm crochet hook (used with red yarn)
- Yarn needle (bent tip helpful for attaching amigurumi parts- see HERE)
- fiberfill
- white felt (for nose) and pink felt (for cheeks and lining of ears)
- 7.5 mm safety eyes
- brown embroidery floss
- glue gun
- patterned fabric (for bow)
- cardboard (optional)
Note: I worked in continuous rounds (vs. joined rounds).
HEAD
Using white yarn,
R1: 6 sc in Magic Ring (6 sts)
R2: 2 sc in each sc around (12 sts)
R3: *Sc 1, 2 sc in next sc*, rep 6 times (18 sts)
R4: *Sc 2, 2 sc in next sc*, rep 6 times (24 sts)
R5: *Sc 3, 2 sc in next sc*, rep 6 times (30 sts)
R6: *Sc 4, 2 sc in next sc*, rep 6 times (36 sts)
R7: *Sc 5, 2 sc in next sc*, rep 6 times (42 sts)
R8: *Sc 6, 2 sc in next sc*, rep 6 times (48 sts)
R9: *Sc 7, 2 sc in next sc*, rep 6 times (54 sts)
R10: *Sc 8, 2 sc in next sc*, rep 6 times (60 sts)
R11-22: Sc 60
R23: *Sc 8, dec 1*, rep 6 times (54 sts)
R24: *Sc 7, dec 1*, rep 6 times (48 sts)
R25: *Sc 6, dec 1*, rep 6 times (42 sts)
R26: *Sc 5, dec 1*, rep 6 times (36 sts)
R27: *Sc 4, dec 1*, rep 6 times (30 sts)
R28: *Sc 3, dec 1*, rep 6 times (24 sts)
Place safety eyes and begin stuffing head.
R29: *Sc 2, dec 1*, rep 6 times (18 sts)
R30: *Sc 1, dec 1*, rep 6 times (12 sts)
Finish stuffing head.
R31: *Dec 1*, rep 6 times (6 sts)
Fasten off and weave in end. Cut circle out of white felt and sew nose with brown embroidery floss. Cut two pink felt ovals and add as cheeks below eyes.
EARS (make 2)
Using white yarn,
R1: 12 sc in Magic Ring (12 sts)
R2-12: Sc 12
Fasten off and leave long end for sewing. Sew open end together. Add pink felt for lining. Sew ontop of head.
DRESS
Using pink yarn,
R1: 6 sc in Magic Ring (6 sts)
R2: 2 sc in each sc around (12 sts)
R3: *Sc 1, 2 sc in next sc*, rep 6 times (18 sts)
R4: *Sc 2, 2 sc in next sc*, rep 6 times (24 sts)
R5: *Sc 3, 2 sc in next sc*, rep 6 times (30 sts)
R6: Through back loops only, Sc 30
R7-9: Sc 30
R10: *Sc 3, dec 1*, rep 6 times (24 sts)
R11-12: Sc 24
R13: *Sc 4, dec 1*, rep 4 times (20 sts)
R14: Sc 20
Fasten off. Reattach pink yarn onto crocheted piece with a slip stitch into any stitch.
R15: Ch 1, Sc 14 (15 sts, leaving a gap of 5 sts).
R16: Ch 1, turn. Sc 15.
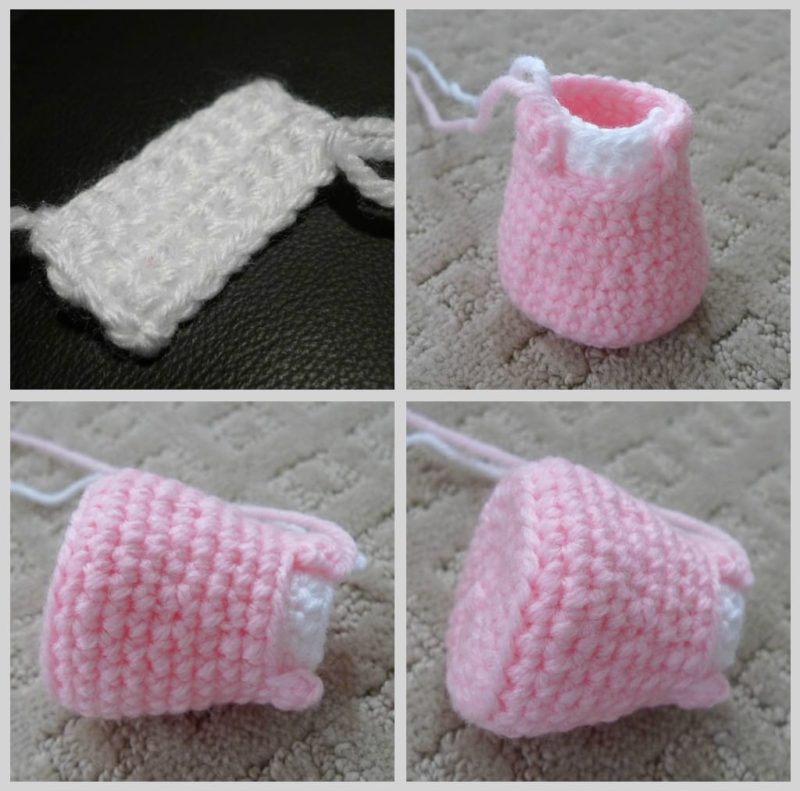
Fasten off and leave long end for sewing. Insert cardboard circle onto bottom of base to secure shape. Stuff firmly.

NECK [panel]
Using white yarn,
Ch 10
R1: Starting from second chain from hook, Sc 9.
R2-4: Ch 1. Turn. Sc 9.
Fasten off and leave long end for sewing. Fit white panel into pink dress so that white part is seen in the 5 stitch gap. Sew/glue into place. Use white yarn to attach panel portion onto head. Use pink yarn to attach dress portion onto head.
ARMS (make 2)
Using white yarn,
R1: 6 sc in Magic Ring (6 sts)
R2–7: Sc 6
Fasten off and leave long end for sewing. Attach to sides of body.
LEGS (make 2)
Using white yarn,
R1: 6 sc in Magic Ring (6 sts)
R2-6: Sc 6
Fasten off and leave long end for sewing. Attach to bottom of dress.
HEART
Pattern used with permission from Mandy of Little Birdie Secrets. Please see her heart blog post here and check out her very helpful video here to see her in action crocheting this heart! I love using these hearts to adorn cards and scrapbook pages too!
Using red yarn and 1.25 mm crochet hook and working ALL stitches in first chain,
Ch 4. Work 3 triple crochet (tc) into first chain, 3 dc, ch 1, 1 tc, ch 1, 3 dc, 3 tc. Ch 3, sl stitch into center and FO. Sew/glue heart onto dress.
BOW
Cut rectangular piece of fabric and fold edges inward. Pinch the middle together and sew/glue in place. Wrap middle with strip of fabric. Sew/glue onto one ear.
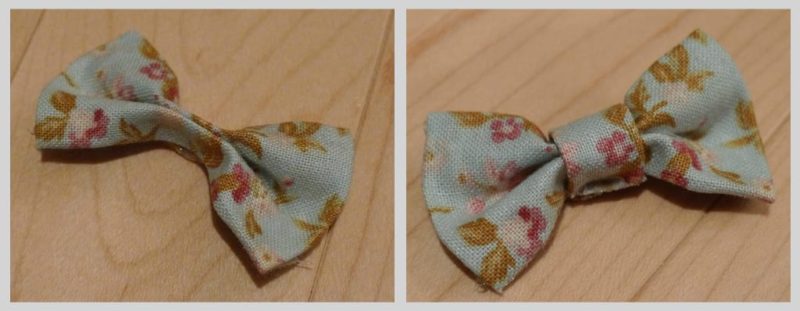
Alternatively, you can crochet a bow for your bunny. Learn how to crochet bows by following the videos here or here.
Hope this bunny adds some sweetness to your day 🙂 Don’t forget to send me photos of your finished work by e-mailing me (all_about_ami@hotmail.com), tweeting me, or posting on my facebook page! Happy crocheting, and have a Happy Valentine’s Day, my lovelies 🙂
This pattern is an original pattern by Stephanie Lau of All About Ami (February 2012). Please do not claim this pattern as your own. If you wish to share this pattern, you may link to this pattern but please do not reprint it on your site. You may keep a copy for your own personal use but you please DO NOT sell the pattern or distribute it.
You may sell products made from this pattern but please clearly credit the design to me, Stephanie Lau of All About Ami, and provide a link to my blog www.AllAboutAmi.com. Permission is NOT granted for mass production or factory manufacturing of any kind. Thank you for being respectful and for your understanding!
